55HARDI
®
N-SERIES 3-PT SPRAYER DIAPHRAGM OPERATOR'S MANUAL
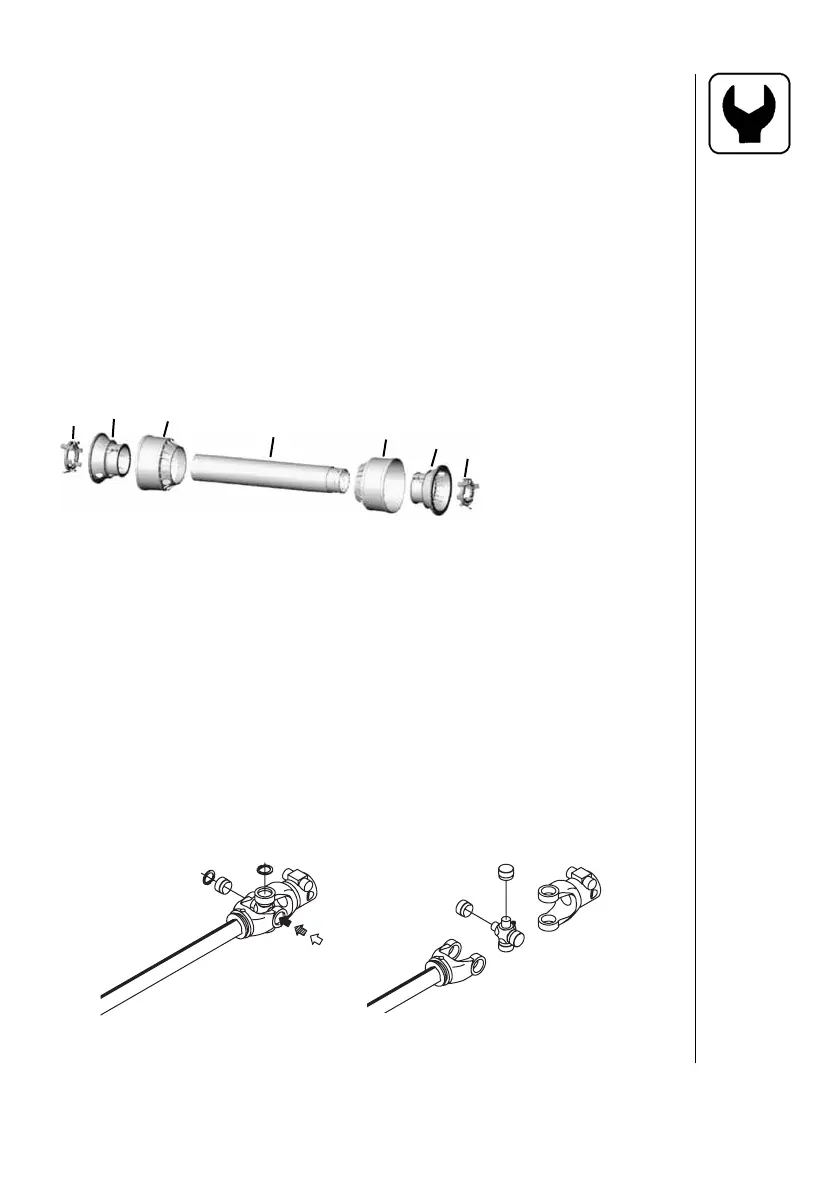
6.4 Replacement Of P.T.O. Shaft Protection Guards
The replacement of defective pro tec tion guards is easy to do.
1. The retaining ring A (Fig. 28) holds the base cone B (Fig. 28) and
shield bell C (Fig. 28) to the shield tube D (Fig. 28).
2. Locate the three white tabs on the retaining ring A (Fig. 28) visible
through holes on the shield bell C (Fig. 28). Pushing these tabs will
release the retaining ring A (Fig. 28).
3. Remove the base cone B (Fig. 28) and shield bell C (Fig. 28) from
the shield tube D (Fig. 28).
4. Assemble again in reverse order, using new parts where necessary.
5. Apply grease (Section 6.8).
Use only genuine HARDI
®
spare parts to service the P.T.O. shaft.
6.5 Replacement Of P.T.O. Shaft Cross Journals.
1. Remove protection guard as described pre vi ous ly.
2. Remove circlip rings.
3. Press the cross journal sidewards, use ham mer and punch if neces-
sary.
4. Remove needle bearing cups and cross journal can now be re-
moved.
5. Carefully remove nee dle bearing cups from new cross journal and
install it in re verse order. Before fi tting the nee dle bearing cups
again, check that nee dles are placed cor rect ly. Avoid dust and dirt in
the new bear ings.
A
C
B
D
A
B
C
Fig. 28
A. Retaining Ring
B. Base Cone
C. Shield Bell
D. Shield tubes
 Loading...