5 – English
WARNING:
Donotallowfamiliaritywiththisproducttomakeyou
careless.Rememberthatacarelessfractionofasecond
issufficienttoinflictseriousinjury.
WARNING:
Alwaysremovebatterypackfromthetoolwhenyouare
assemblingparts,makingadjustments,cleaning,orwhen
notinuse.Removingbatterypackwillpreventaccidental
startingthatcouldcauseseriouspersonalinjury.
WARNING:
Donotuseanyattachmentsoraccessoriesnotrecom-
mendedbythemanufacturerofthisproduct.Theuseof
attachmentsoraccessoriesnotrecommendedcanresult
inseriouspersonalinjury.
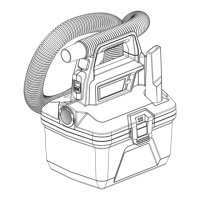
APPLICATIONS
Youmayusethisproductforthefollowingpurpose:
Light-dutyvacuumingofdrysurfaces
Householdtype
INSTALLING/REMOVING BATTERY PACK
See Figures 1 - 2, page 8.
Insertthebatterypackintothebatteryportasshown.
Makesurethelatchonthebatterypacksnapsintoplace
andthebatterypackissecuredintheproductbefore
beginningoperation.
Depressthe latchandpull to releaseand removethe
batterypack.
Removebatteryandplaceontheshelfonthewallmount.
Aligntheraisedribsonthebatterywiththegrooveson
thecharger.
Slidethechargerdownuntilitisfullyseatedonthebat-
tery.
Ifchargeriskeptonthewallmount,usethegrooveson
thebackofthewallmounttomanagethecablesand
keepthemtidy.
Forcompletecharginginstructions,seetheoperator’smanu-
alsforyourbatterypackandcharger.
INSTALLING THE WALL MOUNT
See Figure 2, page 8.
Choosethedesiredlocationforthewallmount.
Placethemountonthewallatthedesiredheight.Mark
thewallanchorlocations.Installtheanchorsandscrew
themounttothewall.
Storethevacuumbyfirmlypressingtheunitintothewall
mounttosecure.
Alwaysensurethevacuumissecurelylockedintoplace.
OPERATION
Accessoriescanbestoredbyinsertingthemfromthetop
orthebottomoftheaccessoryholderlocatedontheright
sideofthewallmount.
STARTING/STOPPING THE VACUUM
See Figure 3, page 8.
To start the vacuum:
presstheON/OFFbutton
.
To stop the vacuum:
presstheON/OFFbuttonagain
.
ECO BUTTON
See Figure 3, page 8.
Thevacuumhastwospeedstoaccommodateyourclean-
ingneeds.
NOTE:Thevacuumalwaysstartsinhighspeed.
PresstheECObuttonforLOWspeedandtheLEDindi-
catorilluminateswhite.
PresstheECObuttontoreturntoHIGHspeedandthe
LEDindicatorilluminatesblue.
NOTE:PressingtheECOswitchrepeatedlywilltogglethe
vacuumbetweenthetwospeeds.
TURNING OFF THE ROLLER BRUSH
See Figure 3, page 8.
Therollerbarcanbeusedwiththerollerbrushturnedoff.
To cancel the roller brush:
PresstherollerbrushON/OFFbutton,locatedbelowthe
ECObuttontocanceltheuseoftherollerbrush.
To reactivate the roller brush:
PresstherollerbrushON/OFFbuttonagaintoturnthe
rollerbrushbackon.
NOTE:Ifvacuumisturnedoffwhiletherollerbrushisoff,
whenthevacuumisturnedbackon,therollerbrushwill
defaulttotheONsetting.
USING THE ROLLER BAR
See Figures 4 - 5, page 9.
Therollerbarcanconnectdirectlytothevacuumforclean-
ingupholsteryandstairsorattachwiththeextensionwand
fornormalfloorvacuuming.
NOTE:Whennotinuse,alwaysstoretheunitonthewall
mountorlieflattopreventfallingover.Neverstandalonein
theuprightposition.Thereisaliplocatedonthebottomof
thevacuumthatallowsittocatchonasurfacetoprevent
itfromslipping.
To connect:
Switchoffunitandremovethebatterypack.
Alignthepinsontherollerbarwiththereceptacleinthe
stickvacuumorextensionwand.
Presstogetheruntilitclicksintoplace.
Insertbatterypack.
 Loading...