5 – English
ASSEMBLY
Fullyassembleproductpriortouse.
WARNING:
Donotusethisproductifitisnotcompletelyassembled
orifanypartsappeartobemissingordamaged.Useof
aproductthatisnotproperlyandcompletelyassembled
orwithdamagedormissingpartscouldresultinserious
personalinjury.
WARNING:
Donotattempttomodifythisproductorcreateac-
cessoriesorattachmentsnotrecommendedforuse
withthisproduct.Anysuchalterationormodification
ismisuseandcouldresultinahazardouscondition
leadingtopossibleseriouspersonalinjury.
Ifanypartsaredamagedormissing,pleasecall1-800-776-5191forassistance.
OPERATION
WARNING:
Donotallowfamiliaritywiththisproducttomakeyou
careless.Rememberthatacarelessfractionofasecond
issufficienttoinflictseriousinjury.
WARNING:
Alwaysremovebatterypackfromtheproductwhen
youareassemblingparts,makingadjustments,clean-
ing,orwhennotinuse.Removingbatterypackwill
preventaccidentalstartingthatcouldcauseserious
personalinjury.
WARNING:
Do not use any attachments or accessories not
recommendedbythemanufacturerofthisproduct.The
useofattachmentsoraccessoriesnotrecommended
canresultinseriouspersonalinjury.
WARNING:
Do not put hands or objects inside of beater bar
attachmentas thiscouldcauseamalfunction ofthe
toolorriskofinjurymayoccur.
APPLICATIONS
Youmayusethisproductforthefollowingpurpose:
Light-dutyvacuumingofdrysurfaces
Householdtype
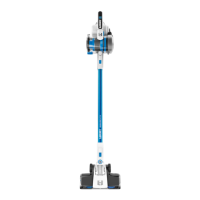
INSTALLING/REMOVING BATTERY PACK
See Figure 1, page 9.
Insertthebatterypackintothebatteryportasshown.
Make sure the latch on the battery pack snaps into place
andthebatterypackissecuredintheproductbefore
beginningoperation.
Depress the latch and pull torelease and remove the
batterypack.
For complete charging instructions, see the operator’s
manualsforyourbatterypackandcharger.
INSTALLING THE WALL MOUNT
See Figure 2, page 9.
Choosethedesiredlocationforthewallmount.
Placethemountonthewallatthedesiredheight.Mark
thescrew locations.Installthescrews andanchors(if
necessary)tomounttothewall.
Storethevacuumbyfirmlypressingtheunitintothewall
mounttosecure.
Alwaysensurethevacuumissecurelylockedintoplace.
Certain accessories, batteries, and chargers can be
storedonthewallmount.
STARTING/STOPPING THE VACUUM
See Figure 3, page 9.
To start the vacuum:presstheON/OFFbutton.
NOTE:Whenthevacuumison,theLEDindicatorwill
lightupblue.Whenthebatterychargeislow,theLED
indicatorwillturnRED.
To stop the vacuum:presstheON/OFFbuttonagain.
 Loading...