Network Mini Dome Camera·Quick Start Guide
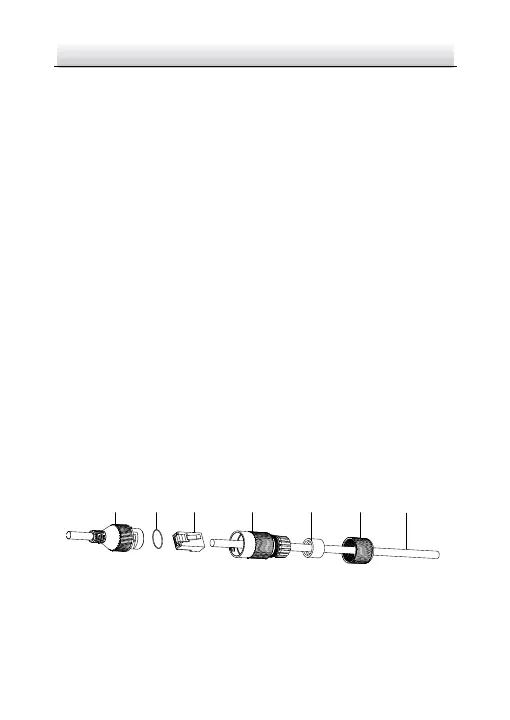
2.3 Install the Water-proof Jacket
It is recommended to adopt the water-proof jacket (supplied) for
the network interface when the camera is installed outdoor.
Steps:
1. If the network cable has been settled down, cut off the plug of
the network cable first.
2. Route the network cable through the following components in
sequence: fix nut, water-proof ring, and the main body of the
water-proof jacket, as shown in the figure.
3. Insert the water-proof ring into the main body of the
water-proof jacket, to increase the sealing ability of the
components.
4. Wire the plug and network cables up.
5. Fix the O-ring to the network interface of the camera, and then
connect the network cables.
6. Wrap the network interface with the main body of the
water-proof jacket, and then rotate the fix nut clockwise to
assemble it to the main body of the water-proof jacket.
Network Interface
O-ring Plug
Water-proof Jacket Water-proof Ring Fix Nut Network Cable
Figure 2-27 Water-proof Jacket
 Loading...