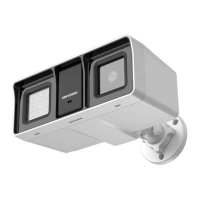
Figure 2-9 Secure Camera to Wall Mount Cover
7. Route the cables through the cable hole of the wall
mount and connect the cables.
8. Insert one end of the wall mount cover diagonally into
the wall mount body, and then snap the other end of
the cover upward on the body.
Figure 2-10 Secure Cover to Body
9. Lock the cover to the body with one PA3 × 8 screw.
Figure 2-11 Lock Cover to Body
10. Repeat steps 4 to 6 of 2.1.1 Ceiling/Wall Mounting to
adjust the angle and finish the installation.
3 Menu Description
Please follow the steps below to call the menu.
Note:
The actual display may vary with your camera model.
Steps:
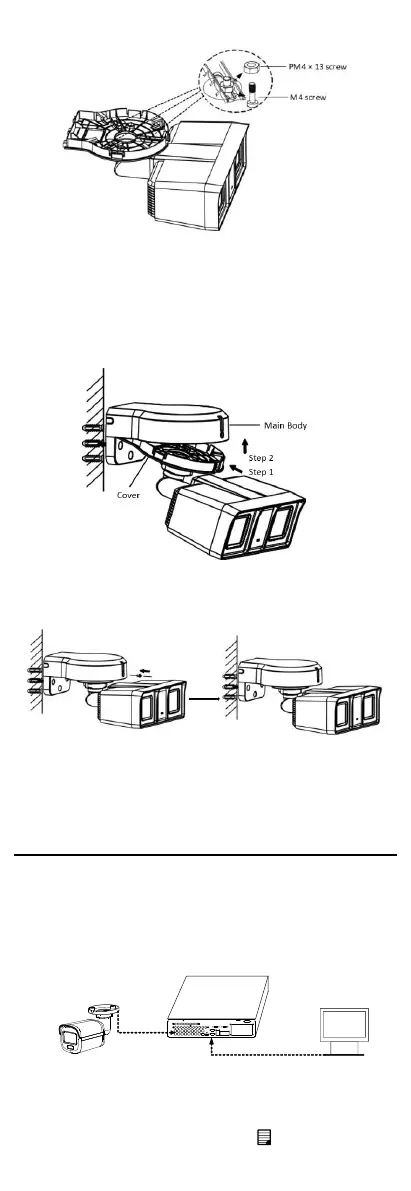
1. Connect the camera with the TVI DVR and the
monitor, as shown in figure 3-1.
Figure 3-1 Connection
2. Power on the camera, TVI DVR, and monitor to view
the image on the monitor.
3. Click PTZ Control to enter the PTZ Control interface.
4. Call the camera menu by clicking button or calling
preset No. 95.
 Loading...