Video Intercom Module Door Station·User Manual
4 Installation
Before you start:
Make sure the device in the package is in good condition and all the assembly parts
are included.
Set the sub module address before start the installation steps.
Make sure the place for surface mounting is flat.
Make sure all the related equipment is power-off during the installation.
Tools that you need to prepare for installation:
Drill (ø6), cross screwdriver (PH1*150 mm), and gradienter.
Buy corresponding accessory package for installation. The accessory package model
and its suitable installation method as below:
One-Module Surface Mounting
Install the device according
to the instructions.
Not all the lines in the
accessory package will be
used.
Two-Module Surface Mounting
Three-Module Surface Mounting
One-Module Flush Mounting
Two-Module Flush Mounting
Three-Module Flush Mounting
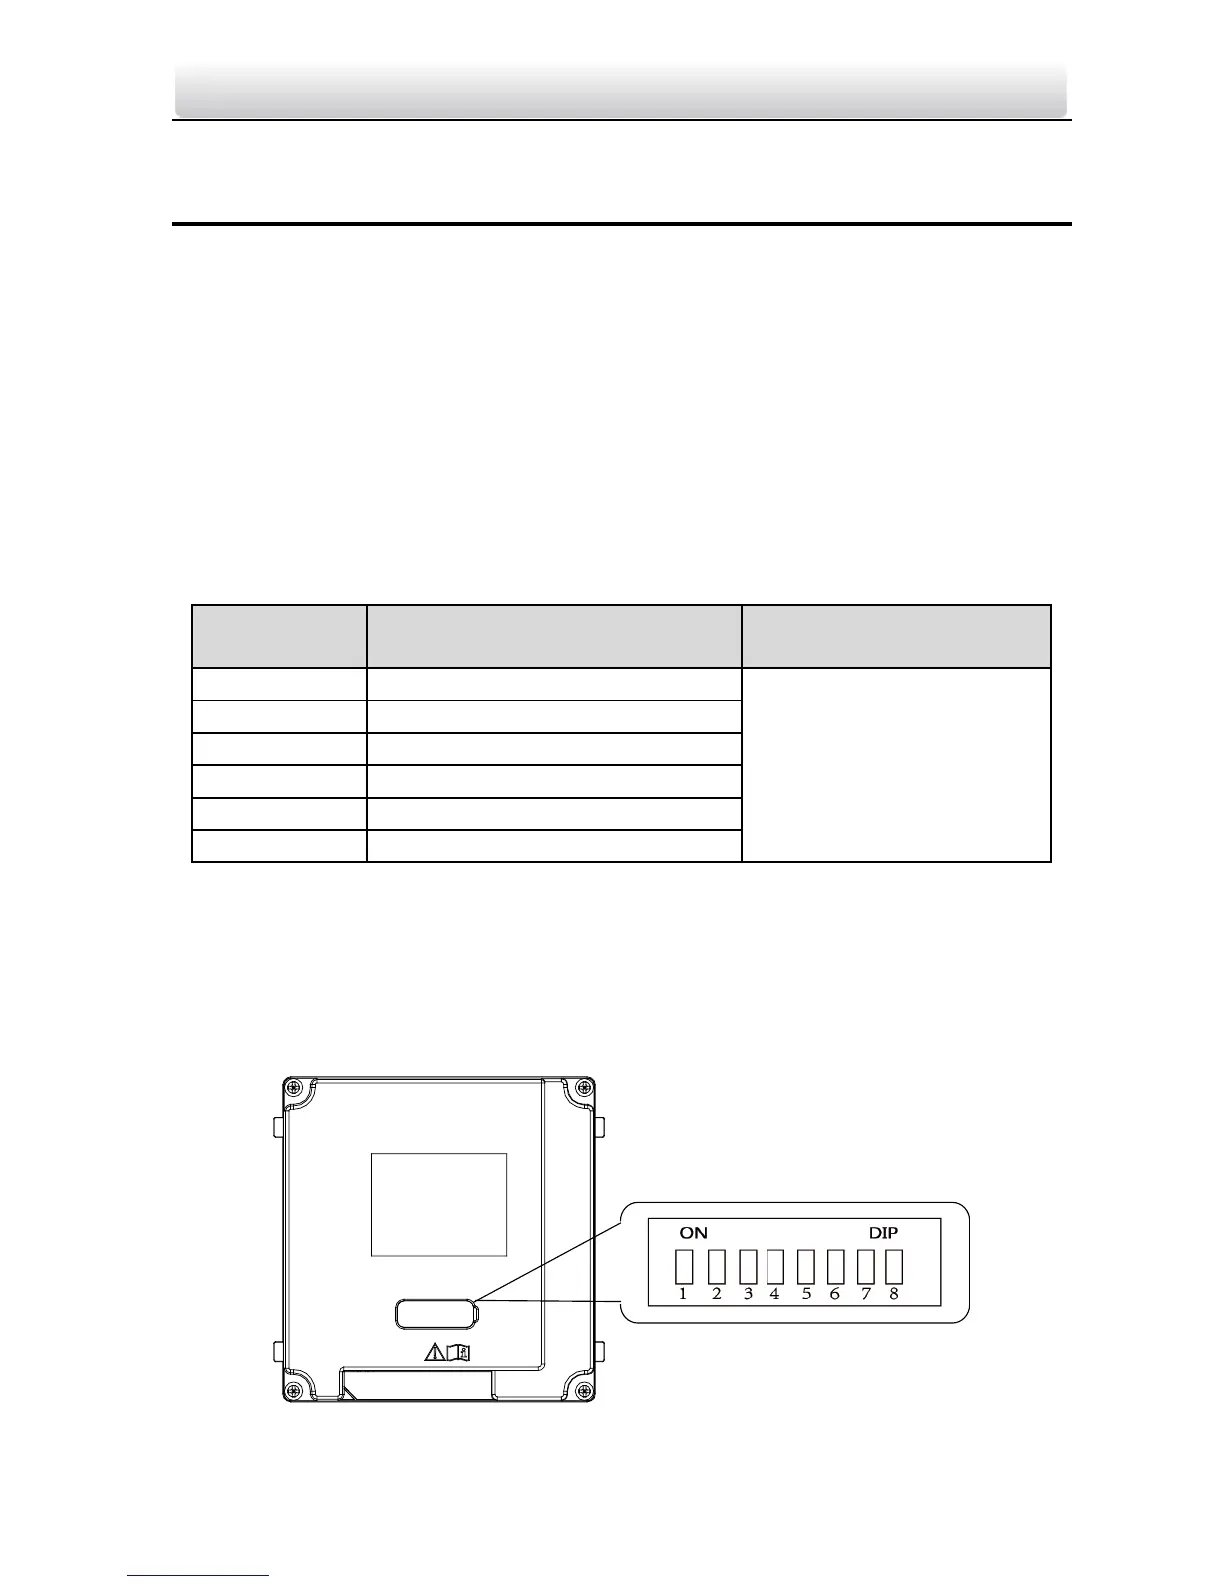
4.1 Configure Sub Module Address
You need to set the sub module address via DIP before installation.
Steps:
1. Remove the rubber cover on the sub module rear panel to expose the DIP switch.
Figure 4-1 DIP Switch

 Loading...