E Series IR Speed Dome Installation Manual
© Hikvision Digital Technology Co., Ltd. All Rights Reserved.
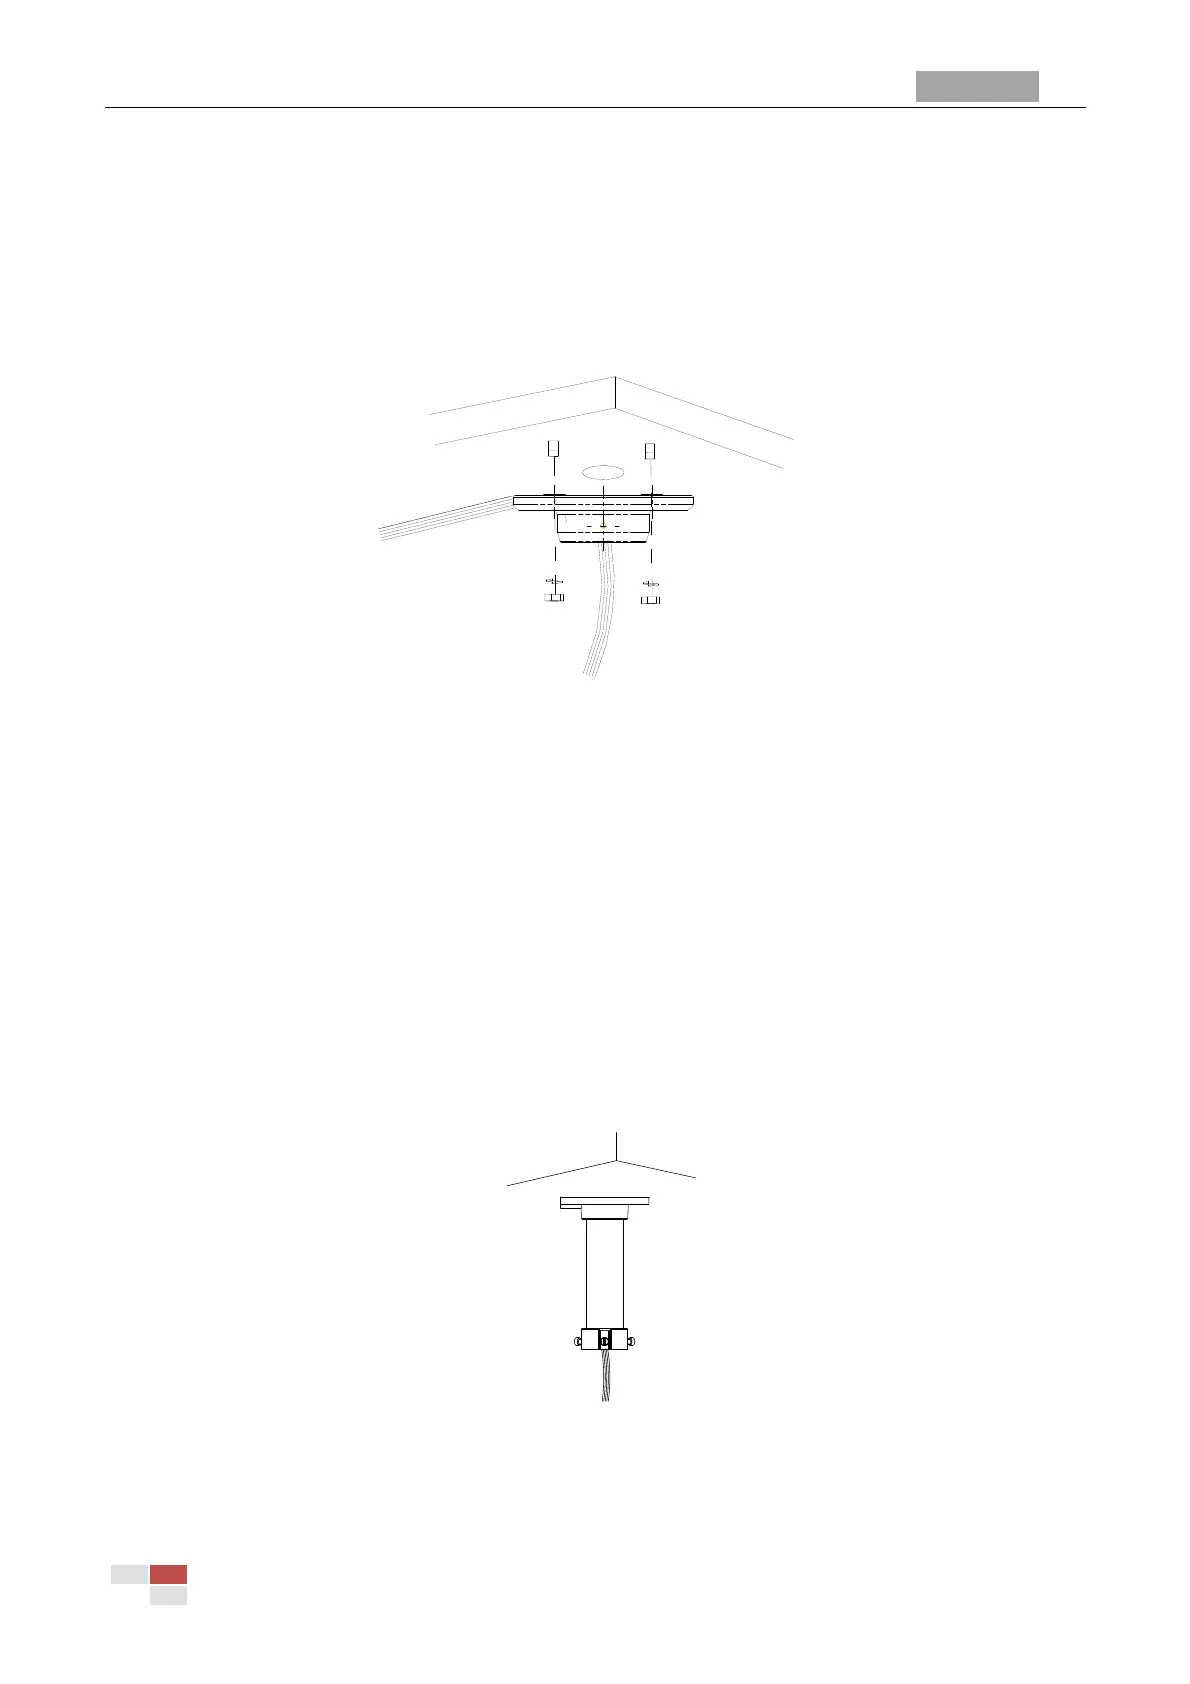
(1) Drill four φ8 holes in the ceiling according to the screw holes of the mounting base, and
then insert M8 expansion screws (not supplied) into the holes.
(2) Pull the power cable, video cable and control wire through the cable hole of the mounting
base.
(3) Attach the mounting base to the ceiling by aligning the screw holes of the mounting base
with the expansion screws on the ceiling.
(4) Secure the mounting base by using nuts and washers to tighten the four expansion screws.
Figure 3-20 Install the Mounting Base
Note: Make sure that the cables are long enough. For outdoor applications, please apply
waterproof measures between the ceiling surface and mounting base and around the cable hole.
The pendant mounting application is not recommended for places where the speed dome is easily
caught in the rain.
2. Install the pendant pole.
Steps:
(1) Pull out the cables through the pendant pole and screw the pendant pole into the mounting
base.
(2) Secure the pendant pole and mounting base with the set screws.
Note: For outdoor applications, please apply the water-proof thread compound to the threads.
Figure 3-21 Ceiling Mount
3. Install the speed dome to the mount. Please refer to Section 1.1 Installation and Cabling for
installation details.