-9-
ၥၷှျၱၑၥ[162]
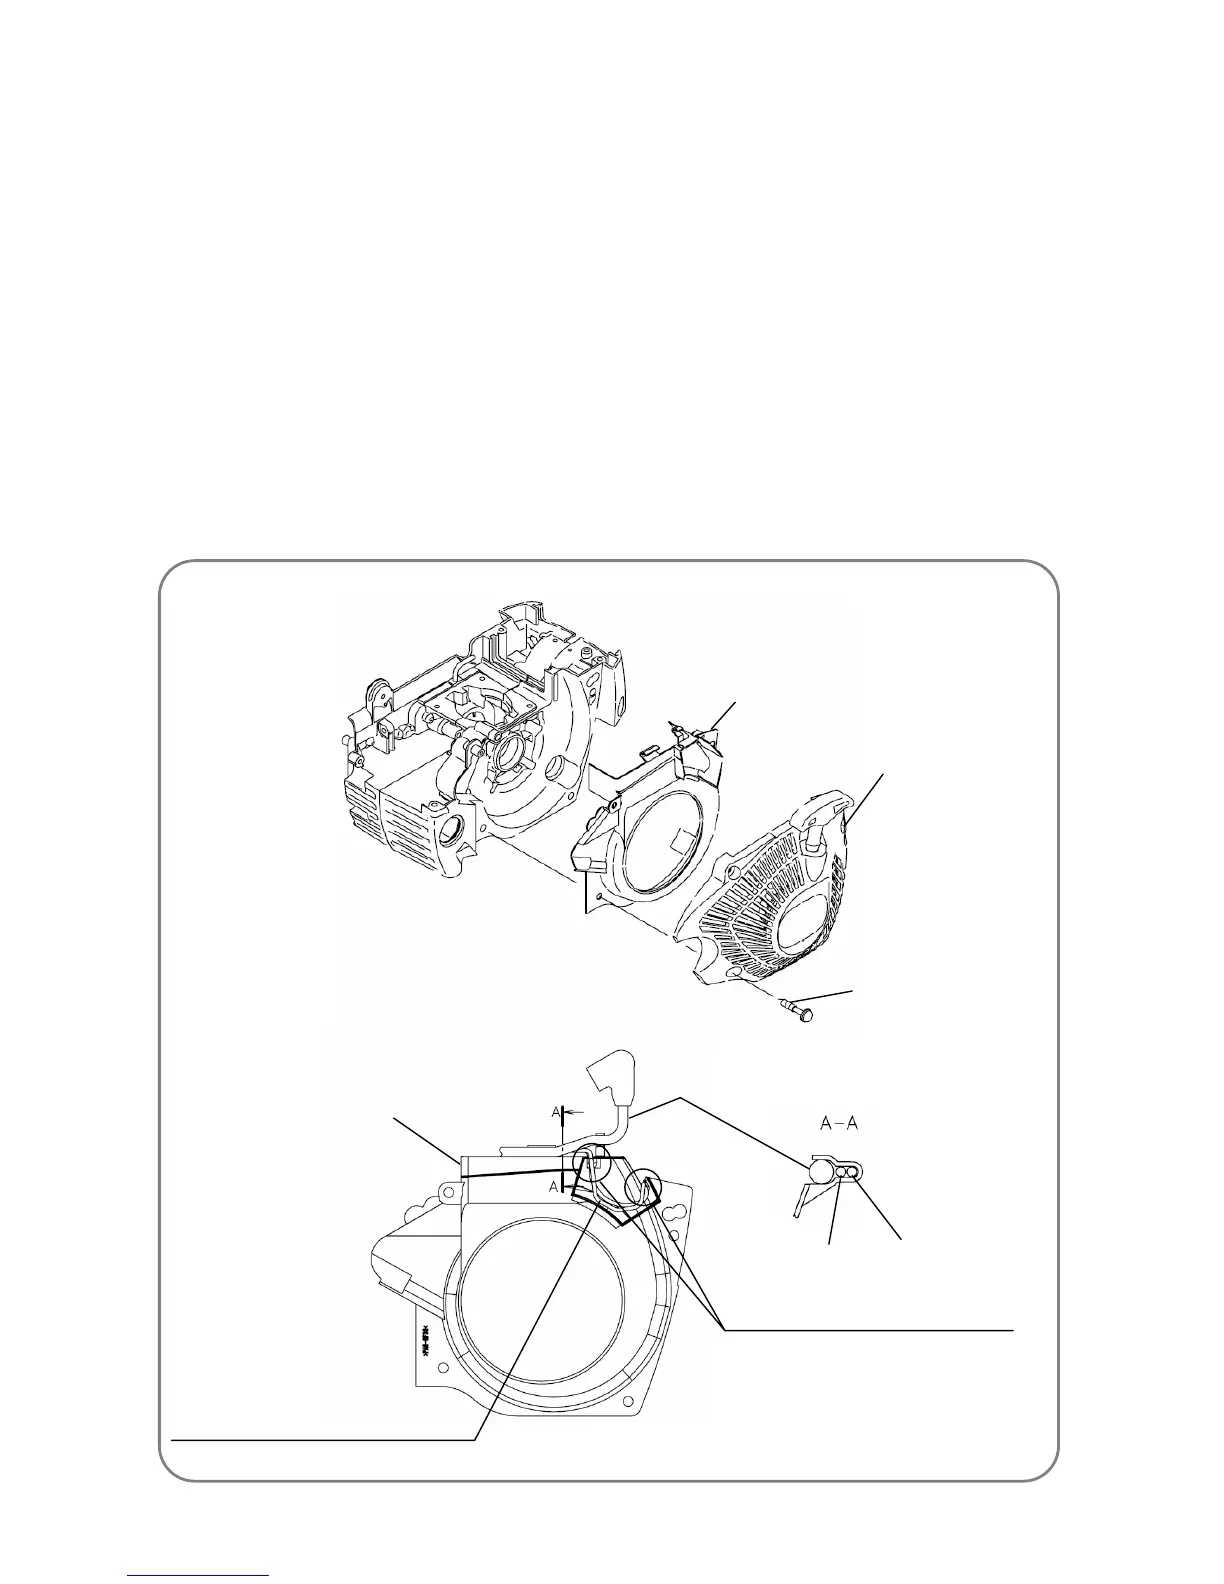
Ɣ Recoil starter
Air Deflector [175]
Recoil Starter [176]
Cover Set Bolt [4]
Air Deflector [175]
Cord (A) [163]
Cord (B) [164]
High voltage cord
CAUTION: Place Cord (A) [163] and Cord (B)
[164] into the groove of the Air
Deflector [175] for assembly.
CAUTION: Move the excess cords
here to take up the
slack of Cord (A) [163]
and Cord (B) [164].
3. Disassembly and reassembly of the recoil starter
[Tool required]
Ɣ Phillips screwdriver
(1) Disassembly
Ɣ Pull out the Plug Cap [162] from the Spark Plug [46].
Ɣ Use a Phillips screwdriver to loosen the four Cover Set Bolts [4], and then remove the Recoil Starter
[176] and Air Deflector [175].
(2) Reassembly
Reassembly can be conducted by reversing the disassembly procedure. However, special attention
should be given to the following items.
Ɣ Place Cord (A) [163] and Cord (B) [164] into the groove of the Air Deflector [175] for assembly.
Ɣ Place the high voltage cord of the ignition coil into the groove of the Air Deflector [175] for assembly.
Ɣ Apply 0.05 to 0.1 g of Chemiseal L-391 (manufactured by Chemitech Inc.) on the female threads of the
Cover Set Bolt [4] before mounting the Recoil Starter [176].
Ɣ Assembling the Recoil Starter [176] is made easier by first pulling the starter handle, and then
returning it a little.
 Loading...