13
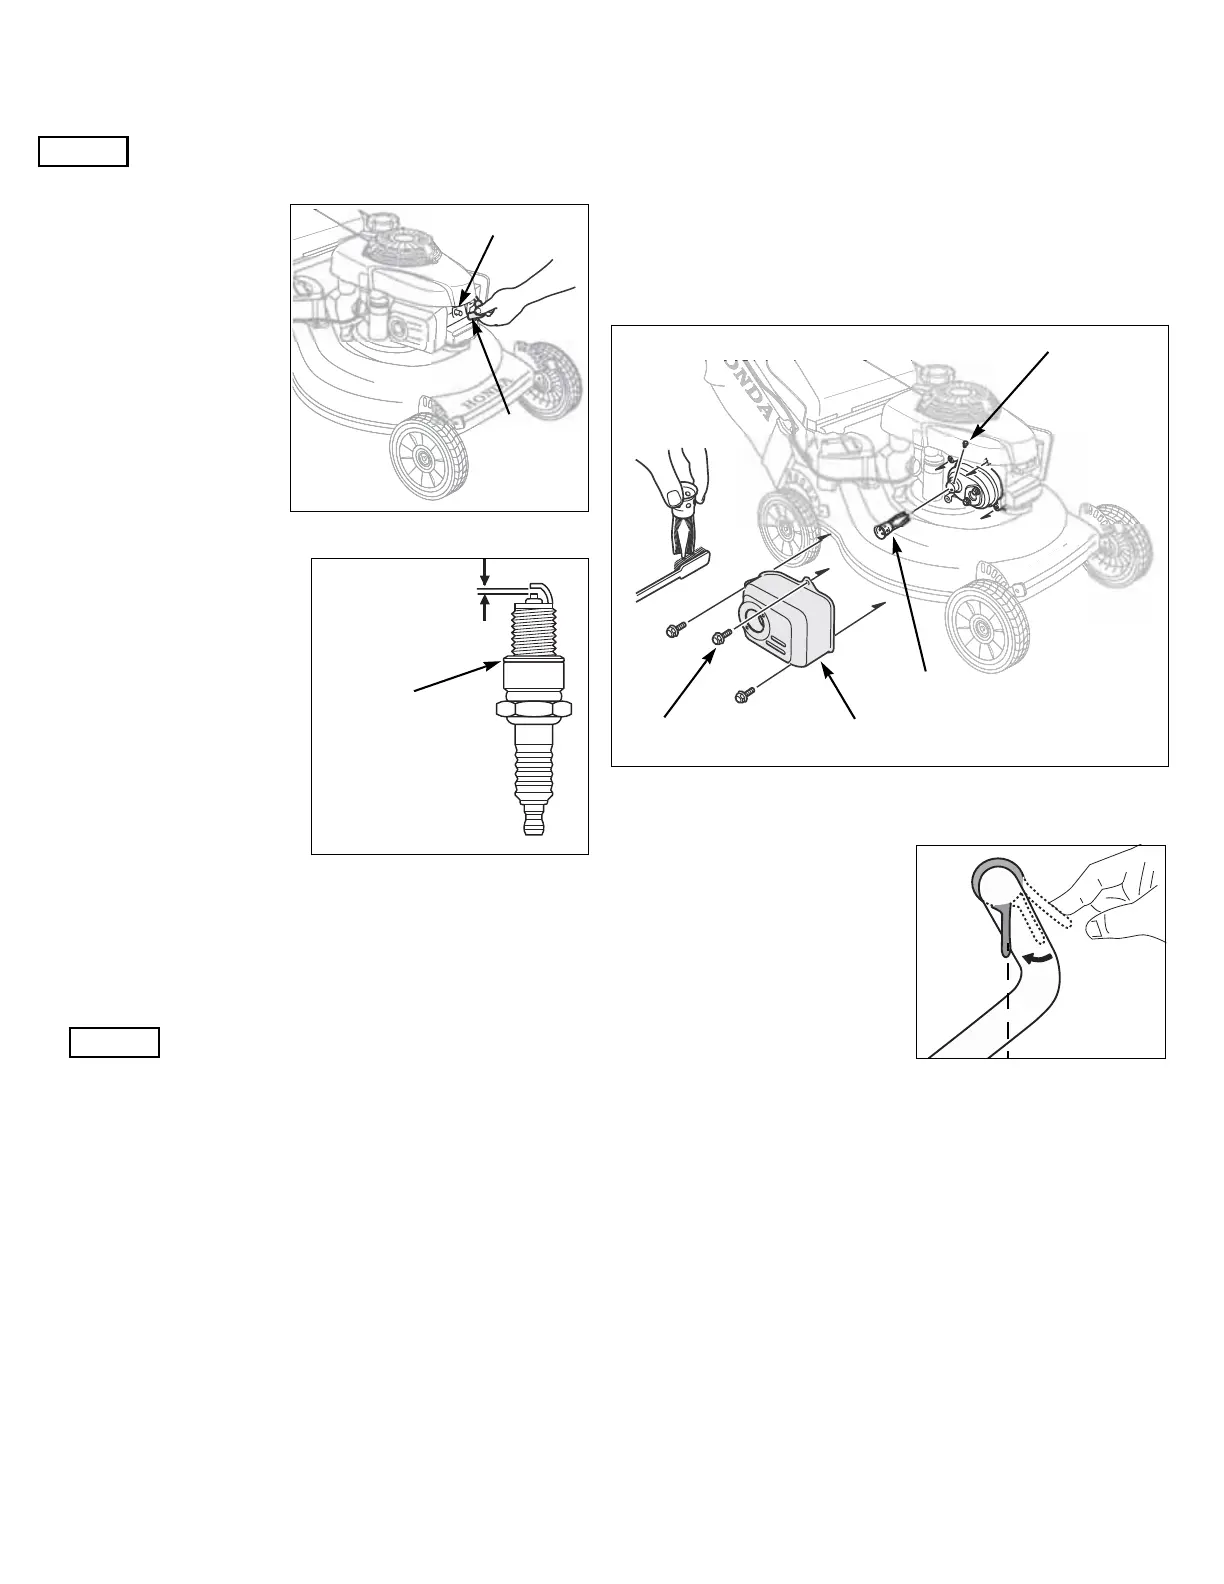
Spark Plug
Replace the spark plug every 2 years or after 150 hours of use.
Recommended Spark Plug: NGK - BPR5ES
An incorrect spark plug can cause engine damage.
For good performance, the
spark plug must be properly
gapped and free of deposits.
1. Allow the engine to cool,
disconnect the spark plug
cap, and remove any dirt
from around the spark plug
area.
2. Remove the spark plug
with a 21mm spark plug
wrench.
3. Inspect the spark plug.
Replace it if the electrodes
are worn, or if the insulator
is cracked or chipped.
4. Measure the spark plug
electrode gap with a suitable
gauge.
Gap: 0.7 ~ 0.8mm
Correct the gap, if necessary,
by carefully bending the side
electrode.
5. Install the spark plug
carefully, by hand, to avoid
cross-threading.
6. After the spark plug seats,
tighten with a 21mm spark
plug wrench to compress the
washer
If reinstalling the old spark plug, tighten 1/8 to 1/4 turn after the
spark plug seats.
If installing a new spark plug, tighten 1/2 turn after the spark plug
seats.
Spark plug torque: 20 N·m
A loose spark plug can overheat and damage the engine.
Overtightening the spark plug can damage the threads in the
cylinder head.
7. Install the spark plug cap on the spark plug.
Spark Arrester (optional part)
The spark arrester must be serviced every 100 hours to keep it
functioning as designed.
1. Allow the engine to cool and disconnect the spark plug cap.
2. Remove the three flange bolts and the heat shield. Remove the
setscrew and the spark arrester from the muffler.
3. Check for carbon deposits on the spark arrester and the exhaust
port. Use a brush to remove any carbon deposits from the screen.
Replace the screen if it is torn or damaged.
4. Installation is the reverse of removal. Tighten all hardware
securely.
Smart Drive Cable Check/Adjustment
Cable Check
With the engine off, use the
multi-position adjuster to set the
Smart Drive control in its lowest
position (page 9).
Gradually push the Smart Drive
control down while pulling the lawn
mower backwards. The rear wheels
should lock up before the Smart
Drive paddles are straight
up-and-down. If they don’t, perform
the cable adjustment on page 14.
HONDA
SETSCREW
SPARK ARRESTER
FLANGE BOLT (3) HEAT SHIELD
 Loading...