DT92 WIRELESS DIGITAL ROOM THERMOSTAT
5
INSTALLATION
Installation Process
To ensure best system performance, there is an
optimum sequence of installation operations and test
steps. These are as follows:
1. Install BDR91 relay box, connect to mains, and
power up.
2. Before mounting DT92 thermostat onto backplate,
power it up (activate batteries).
3. Bring DT92 thermostat to a distance 2-3 m from
relay box and initiate RF Communication Test.
This confirms that relay box is wired correctly and
that both devices are bound (linked) to each other.
If this test does not work, the 2 units must be reset
and bound to each other by following the procedure
for Binding / Re-binding.
4. Take the DT92 thermostat to the proposed
mounting location, and initiate the Signal Strength
Test. This will indicate if the thermostat is suitably
positioned to provide a reliable signal for the relay
box. If the signal strength is too low, the thermostat
must be repositioned.
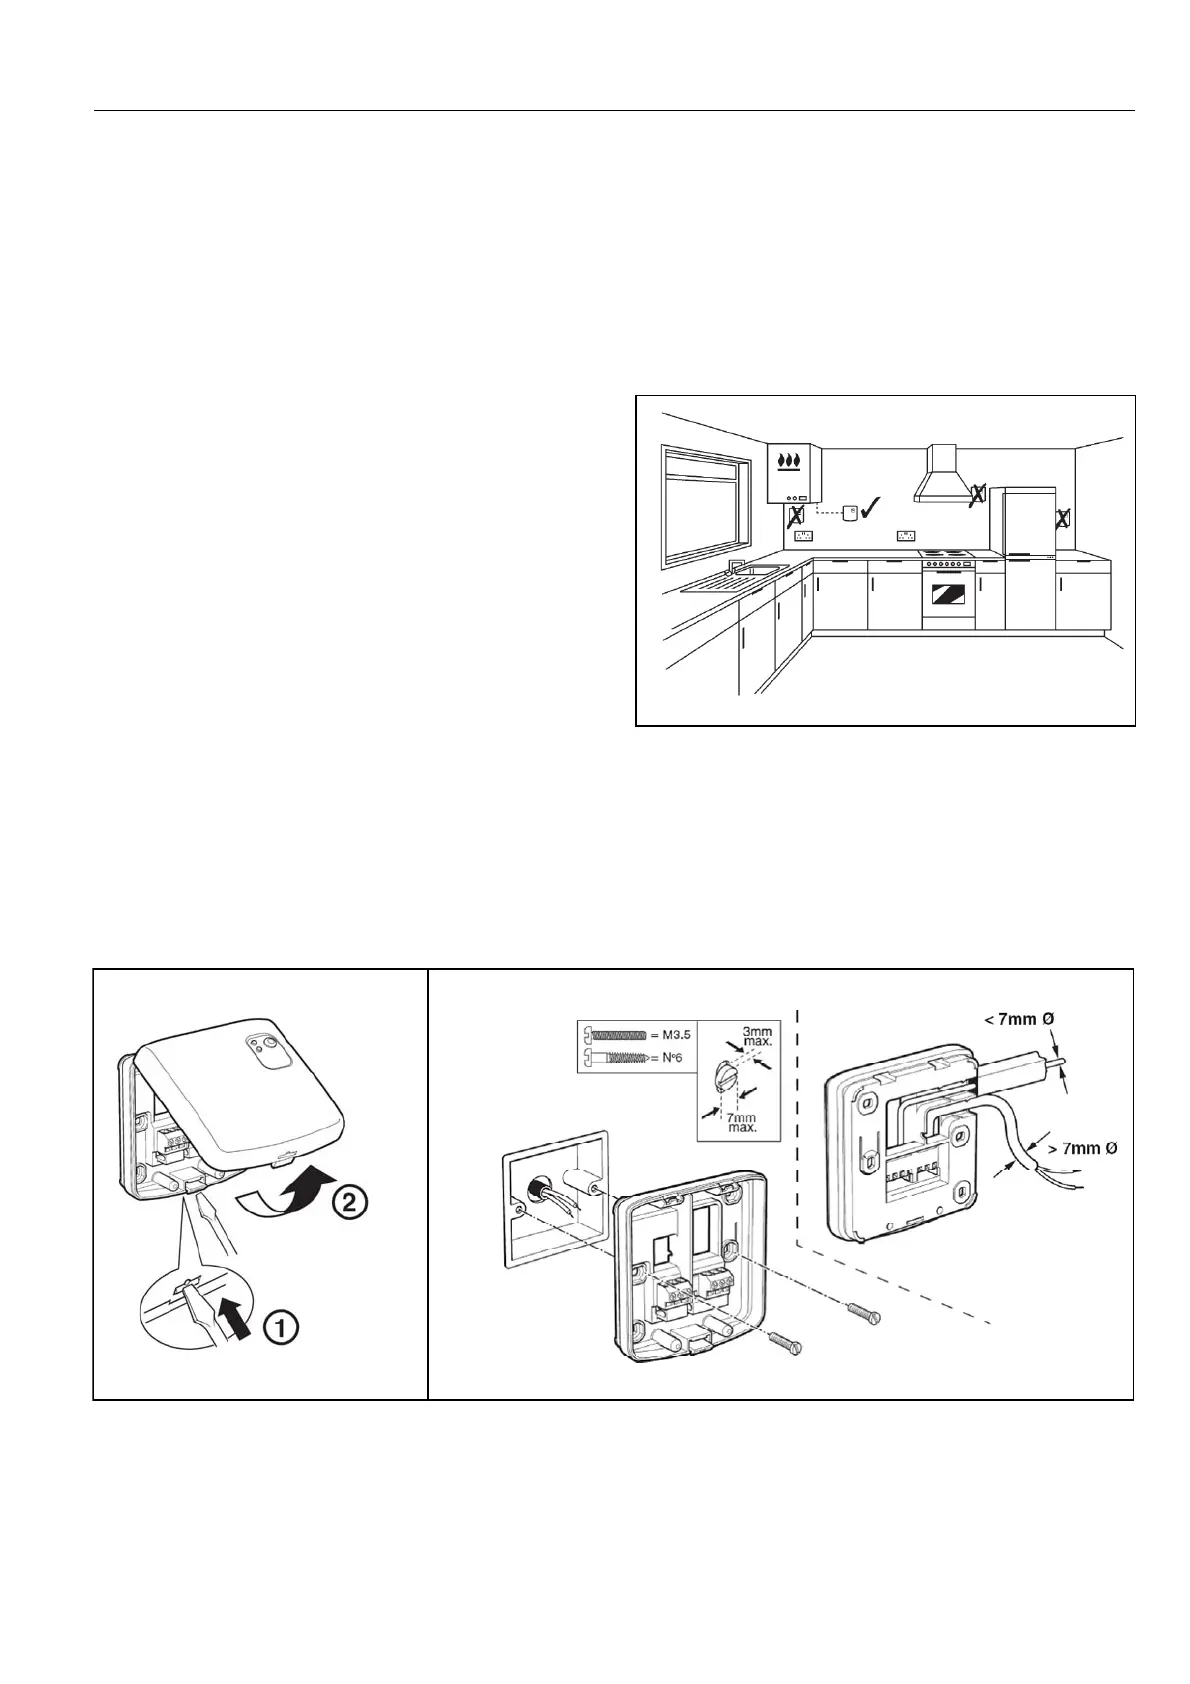
5. When a suitable position is established, the
backplate can be mounted on the wall and the
thermostat can be attached to it.
.
Installing the BDR91 Relay Box
For best performance, the BDR91 Relay Box should be
installed in an open space, at least 30cm distance from
any metal objects including wall boxes and boiler
housing. It should not be mounted on a metal wall box.
Location
a.
b.
 Loading...