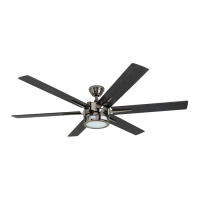
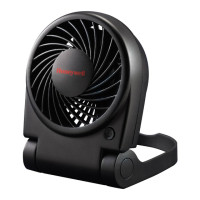
Closemount
Screws
Spring
Washer
Motor
Housing
Fig. 15
10
CLOSEMOUNT INSTRUCTIONS
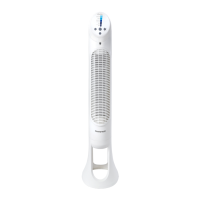
16. Raise the fan and place the canopy on the
mounting bracket hook for wiring. Insert the
receiver into the mounting bracket with the at side
facing the ceiling (Fig. 16).
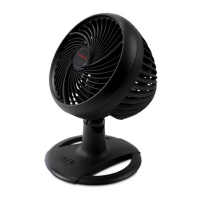
Canopy
Canopy
Receiver
Hook
Canopy
Cover
Fig. 14
Fig. 16
14. Remove the canopy cover from the bottom of the
canopy (Fig. 14).
Helpful Hint: The downrod, hanging ball, and canopy
cover are not used in this type of installation.
Closemount Screw
Spring Washer
15. Align the canopy with the closemount screw holes
in the top of the motor housing. Secure the canopy
to the top of the motor housing by installing three
closemount screws and spring washers into the top
of the motor housing (Fig. 15).
Ceiling
 Loading...