EasyManua.ls Logo

Honeywell TH4210U2002 User Manual

Honeywell TH4210U2002
36 pages
To Next Page IconTo Next Page
Page #1 background imageLoading...
Page #1 background image
Package Includes:
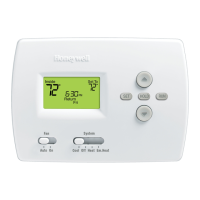
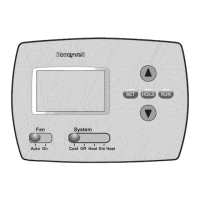
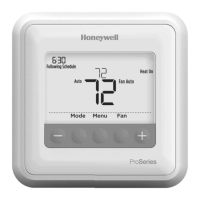
T4 Pro Thermostat
UWP™ Mounting System
Honeywell Standard Installation
Adapter (J-box adapter)
Honeywell Decorative Cover Plate –
Small; size 449/64 in x 449/64 in x
11/32 in (121 mm x 121 mm x 9 mm)
Screws and anchors
2 AA Batteries
Installation Instructions and User
Guide
T4 Pro
Programmable Thermostat
Installation Instructions
Optional Cover Plate installation
NOTE: If Optional Cover Plate is not required,
see “UWP Mounting System installation” on
next page.
Use the Optional Cover Plate when:
Mounting the thermostat to an electrical
junction box
Or when you need to cover paint gap from
old thermostat.
1. Before starting, turn the power off at
the breaker box or switch. Separate the
Junction Box Adapter from the Cover
Plate. See Figure 1.
2. Mount the Junction Box Adapter to the
wall or an electrical box using any of the
eight screw holes. Insert and tighten
mounting screws supplied with Cover
Plate Kit. Do not overtighten. See Figure 2.
Make sure the Adapter Plate is level.
3. Attach the UWP by hanging it on the top
hook of the Junction Box Adapter and
then snapping the bottom of the UWP in
place. See Figure 3.
4. Snap the Cover Plate onto the Junction
Box Adapter. See Figure 4.
Use 2x
supplied
screws #6
5/8”
4
3
2
1
Question and Answer IconNeed help?

Do you have a question about the Honeywell TH4210U2002 and is the answer not in the manual?

Honeywell TH4210U2002 Specifications

General IconGeneral
Model NumberTH4210U2002
DisplayDigital
ProgrammableYes
Programmability7-Day Programmable
BacklightYes
Hold FunctionYes
Temperature Range40°F to 90°F (4°C to 32°C)
Power SourceBattery or Hardwired
CompatibilityHeat Pump
Power MethodBattery, Hardwired
Display TypeLCD
Voltage24V
Stages2 Heat/1 Cool

Summary

Thermostat Installation Guide

Optional Cover Plate Installation

Steps for installing the optional decorative cover plate.

UWP Mounting System Installation

Guide to installing the Universal Wiring Plate (UWP) on the wall.

Power Options

Details on using AA batteries or AC power for thermostat operation.

Setting Slider Tabs

Instructions for setting internal slider tabs for system configurations.

System Wiring and Configuration

UWP Wiring Terminal Designations

Explanation of each terminal on the Universal Wiring Plate (UWP).

Wiring Conventional Systems

Wiring diagrams for conventional forced air and hydronic systems.

Wiring Heat Pump Systems

Wiring instructions for 1H/1C and 2H/1C heat pump systems.

Thermostat Operation and Setup

Thermostat Mounting

Steps to securely mount the thermostat onto the UWP.

System Operation Settings

How to select and activate system modes like Heat, Cool, Auto, and Off.

Fan Operation Settings

How to select and activate fan modes like Auto and On.

Installer Setup (ISU) Navigation

Procedure for entering and navigating the Installer Setup (ISU) menu.

Advanced Configuration Options

Advanced Setup: Scheduling and Scale

Configuration for scheduling, temperature scale, and heating system type.

Advanced Setup: Equipment and Control

Settings for equipment type, reversing valve, stages, fan control, and differentials.

Advanced Setup: Timers and Protection

Configuration for backup heat timers, cycle rates, compressor protection, and setpoints.

Advanced Setup: Reminders and Display

Settings for air filter reminders, backlighting, clock format, and temperature offset.

System Testing and Specifications

Installer System Test

Procedure for performing system tests for heat, cool, and fan.

Specifications

Technical specifications including temperature ranges, dimensions, and electrical ratings.

Troubleshooting and Support

Troubleshooting Common Issues

Solutions for common problems like blank display, system non-response, and temperature settings.

Customer Assistance

Contact information and resources for product support.
Related product manuals