XNX Relay Board Installation Guide
4
2 Option Board Installation
WarNiNg
If you are retrotting an option board into a previously installed unit, remove power from the
XNX unit to prevent potential electric shock
Release the cover locking screw with the provided 2mm hex key.1.
Unscrew, remove the cover and set it aside.2.
Using the handle provided, carefully slide the POD from the inside of the XNX 3.
Transmitter housing. If your XNX is currently in use, carefully unplug the terminal
blocks from the rear of the POD.
Place the POD face down on a flat work surface taking care to not damage the 4.
LCD screen.
Remove the blank label from the POD and replace it with the label provided with the 5.
new Relay option board
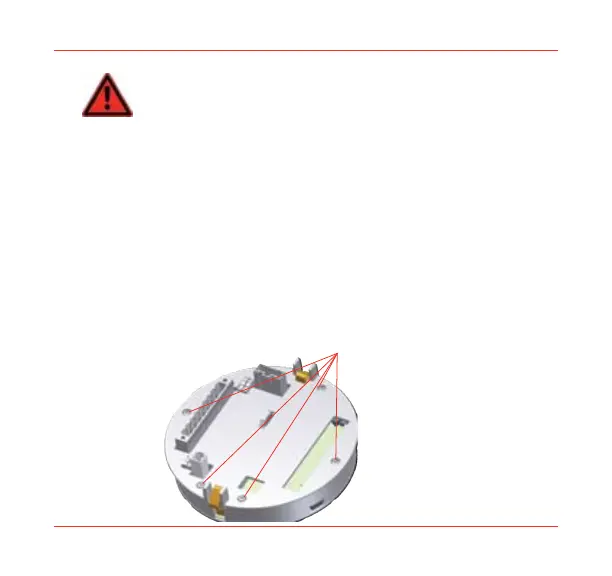
Remove the 6 case screws from the POD set them aside in a safe place.6.

 Loading...