 Loading...
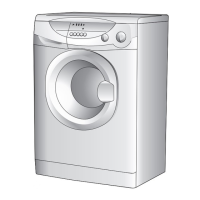
Do you have a question about the Hoover HNL 6106 and is the answer not in the manual?
Check that all specified components are included with the machine.
Store components safely and check for transport damage.
Unplug appliance, close water tap, ensure proper grounding.
Avoid wet contact, bare feet, and use extension cords carefully.
Caution about high water temperatures (90°C) during wash cycles.
Supervise children, proper plug removal, protect from elements, safe lifting.
Ensure bottom vents are clear; lift machine in pairs.
Turn off, close tap, do not tamper; contact service for repairs.
Move machine, cut straps, remove polystyrene, plug in.
Keep packaging away from children as it's a potential hazard.
Connect the fill hose to the tap using new hose-sets.
Hook the outlet tube to the bath edge or fixed drain, ensuring no bends.
Adjust front feet to ensure the machine stands firmly and level on the ground.
Ensure program knob is OFF, door is closed, insert plug, and socket is accessible.
Describes door handle, start/pause, start delay, prewash buttons.
Explains indicator lights and temperature/spin selectors.
Covers program selector and detergent drawer.
Explains the door locked indicator light and the safety device preventing immediate door opening.
How to use the START button, including pausing and resuming.
How to start a cycle, wait for STOP light, and note delay before start.
How to pause the machine, change settings, and restart.
How to cancel a selected program by turning the selector to OFF.
How to set the start time delay (3, 6, or 9 hours) and cancel it.
Use for heavily soiled loads, detergent placement in compartment 'I'.
Special rinse cycle for sensitive skin or very dirty items.
Minimizes creases, especially for mixed and delicate fabrics.
Explains how Crease Guard works for mixed, delicate, wool, and silk fabrics, including stopping the cycle.
Adjust spin speed, reduce or cancel it. Machine has electronic device for load balancing.
Select temperature, do not exceed garment label recommendations. Machine adjusts automatically.
Explains the function of various indicator lights for program status and time remaining.
Indicator lights show remaining cycle time (Start, 60, 30, 15, Stop).
How to turn on/off the machine and select programs. Notes on STOP light and power failures.
Details programs for various fabrics (cotton, synthetics, delicate, wool, silk) and options (rinse, spin, drain).
Recommendations for load size, spin speed, temperature selection, and use of bleach.
Machine offers programs based on fabric type, dirt level, temp, and duration.
Explains features of Resistant, Special AA 40°C, Mixed/Synthetics, and Delicate fabric programs.
Describes the special rinse cycle and its use for bleaching.
Details the fast spin and drain-only programs.
Explains programs for wool and delicate silk/hand wash items.
Dedicated program for sportswear, designed for mixed fibers and dirt removal.
High-quality wash performance in a reduced time for specific loads.
Fast programs for everyday laundry, lightly soiled items, and small loads. Details 44' and 29' cycles.
Describes the purpose of compartments I, &, and II for detergent and additives.
How to insert liquid detergent container and warnings about difficult-to-remove detergents.
Advice on not spinning heavy items and washing wool garments.
Instructions on preparing laundry, checking pockets, closing fasteners, and removing stains.
Use full loads to save energy, water, and detergent.
Only for heavily soiled laundry; saves energy if skipped for normal loads.
Use stain removers to avoid high temperatures; 60°C saves energy.
Machine adapts water level to load type/quantity for energy efficiency and reduced wash times.
Load limits for heavy, delicate, and wool fabrics; use of net bags. Advice against washing only towelling items.
Consult program table, follow sequence, check STOP light, press START. Notes on power interruption memory.
Wait for door lock release, turn selector to OFF, open door, remove laundry.
Use a damp cloth, avoid abrasives/solvents.
How to remove and clean the drawer compartments.
How to access, remove, and clean the filter.
Detailed steps for removing the base, collecting water, turning and removing the filter, and cleaning it.
Procedures for draining hoses when moving or storing the machine for long periods.
Addresses issues like no program start, no water intake, no water discharge, and leaks.
Covers problems with spinning, level, transport brackets, and load distribution.


