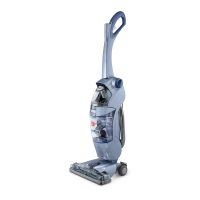
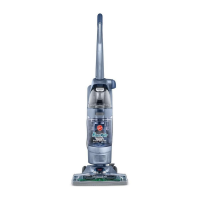
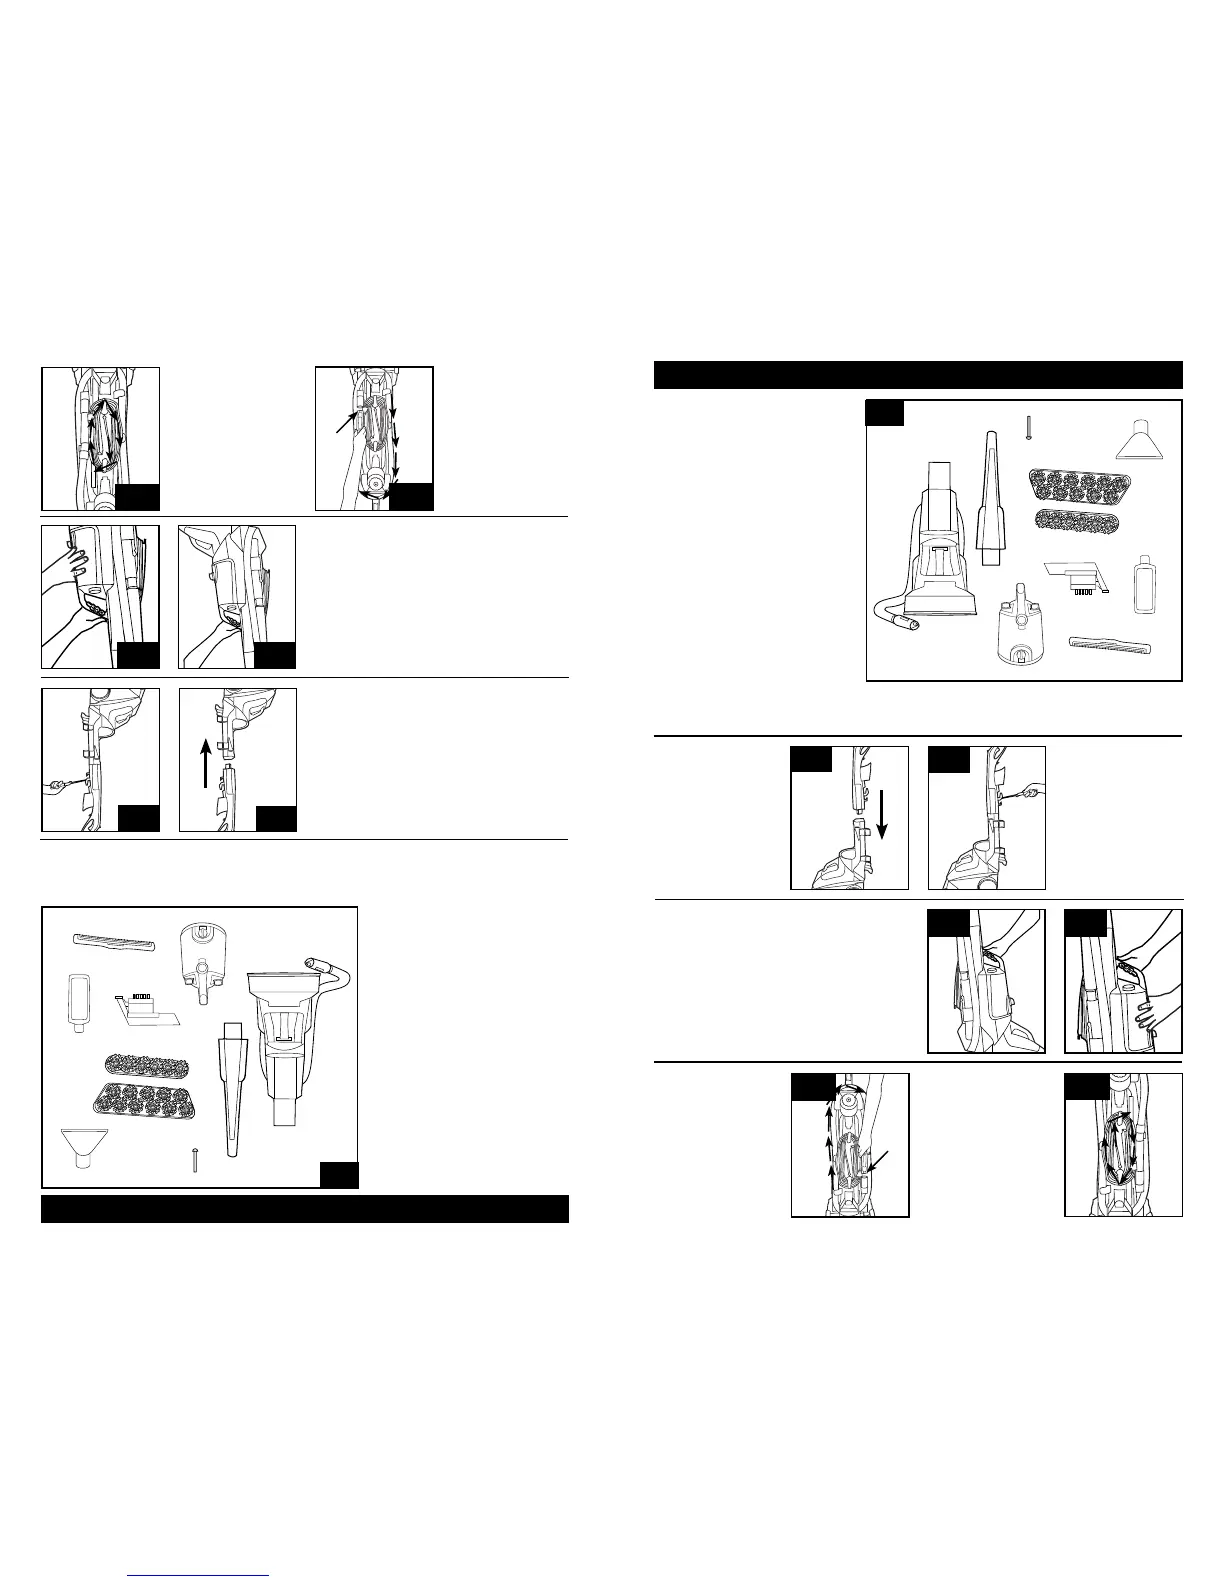
1. CLEANER ASSEMBLY
5
A. Base, Hose and Removable Dirty
Water Tank
B. Upper Handle
C. Handle Bolt (located in handle of unit)
D. SpinScrub
®
60 Brush Assembly or
SpinScrub
®
77 Brush Assembly
(Assembled on unit)
E. Stair/Upholstery Nozzle
(Assembled on unit)
F. SpinScrub
®
Hand Tool*
G. Clean Water Tank/ Carry
Handle
H. Squeegee* (Assembled on unit)
I. Solution Bottle
Remove all parts from carton and
identify each item shown.
Make sure all parts are located before
disposing of packing materials.
Handle ships with
bolt screwed in place.
Remove bolt.
1.2 Insert handle section
into vacuum base. Push
down firmly.
1.3 Insert bolt. Tighten
with screwdriver.
ATTACH HANDLE
CARTON CONTENTS
1.2
1.3
1.1
A
B
C
D
E
F*
Actual model may vary from images shown.
1.4 1.5
UPPER TANK
1.4 Position bottom of tank onto cleaner.
1.5 Push upper part of tank to lock it into place.
STORE HOSE
1.6 Wrap hose around
back of cleaner. Store
hose handle in holster.
1.7
1.6
CORD STORAGE
1.7 Wrap cord around
cord hooks for convenient
storage. Attach the plug
end to cord.
G
H*
*Available on select models only. Accessories not included with your
model may be purchased separately by visiting hoover.com.
NOTE: Phillips screwdriver needed for assembly.
I
5
A. Base, tuyau et réservoir d’eau sale
amovible.
B. Poignée supérieure
C. Boulon du manche (situé dans la
poignée de l’appareil)
D. Assemblage de la brosse 66
SpinScrub
MD
/ Assemblage de la
brosse 70 SpinScrub
MD
(assemblé à l’appareil)
E. Buse pour escaliers/meubles
(assemblé à l’appareil)
F. Accessoire portatif SpinScrub
®
*
G. Réservoir d’eau propre supérieur /
Poignée de transport
H. Plancher* (assemblé à l’appareil)
I. Bouteille de détergent
Retirer toutes les pièces de l’emballage.
Avant d’éliminer les matériaux
d’emballage, s’assurer qu’aucune des
pièces illustrées ne manque.
Le modèle d’aspirateur peut varier de
celui illustré.
1. ENSAMBLADO DE LA ASPIRADORAN
CONTENU DE L’EMBALLAGE
Le manche est livré avec le boulon vissé en place.
Retirer le boulon.
1.2 Insérer le manche dans la base de l’aspirateur.
Appuyer fermement.
1.3 Insérer le boulon.
Resserrer avec un tournevis.
FIXER LE MANCHE
REPLACER LE RÉSERVOIR
SUPÉRIEUR
1.4 Placer le bas du réservoir sur l’aspirateur.
1.5 Pousser la partie supérieure du réservoir pour la
verrouiller en place.
RANGER LE
TUYAU
1.6 Enrouler le tuyau
derrière l’appareil. In-
sérer la poignée du
tuyau dans l’orifice.
STOCKAGE DE
CORDE
1.7 Enrouler le cordon
autour des crochets
pour le ranger
facilement. Fixer
l’extrémité de la fiche
au cordon.
NOTA : Utiliser un tournevis cruciforme (Philips) pour
effectuer l’assemblage.
*Seulement sur certains. Les accessoires non compris avec votre modèle peuvent être achetés séparément
sur le site www.hoover.com.
1.1
 Loading...