EasyManua.ls Logo

HP 15 Notebook PC User Manual

HP 15 Notebook PC
124 pages
To Next Page IconTo Next Page
To Previous Page IconTo Previous Page
Page #80 background imageLoading...
Page #80 background image
Reverse this procedure to install the speakers.
Heat sink assembly
NOTE: The heat sink assembly spare part kit includes replacement thermal materials.
Description Spare part
number
Heat sink for use in models with UMA graphics and the following Intel processors: i7-4510U, i5-4210U, i3-4005U 759880-001
Heat sink for use in models with discrete graphics and the following Intel processors: i7-4510U, i5-4210U, i3-4005U 759881-001
Heat sink for use in models with Intel Pentium or Celeron processors and UMA graphics 767537-001
Heat sink for use in models with Intel i3-3217U processors and discrete graphics 767538-001
Heat sink for use in models with Intel i3-3217U processors and UMA graphics 767539-001
NOTE: To properly ventilate the computer, allow at least 7.6 cm (3.0 in) of clearance on the left side of the
computer. The computer uses an electric fan for ventilation. The fan is controlled by a temperature sensor
and is designed to turn on automatically when high temperature conditions exist. These conditions are
affected by high external temperatures, system power consumption, power management/battery
conservation configurations, battery fast charging, and software requirements. Exhaust air is displaced
through the ventilation grill located on the left side of the computer.
Before removing the heat sink assembly, follow these steps:
1. Shut down the computer. If you are unsure whether the computer is off or in Hibernation, turn the
computer on, and then shut it down through the operating system.
2. Disconnect all external devices connected to the computer.
3. Disconnect the power from the computer by first unplugging the power cord from the AC outlet and
then unplugging the AC adapter from the computer.
4. Remove the battery (see
Battery on page 41), and then remove the following components:
Keyboard (see
Keyboard on page 45)
Top cover (see
Top cover on page 53)
WLAN module (see
WLAN module on page 61)
System board (see
System board on page 66)
To remove the heat sink assembly:
1. Position the system board upside down.
2. Loosen the screws on the heat sink (1) that secure the heat sink assembly to the system board.
72 Chapter 6 Removal and replacement procedures for Authorized Service Provider parts

Table of Contents

Question and Answer IconNeed help?

Do you have a question about the HP 15 Notebook PC and is the answer not in the manual?

HP 15 Notebook PC Specifications

General IconGeneral
ProcessorIntel or AMD processors (various models available)
RAM4GB/8GB/16GB DDR3/DDR4 (varies by model)
StorageUp to 1 TB HDD or up to 512 GB SSD (various configurations available)
Display15.6" diagonal HD (1366 x 768) or FHD (1920 x 1080) display
GraphicsAMD Radeon Graphics
Operating SystemWindows 10
Optical DriveDVD-RW (varies by model)
WirelessWi-Fi 802.11ac, Bluetooth 4.2
AudioStereo speakers
WebcamHD Webcam with integrated microphone
Battery3-cell (varies by model)
PortsUSB 2.0/3.0, HDMI, Ethernet, Headphone/microphone combo jack

Summary

Product notice

Safety warning notice

Product description

Processors

Lists Intel Core and Bay Trail M processors and their specifications.

Memory

Details memory module slots and supported RAM configurations.

Ports

Lists available ports like HDMI, RJ-45, USB.

External component identification

Display

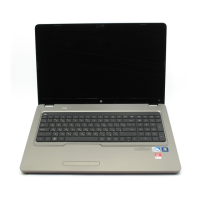
Identifies external components related to the display.

Left side

Identifies components on the left side of the computer.

Top

Identifies components on the top of the computer, including TouchPad and lights.

Illustrated parts catalog

Computer major components

Shows an exploded view of major computer parts with part numbers.

Sequential part number listing

Provides a list of all spare parts by number.

Removal and replacement procedures preliminary requirements

Tools required

Lists necessary tools for disassembly and reassembly.

Grounding guidelines

Explains electrostatic discharge (ESD) and prevention.

Removal and replacement procedures for Customer Self-Repair parts

Battery

Instructions for removing and replacing the computer battery.

Keyboard

Procedure for removing and replacing the keyboard.

Removal and replacement procedures for Authorized Service Provider parts

System board

Instructions for removing and replacing the system board.

Display assembly

Instructions for removing the entire display assembly.

Using Setup Utility (BIOS) and HP PC Hardware Diagnostics (UEFI) in Windows 8.1

Starting Setup Utility (BIOS)

How to access the BIOS settings on the computer.

Using HP PC Hardware Diagnostics (UEFI)

Introduction to the hardware diagnostics tool.

Specifications

Computer specifications

Detailed technical specifications for the computer.

39.6-cm (15.6-in) display specifications

Specific technical details of the display panel.

Backing up, restoring, and recovering in Windows 8.1

Creating HP Recovery media

Step-by-step guide to creating recovery media.

Recovering using HP Recovery Manager

Using HP Recovery Manager for system recovery.

Recycling

Display

Instructions for disassembling the display for recycling.

Related product manuals