Series 44/48
to
58
Memory Upgrade
CHANGING
THE NAMEPLATE
This procedure describes replacing the Series 44/48 nameplate with a Series
58
nameplate. A flatblade screwdriver
is
required for this procedure.
I;
Use the key to unlock the front panel. Swing the panel open to the right.
2.
Unscrew the two nuts
on
the top back
of
the nameplate.
3.
From
the back
of
the nameplate, use the flatblade screwdriver to pry the adhesive-backed nameplate from the panel.
4.
Remove the old adhesive from the panel before installing the new nameplate.
5.
Remove the protective backing from adhesive
on
the back side
of
the new nameplate.
6.
Position the new nameplate so
that
the two small screws through the holes in the panel.
7.
Reinstall the two nuts.
NOTE
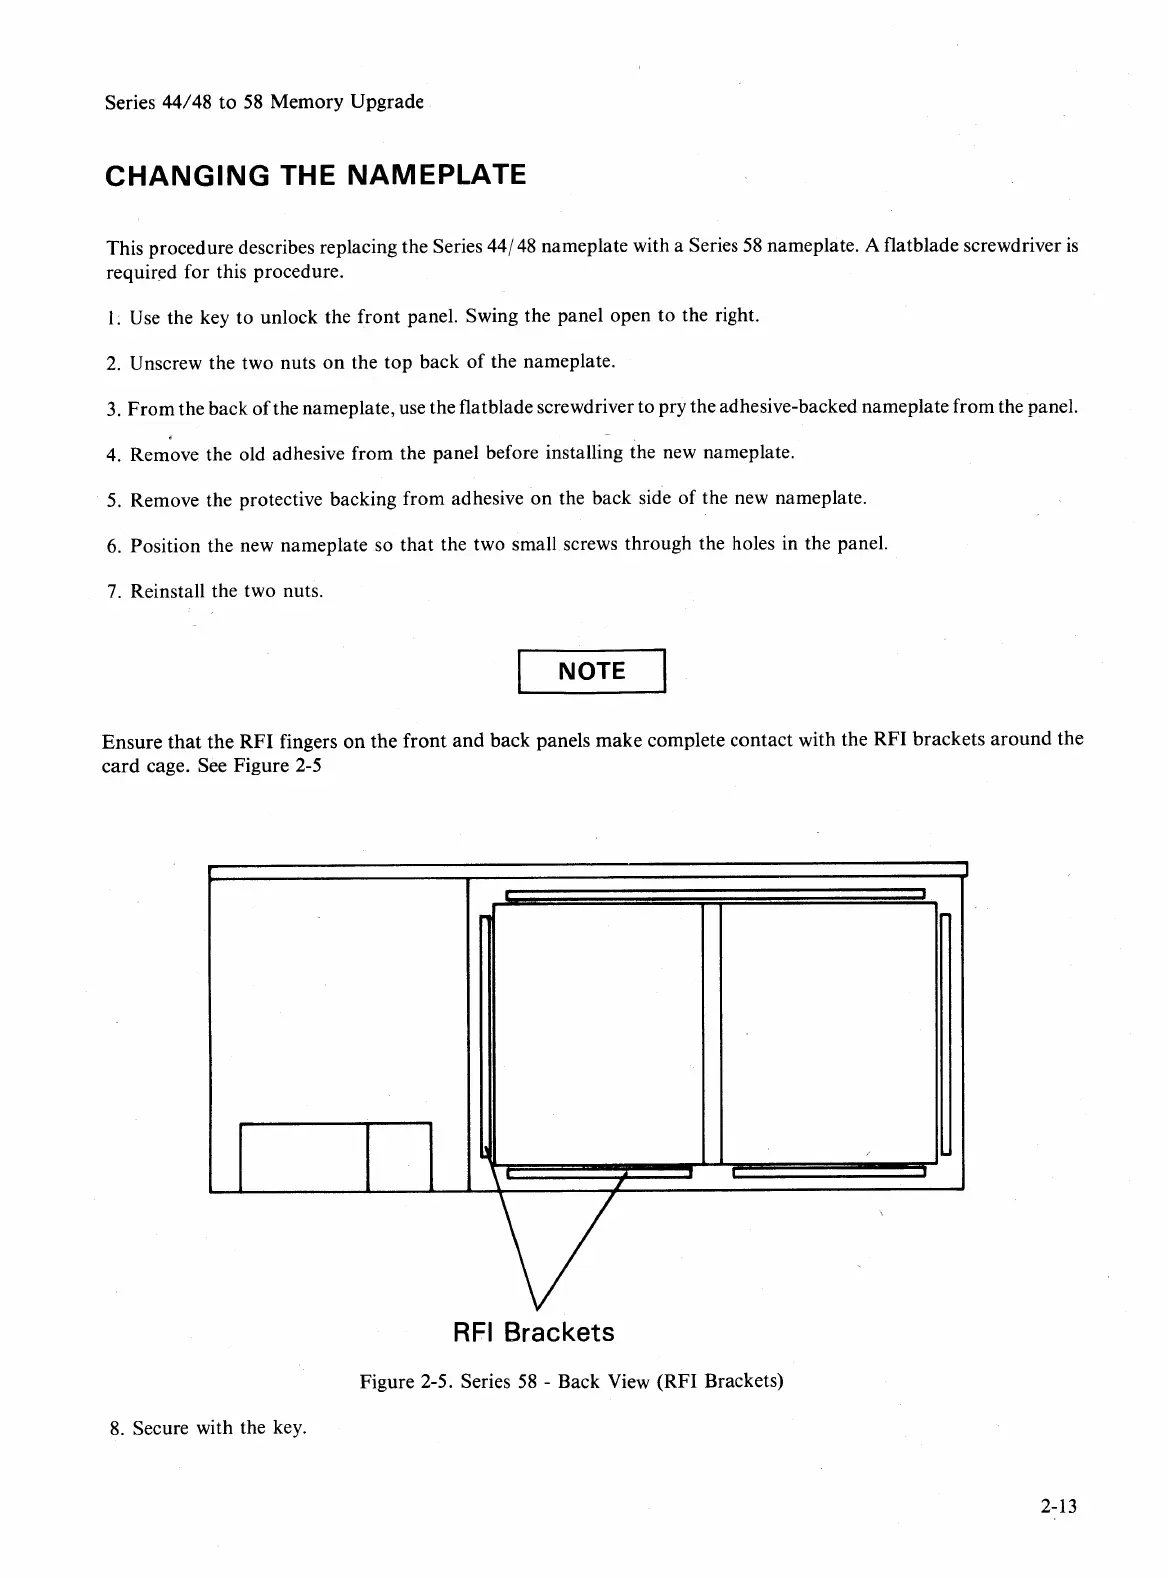
Ensure
that
the
RFI
fingers
on
the
front
and
back panels
make
complete contact with the RFI brackets
around
the
card
cage. See Figure
2-5
I
/
\ I
V
RFI
Brackets
Figure 2-5. Series
58
- Back View (RFI Brackets)
8.
Secure with the key.
2-13
 Loading...