EasyManuals Logo
Home>HP>Desktop>Elite 8300 Series Small Form Factor

HP Elite 8300 Series Small Form Factor User Manual

HP Elite 8300 Series Small Form Factor
356 pages
To Next Page IconTo Next Page
To Previous Page IconTo Previous Page
Page #118 background imageLoading...
Page #118 background image
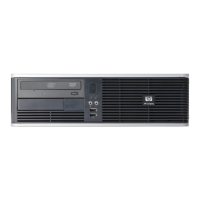
5. Remove the Torx T15 screw that secures the assembly to the front of the chassis.
6. Rotate the right side of the assembly away from the chassis.
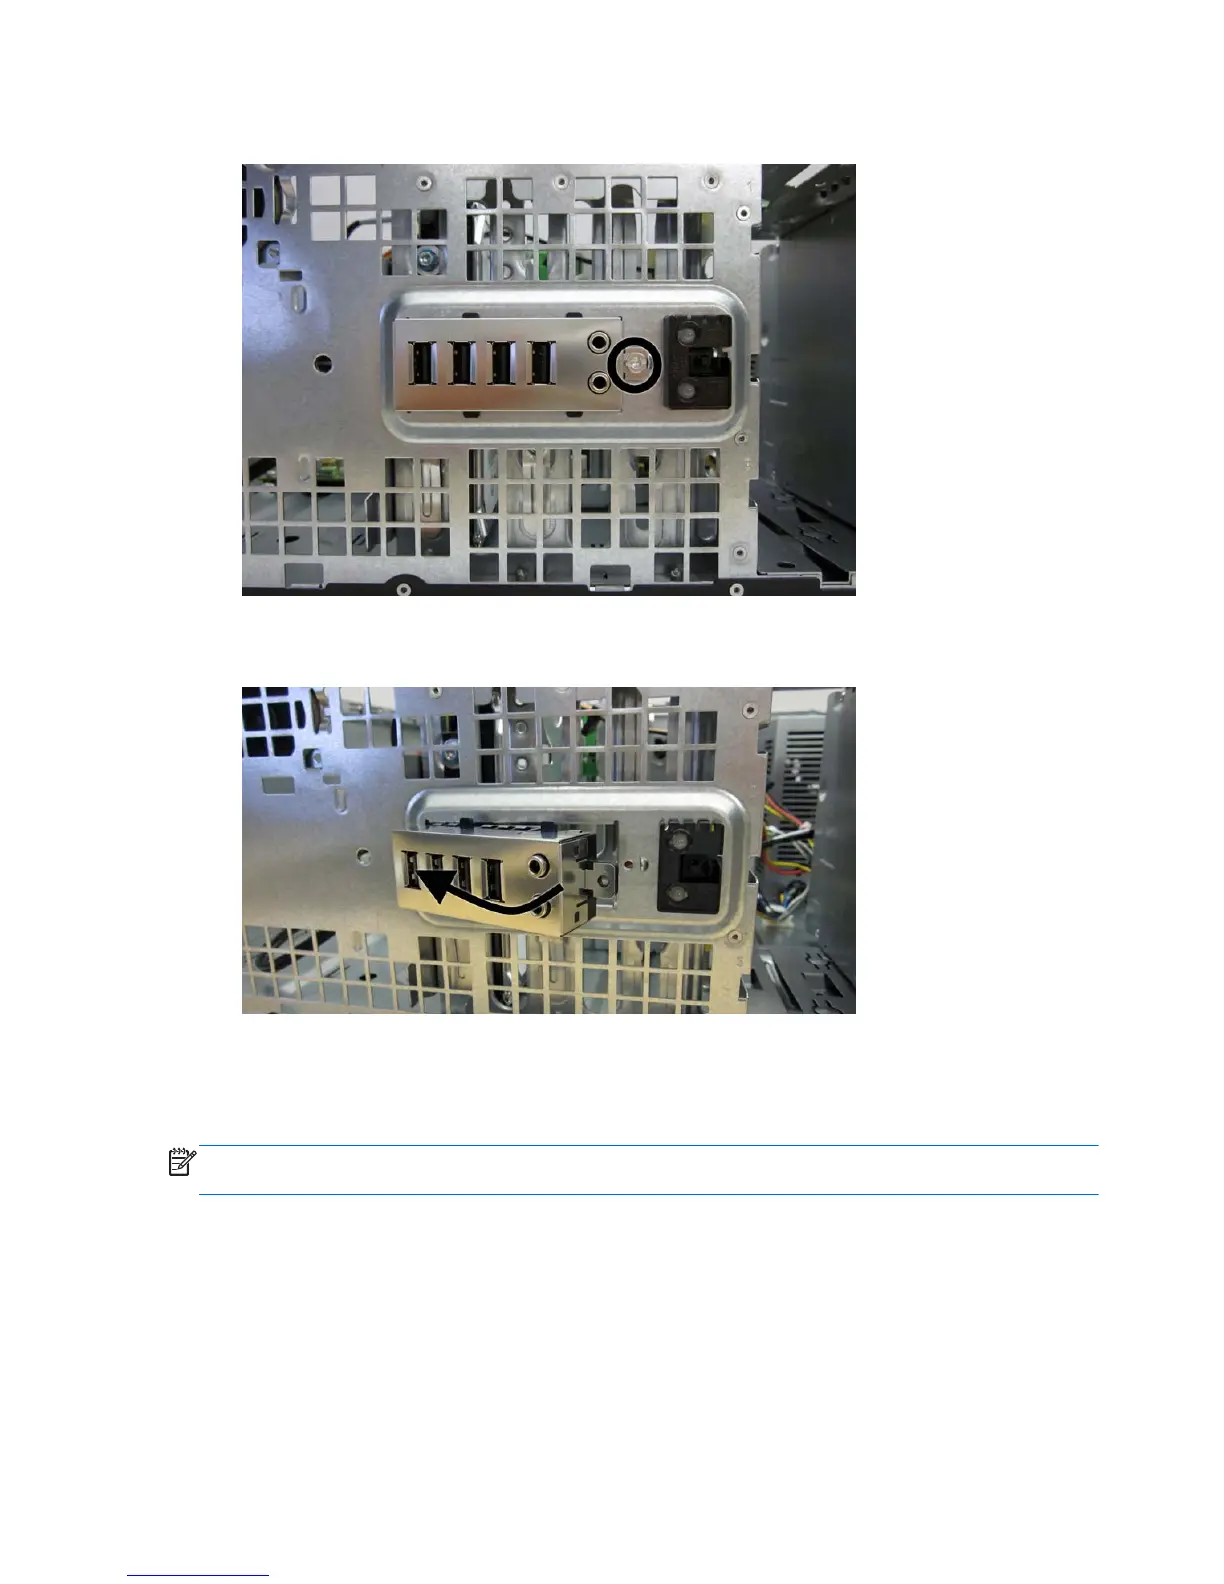
Figure 6-30 Removing the front I/O, USB, power switch assembly
7. Pull the assembly toward the right and away from the chassis while threading the wires through
the slot between the drive cage and chassis front and the hole in the front of the chassis.
To reinstall the assembly, reverse the removal procedure.
NOTE: When reinstalling the cables, route the blue cable through the top hard drive cage slot and
route the green and yellow through the bottom hard drive cage slot.
106 Chapter 6 Removal and Replacement Procedures Convertible Minitower (CMT) Chassis

Table of Contents

Other manuals for HP Elite 8300 Series Small Form Factor

Questions and Answers:

Question and Answer IconNeed help?

Do you have a question about the HP Elite 8300 Series Small Form Factor and is the answer not in the manual?

HP Elite 8300 Series Small Form Factor Specifications

General IconGeneral
BrandHP
ModelElite 8300 Series Small Form Factor
CategoryDesktop
LanguageEnglish

Related product manuals