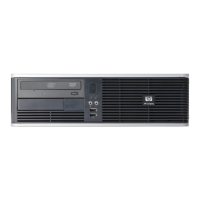
b. Press the tab on right side of the panel (1), and then swing the right side of the cage away
from the chassis to remove it (2).
Figure 9-35 Removing the I/O panel
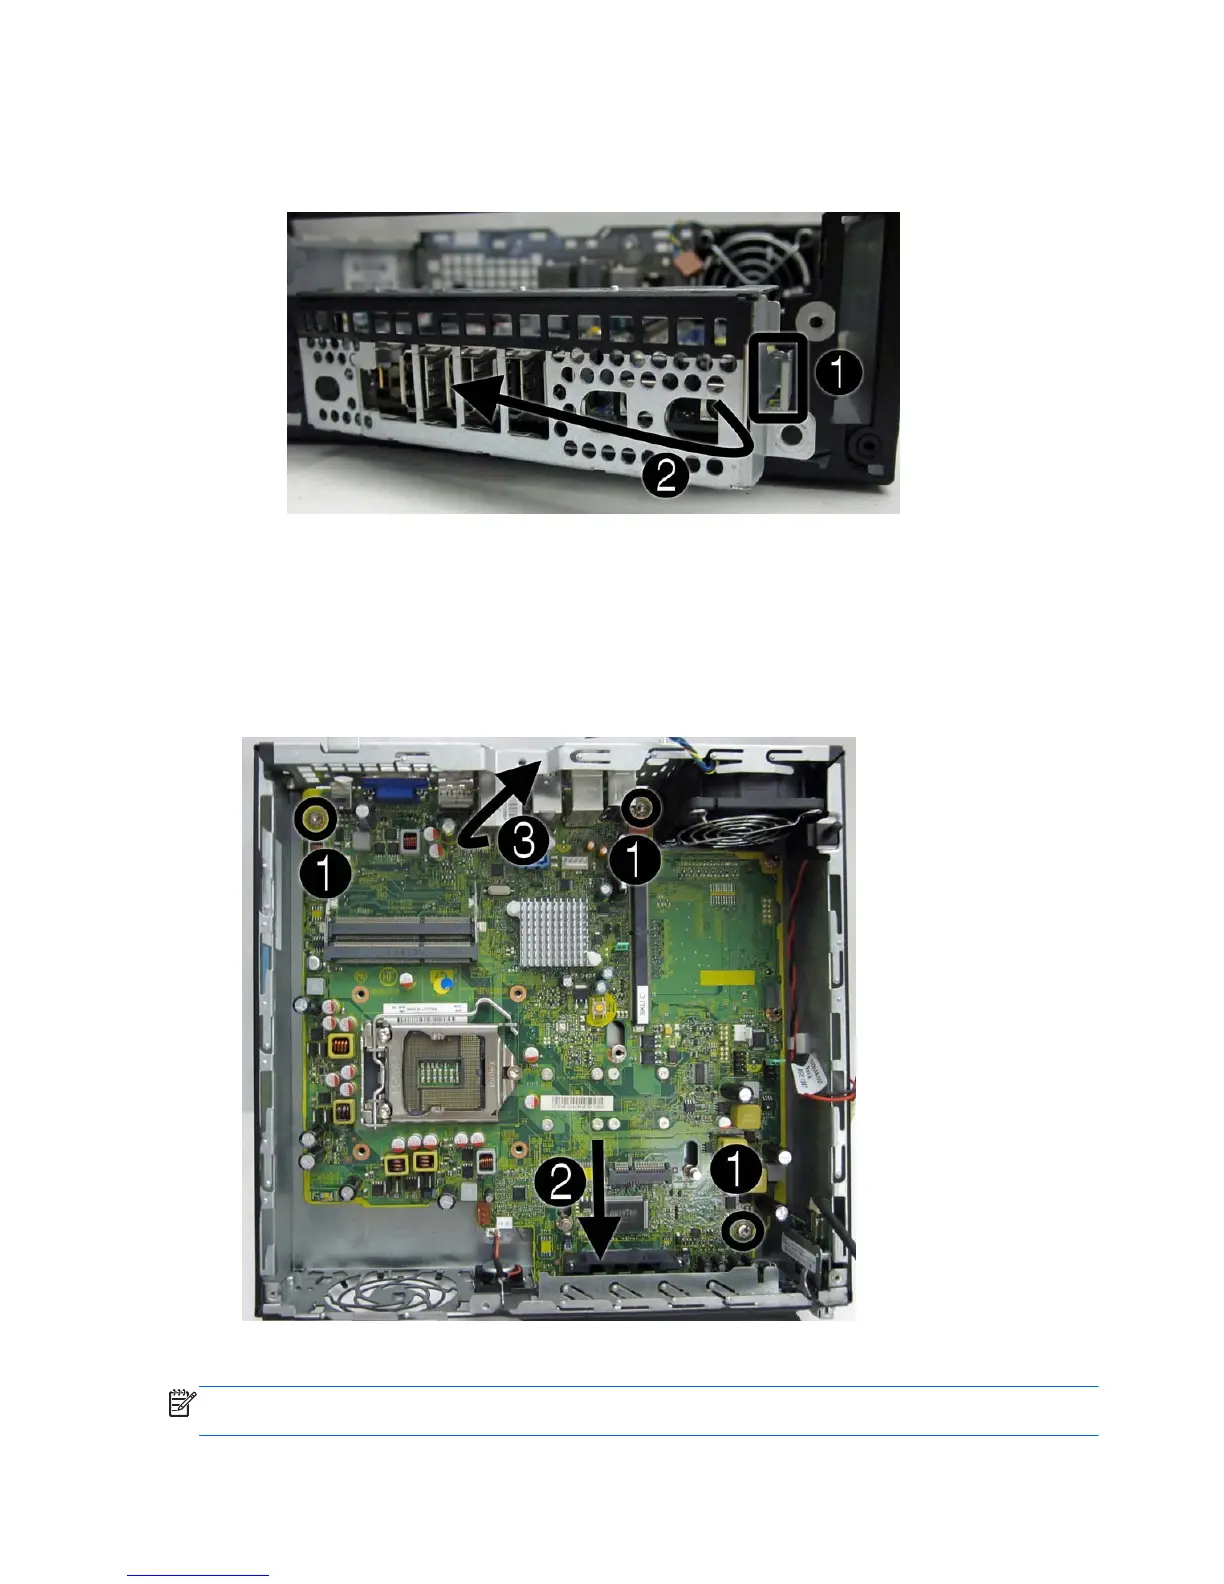
12. Remove the three remaining Torx T15 screws (1) that secure the system board to the chassis.
13. Slide system board toward the front of the unit until the rear connectors are clear of their slots in
the chassis (2).
14. Lift the rear of the system board until it clears the chassis, and then remove the system board
from the chassis (3).
Figure 9-36 Removing the system board
To install the system board, reverse the removal procedure.
NOTE: When replacing the system board, you must also change the chassis serial number in the
BIOS.
242 Chapter 9 Removal and Replacement Procedures Ultra-Slim Desktop (USDT) Chassis
 Loading...