Display assembly – touch screen
To remove the display assembly and access the display assembly subcomponents, follow these steps:
1. Turn o the computer. If you are unsure whether the computer is o or in Hibernation, turn the
computer on, and then shut it down through the operating system.
2. Disconnect the power from the computer by unplugging the power cord from the computer.
3. Disconnect all external devices from the computer.
4. Remove the bottom cover (see Bottom cover on page 35).
5. Remove the battery (see Battery on page 54).
6. Remove the hard drive (see Hard drive on page 55).
7. Remove the speakers (see Speakers (front) on page 57).
8. Remove the system board (see System board on page 66).
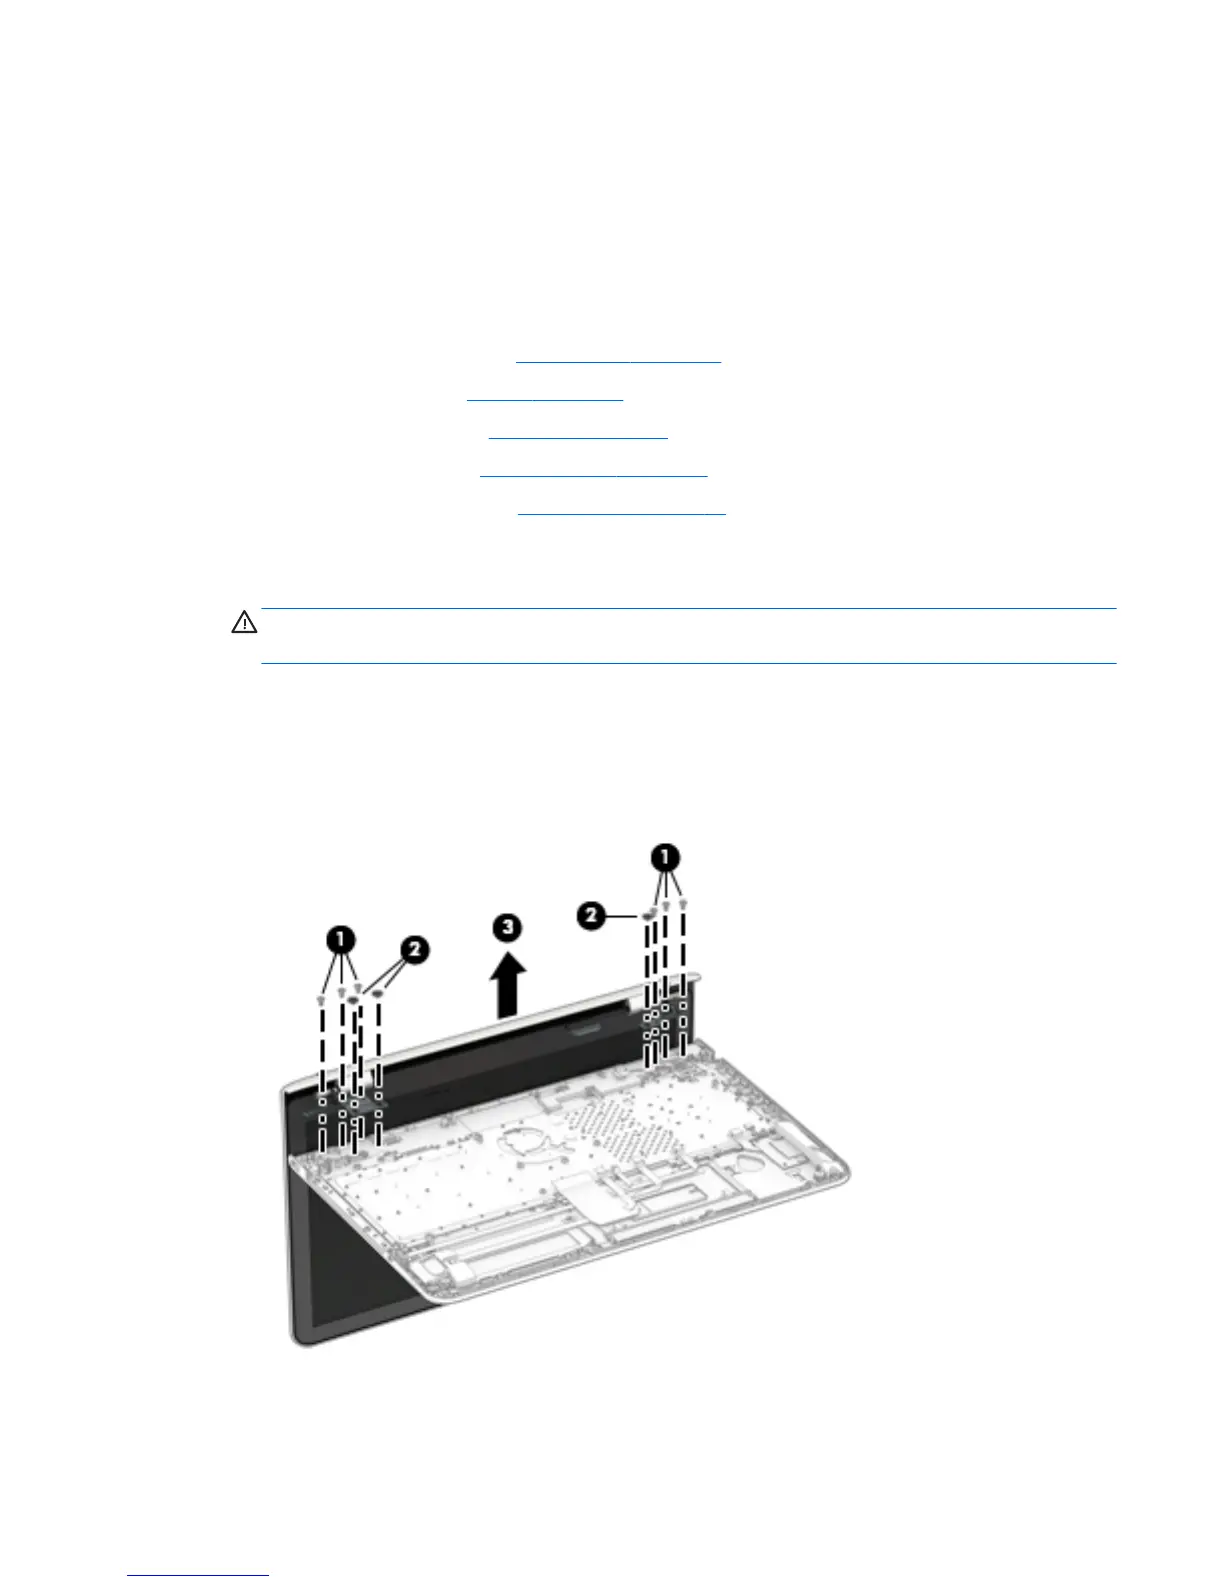
Remove the display assembly:
1. Open the computer and position the computer with the display hanging over the edge of a tablet.
CAUTION: Be sure to support the display as you remove the screws to avoid the display falling and
sustaining damage.
2. Remove the six Phillips PM2.5×4.0 screws (1) (three on each hinge) that secure the display assembly to
the computer.
3. Remove the three broadhead Phillips PM2.5×2.5 screws (2) (two on the right hinge, one of the left
hinge) that secure the display assembly to the computer.
4. Separate the display from the computer (3).
If it is necessary to replace any of the display assembly subcomponents:
Component replacement procedures 71
 Loading...