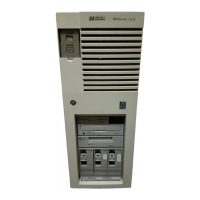
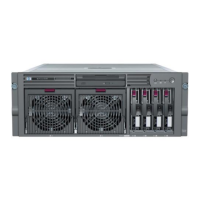
OverviewofNetServerFeatures
FrontView
FactorySeal(locatedon
bottomofchassis)
FloppyDrive
CD-ROMDrive
PowerON
OFF/Sleep
OFF/ON/Sleep
Indicator
SCSI/IDE
Activity
FoldOutFeet
OptionalTape
BackupDrive
LockedPosition
UnlockedPosition
KeyLock
ExternalSCSI
Knock-out
Video
SVGA
Power
Keyboard
Mouse
SerialPortA
ParallelPort
SerialPortB
LANRJ45
ObtainHPNetServerNavigatorCD-ROMReleaseHistory
UnpackandverifythecontentsoftheshippingboxagainsttheContentsChecklistincludedwithyourNetServer.Ifanythingismissingordamaged,
contactyourreseller.Forinformationontestedaccessories,downloadtheOrderAssistantfromtheHPWebpage.
Toobtaindriversandutilitiesfornon-HPcomponentsofyoursystem,followthedirectionsprovidedbythecomponentornetworkoperatingsystem
manufacturertoaccessthenecessaryInternet,BBS,orCompuServesitecontainingthedriversandsoftware.
Toensurethatyouhavethelatestversionsofthesoftware,obtainthecurrentreleasehistory.Thisreportdescribesthelatest
Obtainthereleasehistoryfromoneofthesesources:
softwareupdatesto
eachreleaseoftheandinstructionsforobtainingacurrentrelease.HPNetServerNavigatorCD-ROM
!
!
!
!
CallHP’sfaxsystemat1-800-333-1917(or1-208-344-4809fromyourfaxmachine)andrequestdocumentID
number(foundonCD)
ftp://ftp.hp.com/pub/servers/
Clickon/softwareandviewthe.txtfilethatmatchesthedocumentIDfoundontheCD
GOHPPC;downloadthe
Fax—
InternetWWW—
InternetFTP—
CompuServe— .txtfilethatmatchesthedocumentIDfoundontheCD
http://www.hp.com/netserver/servsup/cdinfo
VerifyContents
3
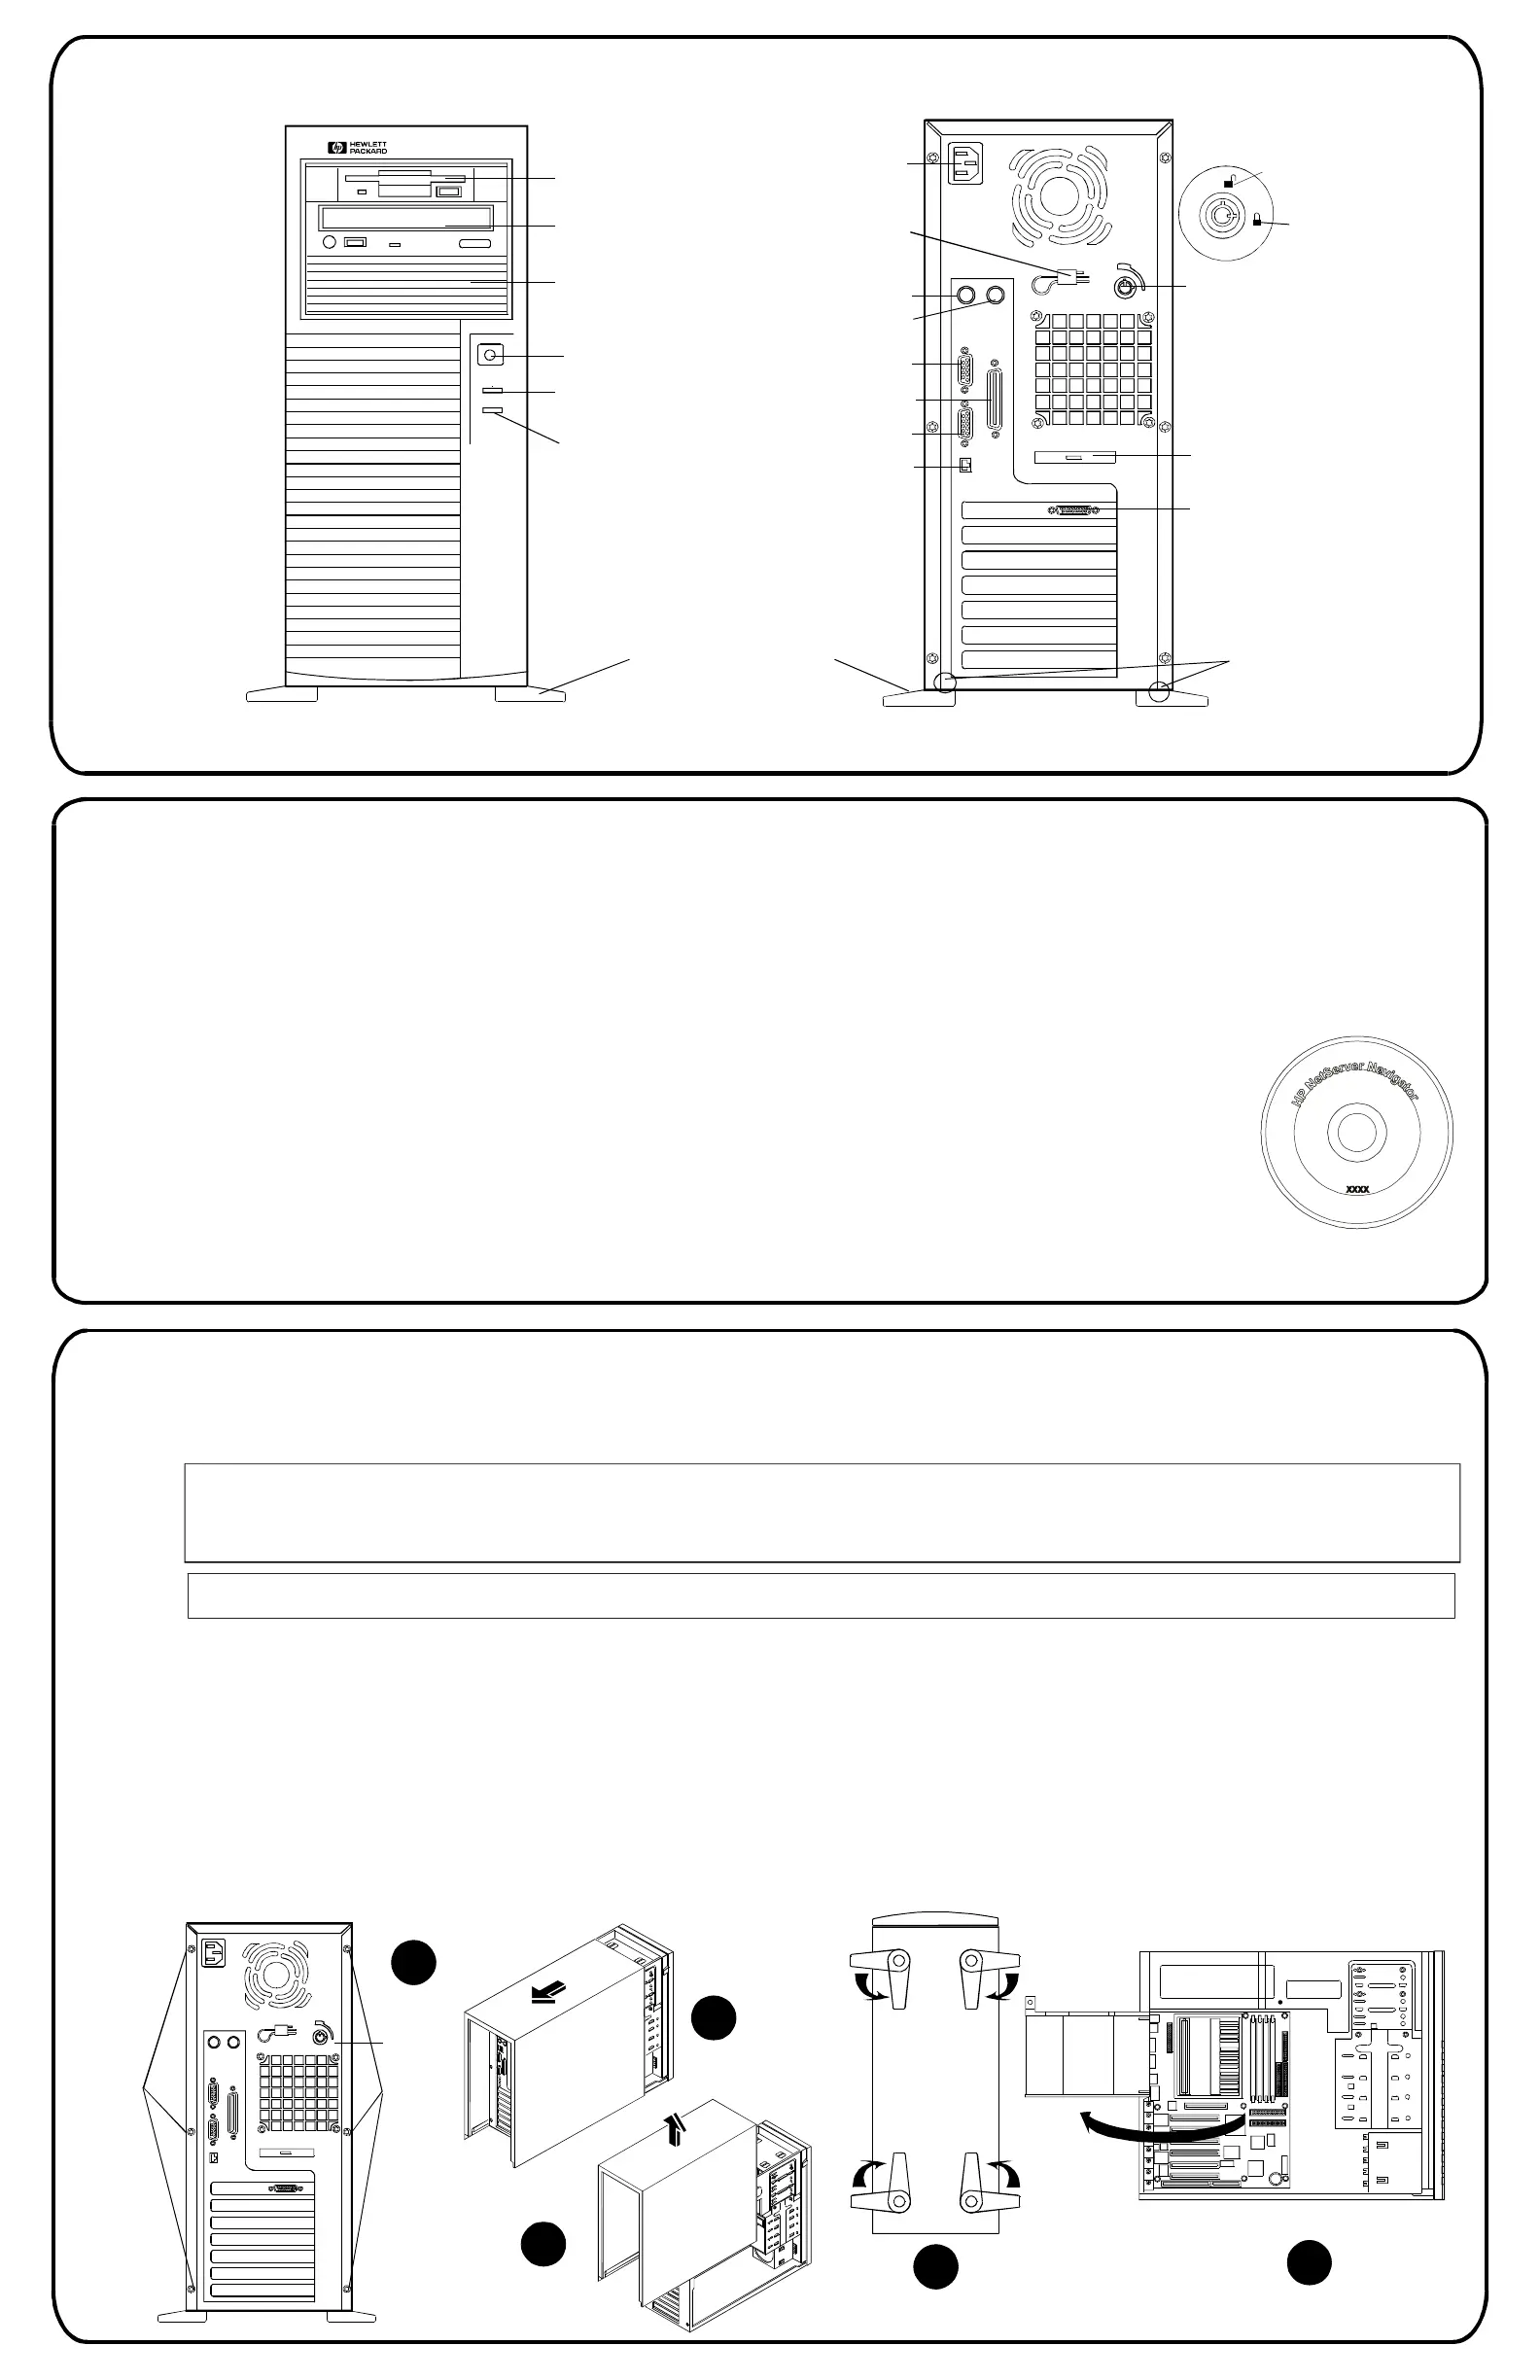
RemovetheCover(IfInstallingOptionalAccessories)
Ifyouareinstallingoptions,youwillneedtoremovethecoverusinga.Toinstalloptions,youwillneeda
TORXT15driveranda
TORXT15driveroraflatbladescrewdriver
flatbladescrewdriverifyouareinstallingtheexternalSCSIport.
1.TurnofftheNetServer
2.Unlockthecover:
3.Unscrewthecover:
4.Removethecover:
5.LaytheNetServeronitsside
6.Repositionthecoolingduct/cover:
anddisconnectthepowercord.
Tounlockthecover,usethekeyinthekeybag.SeeFigureA.
UnscrewthesixTORX15/slottedscrewssecuringthecover.SeeFigureA.
Placeyourhandsoneithersideofthecover.While,pullthecoverbacktoreleaseit
(seeFigureB)andthenliftitoffthechassis.SeeFigureC.
MostinternalworkisbestdonewiththeNetServeronitsside.Turnthefeetin,andlayitonitsside.See
FigureD.
Theductunsnapsandswingsoutoftheway.SeeFigureE.
applyingdownwardpressure
:
WARNINGBeforeremovingthecover,alwaysdisconnectthepowercordandunplugtelephoneandnetworkcables.Disconnect
thepowercordtoavoidexposuretohighenergylevelsthatmaycauseburnswhenpartsareshort-circuitedbymetal
objectssuchastoolsorjewelry.Disconnecttelephonecablestoavoidexposuretoshockhazardfromtelephoneringing
voltages.
CAUTIONWearawriststrapanduseastatic-dissipatingworksurfaceconnectedtothechassiswhenhandlingcomponents.
KeyLock
ScrewsScrews
2
1
A
B
C
D
E
PowerCord
StrainRelief
RearView
 Loading...