56
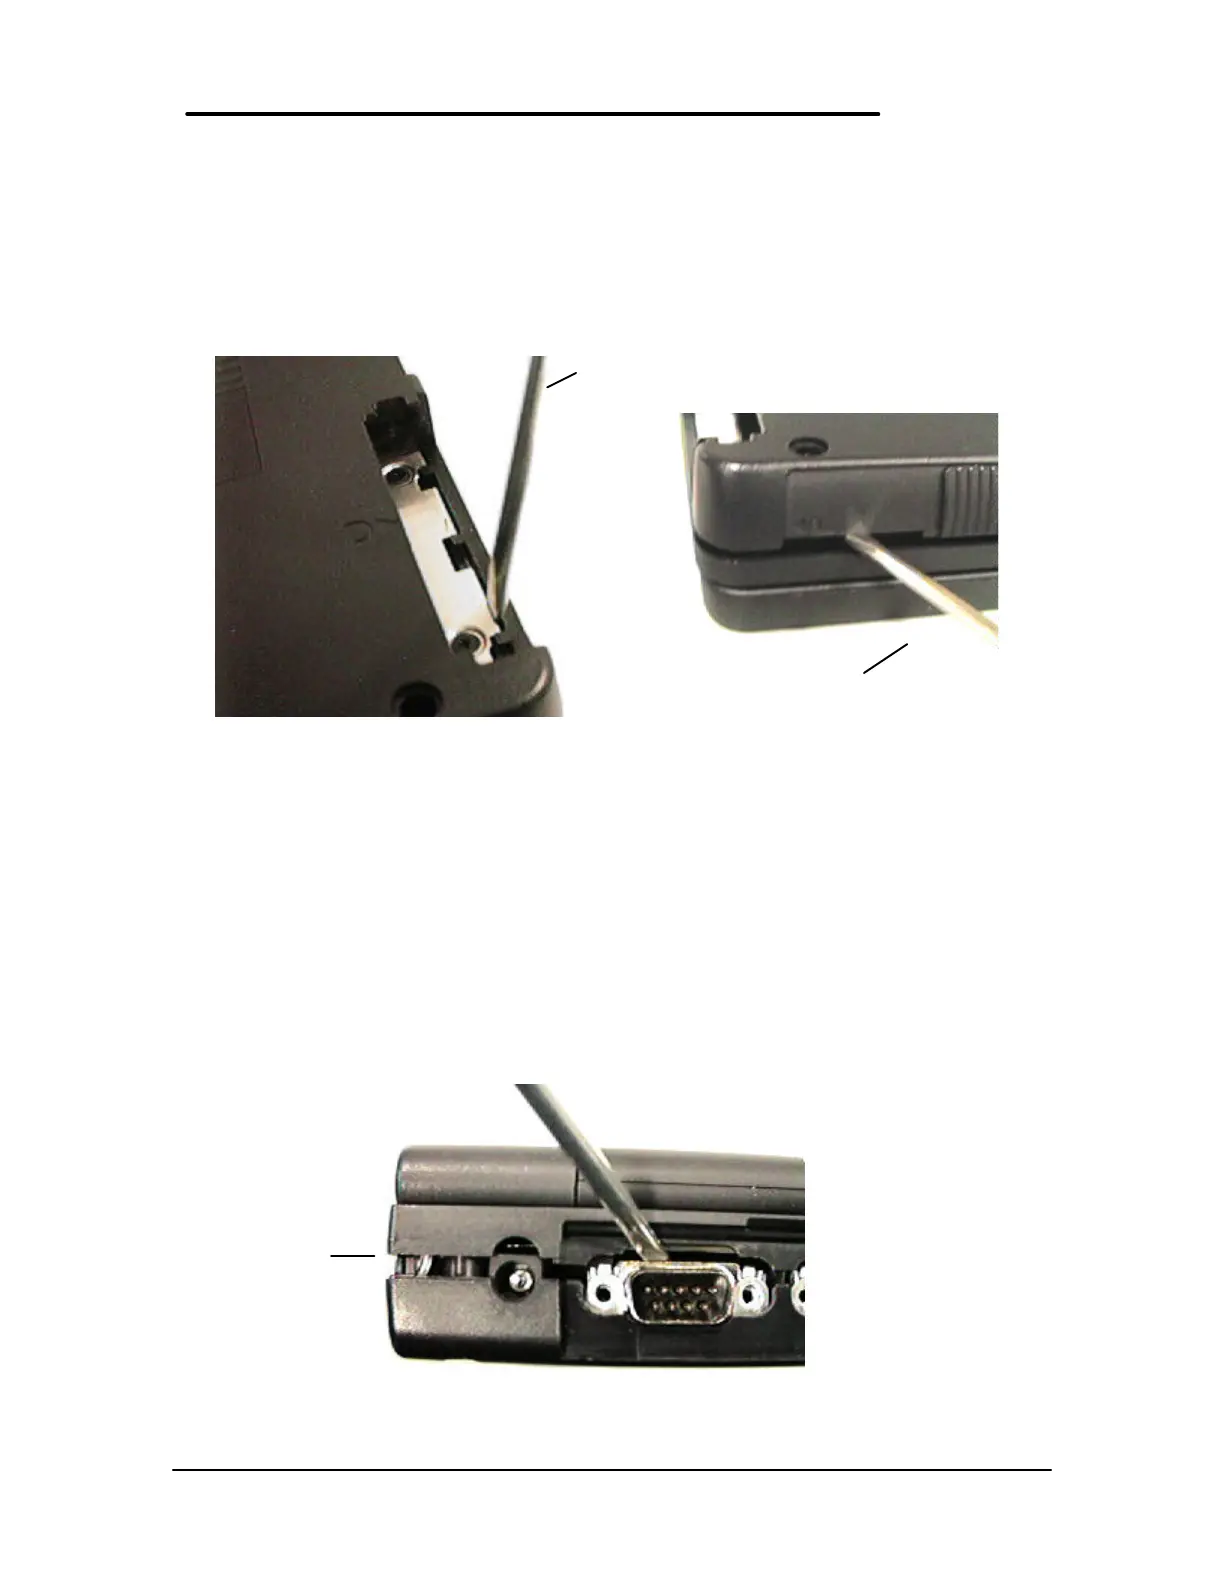
Place a prying device at a tab location between the metal and plastic of the Bottom Case
(see figure below, left). Place another prying device in the PCMCIA eject button (see figure
below, right). To release the tab, simultaneously twist prying device A while lifting on prying
device B. Use caution with this maneuver, as the plastic tabs can break off the Bottom
Case. If this occurs, the Bottom Case must be replaced.
5. Perform step four for each of the four tabs.
6. Once the Bottom Case tabs are released, the Bottom Case and Top Case are being held
together only by the display cable and the two keyboard cables. Do not allow the Top
Case and Bottom Case to separate at this point. The display cable and keyboard
cables will be damaged if they are not properly disconnected.
7. Use a prying device to increase the separation of the Top Case and Bottom Case (see figure
below). Do not separate the Top Case and Bottom Case more than 1 cm. A separation
greater than 1 cm will damage the keyboard flex cables by pulling them out of the
zero-force insertion connectors. The intent is to be able to view the display cable, located
to the left of the ac adapter socket.
Figure 12 - Bottom Case Prying Locations
Figure 13 - I/O Port Prying Location
Prying device “A”
Prying device “B”
Display Cable
 Loading...