6 Upgrading and Servicing Guide
CAUTION: Back up your personal files on
the hard disk drive to an external storage
device, such as a CD, before removing the
hard disk drive. Failure to do so will result
in data loss. After replacing the hard disk
drive, you need to run System Recovery
using the recovery discs to load the
factory-installed files.
1 Complete the procedures to prepare the PC, and to
remove the side panel. See “Opening and Closing
the PC“ on page 1.
2 Locate the hard disk drive you want to remove.
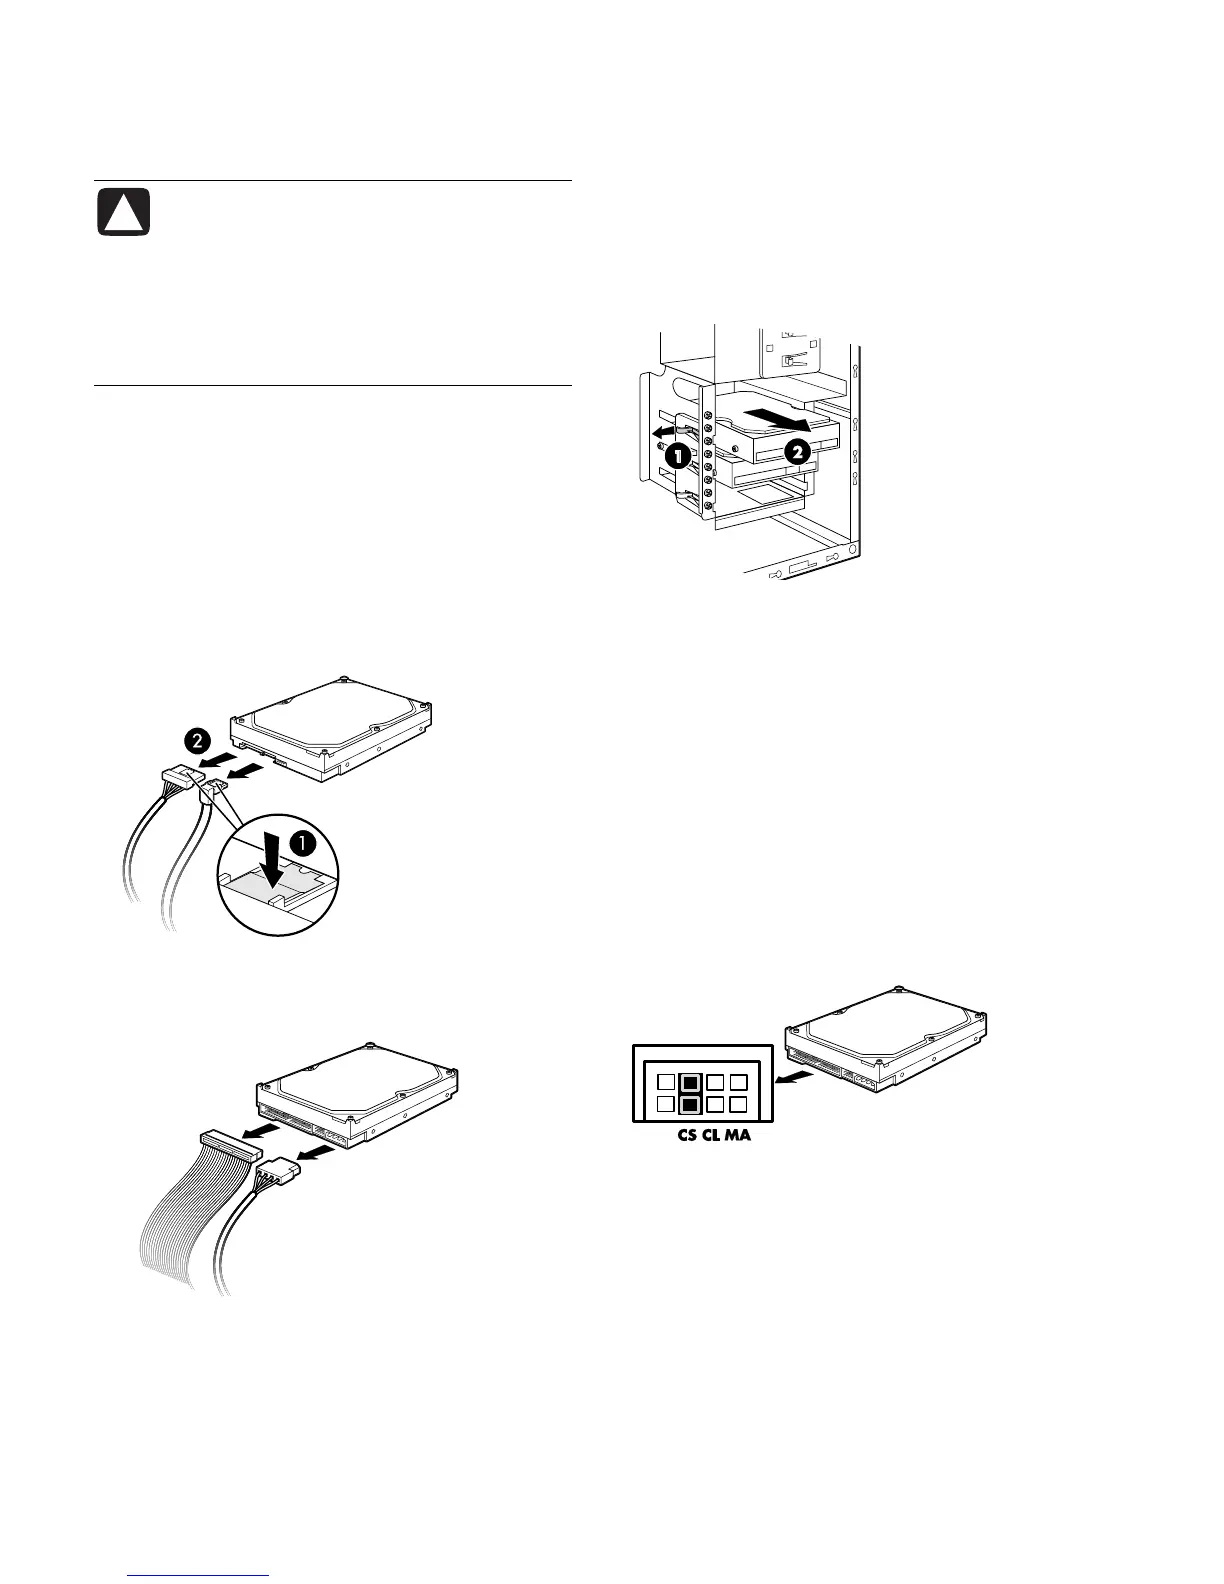
3 Disconnect the power cable and data cable from
the back of the drive you want to remove. For a
Serial ATA drive, press the latch (1) (select models
only) in the center of each plug and pull the plug
(2) from the drive connector. For a Parallel ATA
drive, use a gentle rocking motion to free the plug.
Disconnecting the Serial ATA hard disk drive
cables
Disconnecting the Parallel ATA hard disk drive
cables
4 Release the drive from the cage by lifting the
tab (1) on the latch for the hard disk drive cage
and then sliding (2) the drive out of the cage. (The
latch secures the drive in the cage in the chassis.)
Be careful to touch only the sides of the drive.
5 If you are replacing the old drive with a new drive,
remove the four guide screws (two screws on each
side) from the old drive. You need these screws to
install the new drive.
Replacing or Adding a Hard Disk
Drive
1 If necessary, remove the existing drive. See the
previous procedure.
2 For a Parallel ATA drive, make sure the jumper on
the new hard disk drive is in the CS (cable select)
position. Your drive may vary from the illustration.
The Serial ATA drive does not use cable select.
Cable select jumper
3 Install four guide screws on the sides of the new
drive (two screws on each side). The screws help
guide the drive into its proper position in the bay.
 Loading...