MSM410 Access Point Quickstart 3 HP ProCurve Networking
Important information to read before installing
Warning: PROFESSIONAL INSTALLATION REQUIRED
Prior to installing or using the MSM410, consult with a professional installer trained in
RF installation and knowledgeable in local regulations including building and wiring
codes, safety, channel, power, indoor/outdoor restrictions, and license requirements for
the intended country. It is the responsibility of the end user to ensure that installation and
use comply with local safety and radio regulations.
Cabling: You must use the appropriate cables, and where applicable, surge protection, for
your given region. For compliance with EN55022 Class-B emissions requirements use
shielded Ethernet cables. Cables with large boots may not insert into the RJ-45 connectors
properly. It is recommended that you do not use such cables.
Country of use: In some regions, you are prompted to select the country of use during setup.
Once the country has been set, the MSM410 will automatically limit the available wireless
channels, ensuring compliant operation in the selected country. Entering the incorrect
country may result in illegal operation and may cause harmful interference to other systems.
Plenum installation: The MSM410 and appropriate cabling can be installed in a plenum
(UL2043 rating). The MSM410 should be installed with its top surface facing the floor
(similar orientation as in a ceiling installation). However, it is left to a qualified installer to
determine how to install/secure the MSM410 in a plenum in an appropriate and safe manner.
Plenum-rated cables and attachment hardware must be used.
Safety: Take note of the following safety information during installation.
• If your network covers an area served by more than one power distribution system, be
sure all safety grounds are securely interconnected.
• Network cables may occasionally be subject to hazardous transient voltages (caused by
lightning or disturbances in the electrical power grid).
• Handle exposed metal components of the network with caution.
• The MSM410 is powered-on when connected to a PoE power source.
• The MSM410 and all interconnected equipment must be installed indoors within the
same building (except for outdoor models / antennas), including all PoE-powered
network connections as described by Environment A of the IEEE 802.3af standard.
Powering the MSM410
The MSM410 can be powered by:
• A 10/100 or 10/100/1000 PoE-enabled switch. Various PoE-enabled switches are
available from HP ProCurve.
• An HP ProCurve PoE 1-Port Power Injector (J9407A).
Caution: If the MSM410 will be powered by a user-supplied PoE power injector, use
only a gigabit-compatible power injector. PoE injectors designed for 10/100
networks only are NOT compatible with the MSM410.
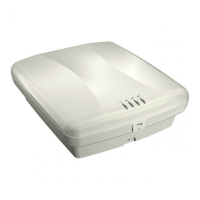
Installation
The MSM410 can be mounted on a wall or a suspended ceiling. In either case, the first step
is to mount the bracket, and the second step is to attach the MSM410 to the bracket.
A. Mount the bracket
Mounting directly on a wall
1. Respecting the UP indicator on the bracket, hold the bracket against the wall at the
desired position. Mark two holes for the screws (wall anchors) and one hole in the
cutout area of the bracket for the Ethernet cable.
2. Drill two holes for the wall anchors, typically 3/16 inch (4.7 mm) in diameter.
3. Drill a hole for the Ethernet cable. Alternatively, you can feed the Ethernet cable
from above and through the MSM410 cable channel.
4. Insert the anchors and tap them flush with the wall surface.
5. Pull the Ethernet cable through the hole in the wall and the hole in the bracket.
6. Screw the bracket to the wall.
Mounting on a wall-mounted electrical box
1. Disconnect power and take any other needed security precautions.
2. Remove the electrical box cover and any contents.
3. Pull the Ethernet cable down into the box and then through the hole in the bracket.
4. Hold the bracket against the box respecting the UP indicator, and attach the bracket
to the box using appropriate countersunk screws.
Mounting holes
for connecting
to a typical
electrical box.
Tabs
UP
indicator

 Loading...