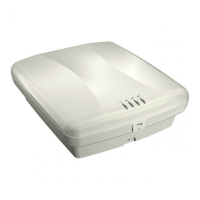
MSM410 Access Point Quickstart 5 HP ProCurve Networking
2. On the Login page, specify admin for Username and Password and then select Login.
3. On the License Agreement page, read the agreement and select Accept License
Agreement.
4. On the Registration page, register now if desired. You can register later by selecting
Service Controller >> Maintenance > Registration.
5. If a Country prompt appears, select the country in which the MSM410 will operate.
Caution: The correct country must be selected. See Country of use on page 3.
6. At the password prompt it is recommended that you change the default password and
select Save. Passwords must be at least six characters long and include four different
characters.
The management tool is organized with menus and sub-menus. Instructions for making
menu selections, such as “select Wireless > Local mesh” instruct you to select the Wireless
menu and then the Local mesh sub-menu, as follows:
D. Reserve an IP address for the MSM410
By default the MSM410 operates as a DHCP client on the Ethernet port. If there is a DHCP
server on the network, the MSM410 will automatically receive a new IP address and will no
longer have the default address of 192.168.1.1. It is suggested that you either pre-configure
the DHCP server for the MSM410 or use a static IP address as follows:
• Pre-configure the DHCP server to assign a specific IP address to the MSM410. To do
this you need to specify the MSM410 MAC address and a reserved IP address on the
DHCP server. The MSM410 MAC address is printed on the MSM410 label identified as
Wireless Base MAC, or listed on the management tool Home or Login page as
Wireless MAC address.
OR
• Assign a static IP address to the MSM410. The address must be on the same subnet as
the network to which the MSM410 will connect.
1. Select Network > Ports > Bridge port.
2. Select Static and then Configure. Configure settings as follows:
• IP address: Set an address that is on the same subnet as the network to which
the MSM410 will connect once installed. Respect any DHCP server-mandated
static address ranges.
• Mask: Set the corresponding mask for the IP address.
• Default gateway: Set the IP address of the gateway on the network.
3. Select Save.
E. Test the wireless network
1. Disconnect the MSM410 from your computer and use a standard Ethernet cable to
connect it to the network via a PoE switch or injector. For the purposes of this
installation procedure, the network must have a DHCP server and an Internet
connection. Broadband routers typically include a DHCP server.
2. Enable the wireless network interface on your computer, and verify that it is set to obtain
an IP address automatically.
For example, to do this in Windows XP, use Control Panel > Network Connections >
Local Area Connection > Properties > Internet Protocol (TCP/IP) > Properties, and
make sure that Obtain an IP address automatically and Obtain a DNS server address
automatically are both checked.
Note:
It is recommended that the wireless interface on your computer be set
to operate as a Wi-Fi Alliance Certified 802.11n draft 2.0 client.
Windows XP users may have to install a patch available from Microsoft.
3. Connect to the wireless network. By default the MSM410 creates a wireless network
named HP ProCurve. For example, from the Windows XP Start menu, select Settings >
Network Connections > Wireless Network Connections. Select HP ProCurve and then
Connect.
4. Confirm that you can browse the Internet using the wireless network.
F. Performing additional configuration
Configure your computer LAN port and connect it to the same network as the MSM410. Re-
launch the MSM410 management tool at https://<IP address> where <IP address> is one of:
• The IP address reserved on the DHCP server in step D above.
• The IP address corresponding to the MSM410 MAC address in the DHCP server log.
• The static IP address assigned to the MSM410 in step D above.
Note: See the Caution regarding WIRELESS SECURITY on page 4.
Enabling access to other resources
By default, the MSM410 only permits traffic that is addressed to the default gateway on the
network (which enables you to connect to the Internet). To enable access to other resources:
1. Select VSC > Profiles and then select the HP ProCurve profile.
2. On the Add/Edit Virtual Service Community page clear the Wireless security filters
checkbox.
3. Select Save.