2
2 3 4
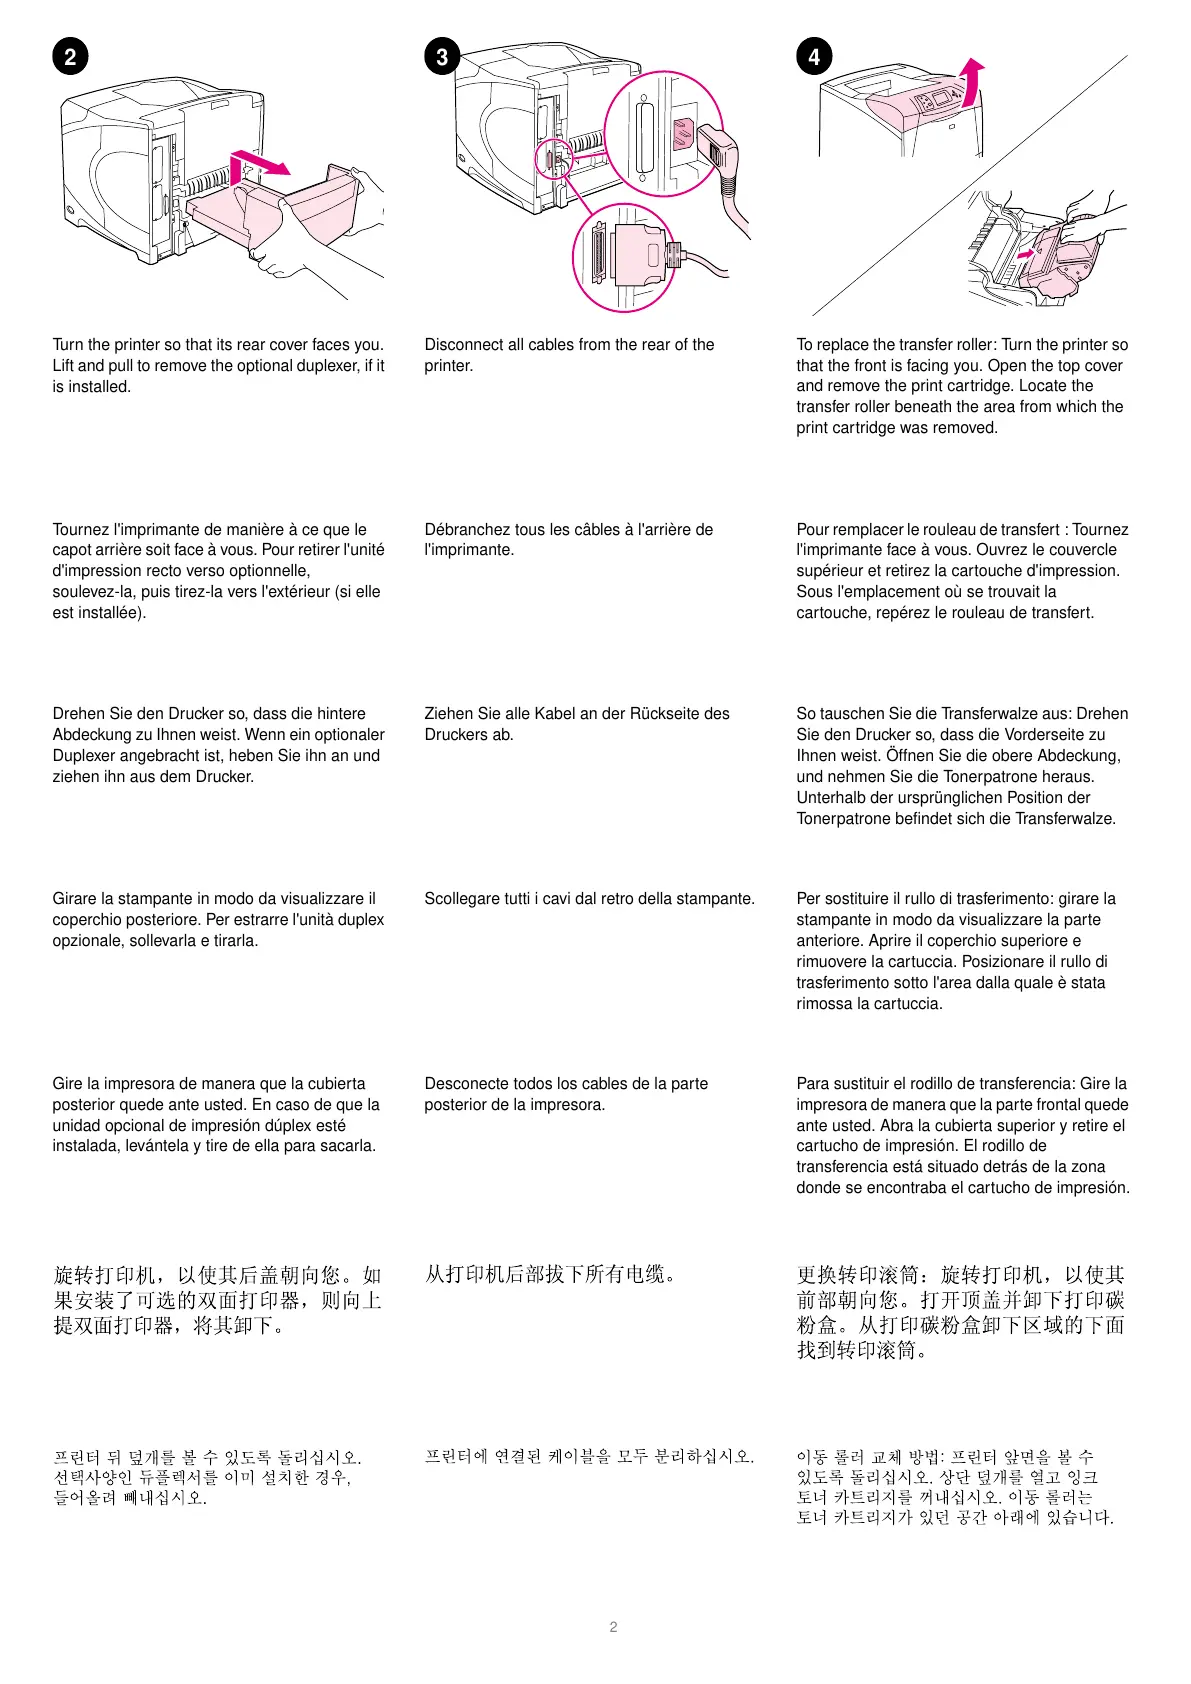
Turn the printer so that its rear cover faces you.
Lift and pull to remove the optional duplexer, if it
is installed.
Disconnect all cables from the rear of the
printer.
To replace the transfer roller: Turn the printer so
that the front is facing you. Open the top cover
and remove the print cartridge. Locate the
transfer roller beneath the area from which the
print cartridge was removed.
Tournez l'imprimante de manière à ce que le
capot arrière soit face à vous. Pour retirer l'unité
d'impression recto verso optionnelle,
soulevez-la, puis tirez-la vers l'extérieur (si elle
est installée).
Débranchez tous les câbles à l'arrière de
l'imprimante.
Pour remplacer le rouleau de transfert : Tournez
l'imprimante face à vous. Ouvrez le couvercle
supérieur et retirez la cartouche d'impression.
Sous l'emplacement où se trouvait la
cartouche, repérez le rouleau de transfert.
Girare la stampante in modo da visualizzare il
coperchio posteriore. Per estrarre l'unità duplex
opzionale, sollevarla e tirarla.
Scollegare tutti i cavi dal retro della stampante. Per sostituire il rullo di trasferimento: girare la
stampante in modo da visualizzare la parte
anteriore. Aprire il coperchio superiore e
rimuovere la cartuccia. Posizionare il rullo di
trasferimento sotto l'area dalla quale è stata
rimossa la cartuccia.
Gire la impresora de manera que la cubierta
posterior quede ante usted. En caso de que la
unidad opcional de impresión dúplex esté
instalada, levántela y tire de ella para sacarla.
Desconecte todos los cables de la parte
posterior de la impresora.
Para sustituir el rodillo de transferencia: Gire la
impresora de manera que la parte frontal quede
ante usted. Abra la cubierta superior y retire el
cartucho de impresión. El rodillo de
transferencia está situado detrás de la zona
donde se encontraba el cartucho de impresión.
Drehen Sie den Drucker so, dass die hintere
Abdeckung zu Ihnen weist. Wenn ein optionaler
Duplexer angebracht ist, heben Sie ihn an und
ziehen ihn aus dem Drucker.
Ziehen Sie alle Kabel an der Rückseite des
Druckers ab.
So tauschen Sie die Transferwalze aus: Drehen
Sie den Drucker so, dass die Vorderseite zu
Ihnen weist. Öffnen Sie die obere Abdeckung,
und nehmen Sie die Tonerpatrone heraus.
Unterhalb der ursprünglichen Position der
Tonerpatrone befindet sich die Transferwalze.