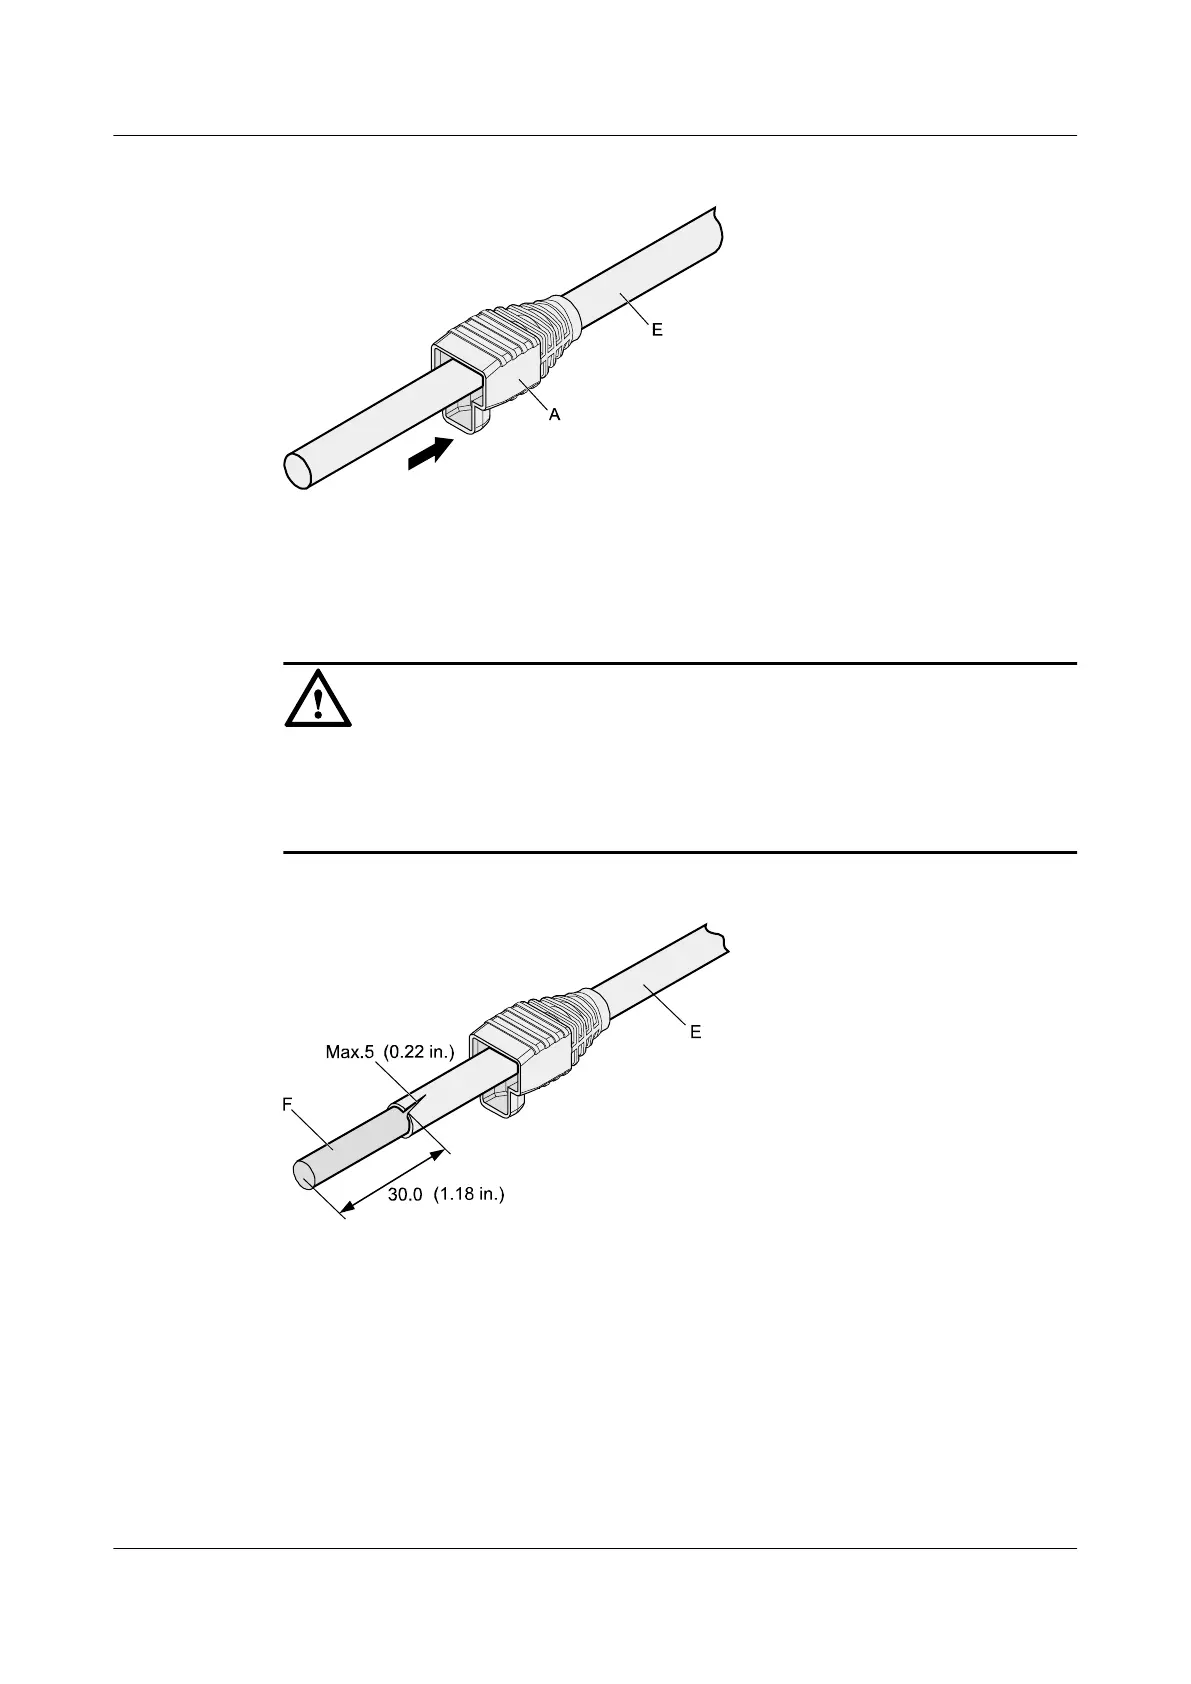
Figure 5-16 Fit the jacket of the connector onto the Ethernet cable
Step 2 Remove a 30 mm (1.18 in.) long section of the jacket, cut off the nylon twine inside the jacket,
and cut a no more than 5 mm (0.20 in.) cleft in the jacket, as shown in Figure 5-17.
NOTICE
l When you remove a section of the jacket, do not damage the shield layer of the twisted-pair
cable.
l When you remove the shield layer, do not damage the insulation of the twisted-pair cable.
Figure 5-17 Removing the jacket of a twisted-pair cable (unit: mm (in.))
Step 3 Fit the metal shell onto the twisted-pair cable. The shield layer is covered by the metal shell, as
shown in Figure 5-18.
Huawei AP3x10xN&5x10xN&5x30xN&6x10xN&7x10xN
Hardware Installation and Maintenance Guide
5 Appendix
Issue 11 (2015-05-18) Huawei Proprietary and Confidential
Copyright © Huawei Technologies Co., Ltd.
49
 Loading...