24 - English
3. INSTALLATION
3.4 Installation of the boundary wire
The boundary wire can be installed in one of the following ways:
1. Securing the wire to the ground with pegs.
It is preferable to staple down the boundary wire if you want to make adjustments to the boundary loop
during the first few weeks of operation. After a few weeks the grass will have grown over the wire
making it no longer visible. Use a hammer/plastic mallet and the pegs supplied when carrying out the
installation.
2. Bury the wire.
It is preferable to bury the boundary wire if you want to dethatch or aerate the lawn. If necessary, both
methods can be combined so one part of the boundary wire is stapled down and the remainder is
buried. The wire can be buried for instance using an edge cutter or a straight spade. Make sure to lay
the boundary wire at least 1 cm and a maximum of 20 cm in the ground.
Plan where to lay the boundary wire
The boundary wire must be laid so that:
• A loop is formed around the working area for the robotic lawnmower. Only original boundary wire
must be used. It is specially designed to resist dampness from the soil that could otherwise easily
damage the wires.
• The robotic lawnmower is never more than 15 metres from the wire at any point in the entire working
area.
• The total length of the boundary wire does not exceed 400 metres.
• 20 cm of extra wire is available to which the guide wire will be connected later. See 3.6 Installation of
the guide wire on page 31.
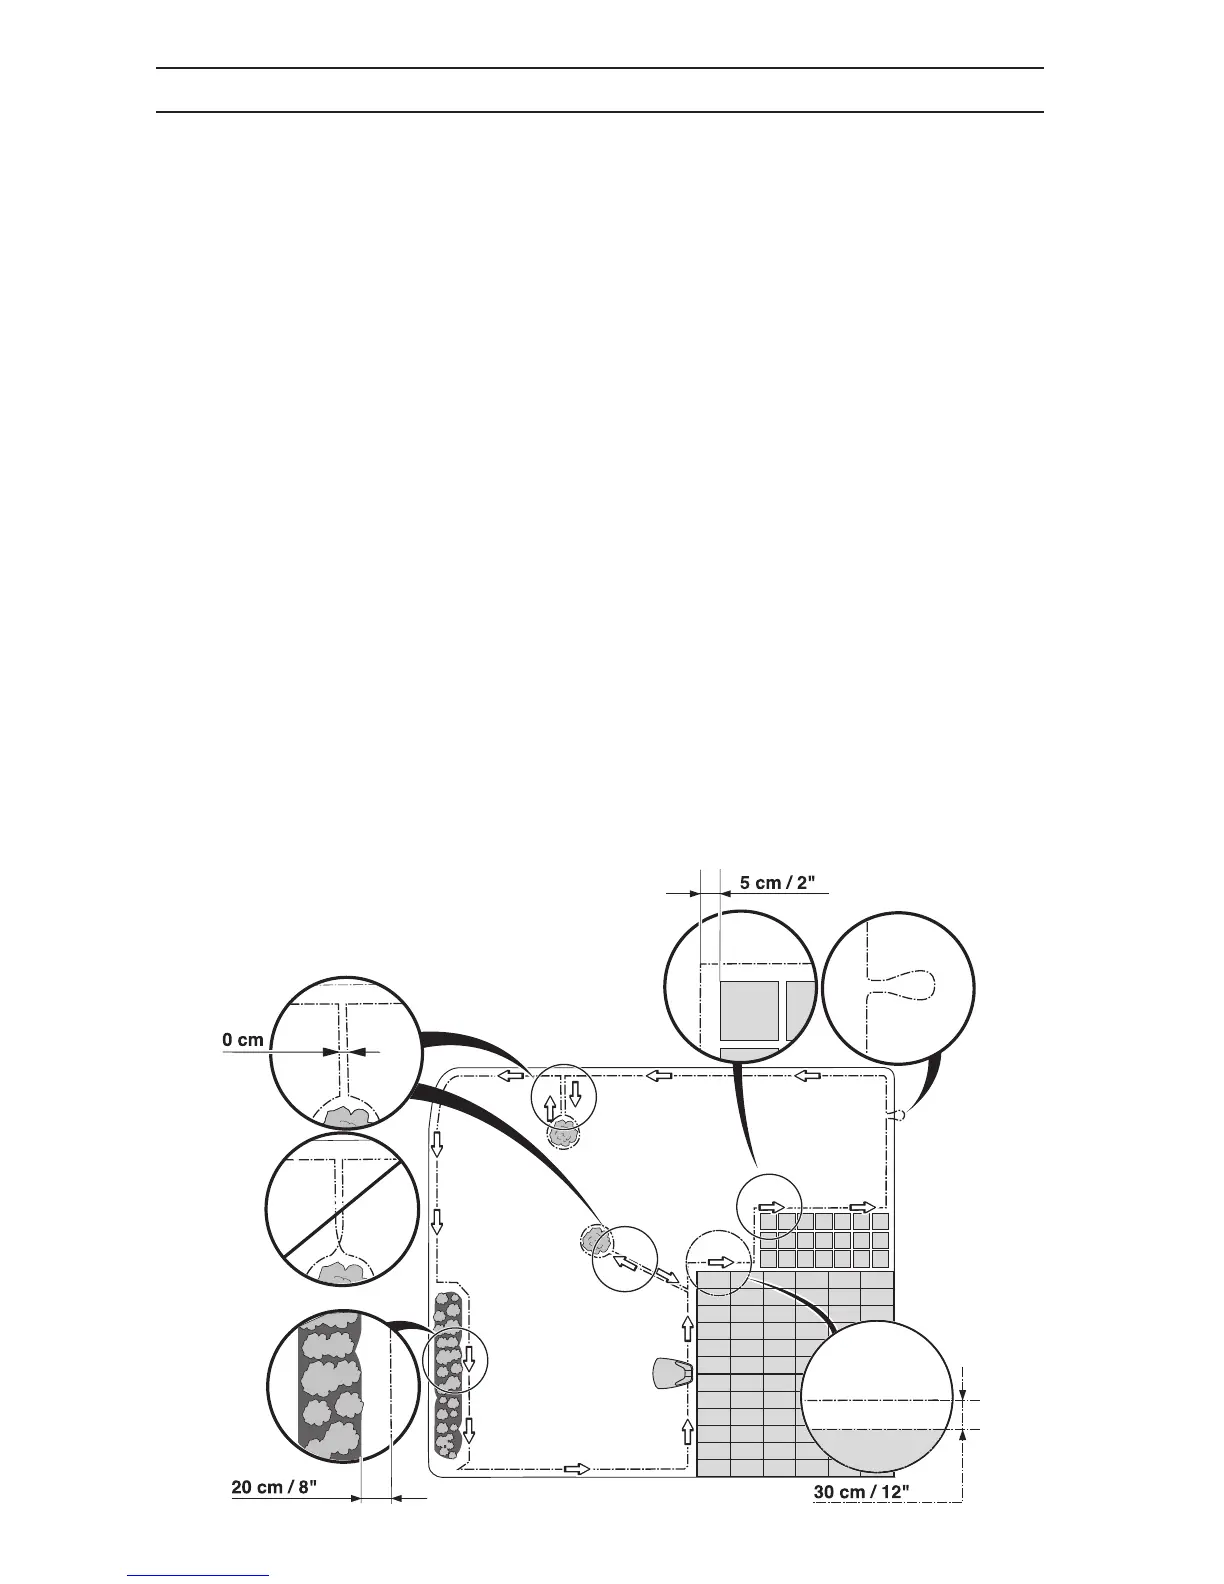
Depending on what the working area is adjacent to, the boundary wire must be laid at different distances
from obstacles. The illustration below shows how the boundary wire must be laid around the working area
and around obstacles. Use the supplied measurement gauge to obtain the correct distance (see 2.1 What
is what? on page13).
3018-070

 Loading...