If the indicator lamp now is flashing yellow,
then the break is somewhere in the wire
between the disconnected end to the point
where the new wire is connected (thick black
line below). In that case, move the
connection for the new wire closer to the
disconnected end (roughly at the middle of
the suspected wire section) and check again
if the indicator lamp is green.
Continue until only a very short section of
the wire remains which is the difference
between a solid green light and a flashing
blue light. Then follow instruction in step 5
below.
4. If indicator lamp still flashes blue in step 3
above: Put L and GUIDE back in their
original positions. Then switch R and
GUIDE. If indicator lamp now is lit with a
solid green light then disconnect L and
connect a new boundary wire to L. Connect
the other end of this new wire at the middle
of the suspected wire section. Follow the
same approach as in 3a) and 3b) above.
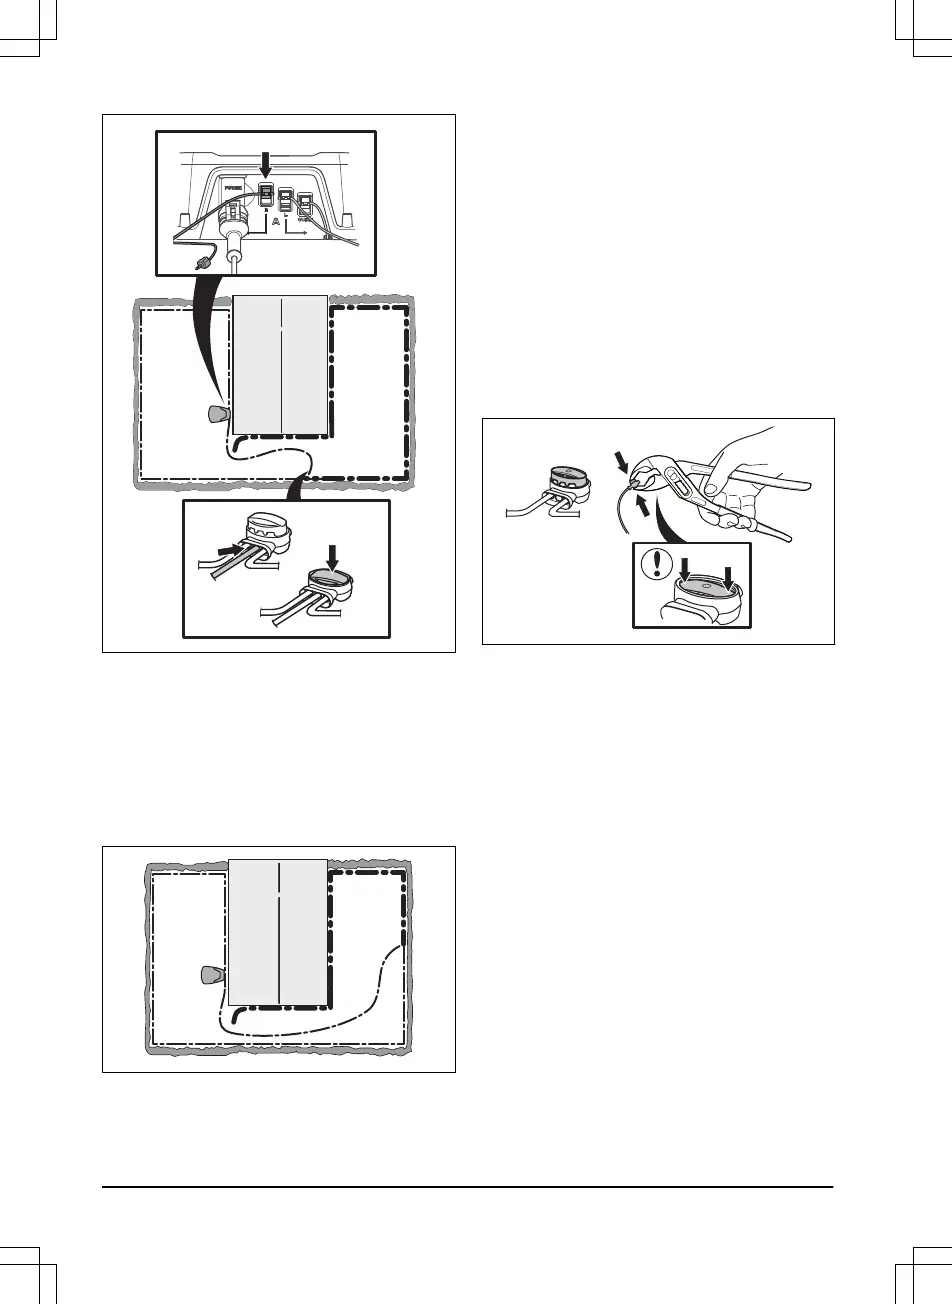
5. When the break is found, the damaged
section must be replaced with a new wire.
Always use original couplers.
44 - Troubleshooting 1285 - 004 - 16.04.2020

 Loading...