English – 25
2
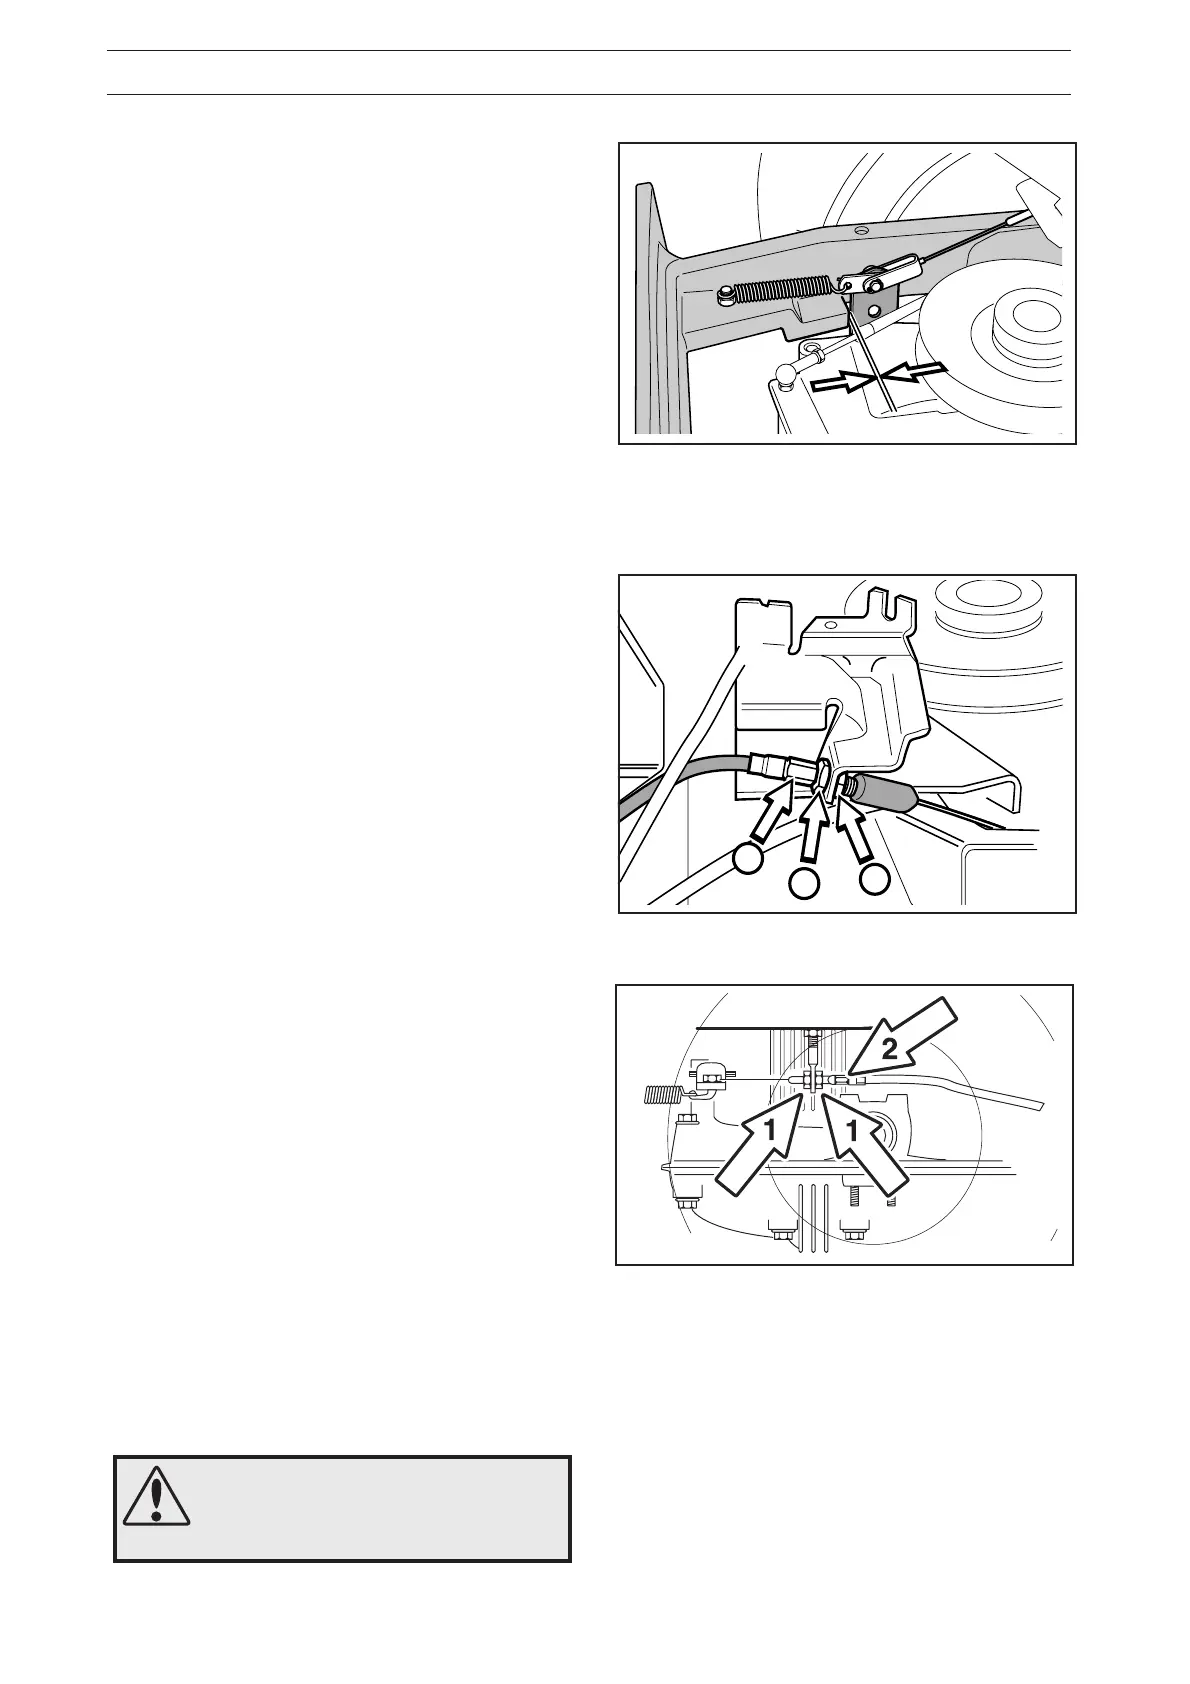
1
1
6008-012
6008-239H
8009-580
WARNING!
Poorly adjusted brakes can result
in reduced braking power.
Check and adjust the brakes on
Rider 13 and Rider 13 Bio
Check that the brakes are correctly adjusted by
placing the Rider on a slight downhill slope with the
clutch disengaged and activating the brake.
If the rider mower begins to move then the brakes
must be adjusted.
The brake is adjusted as follows:
1. Release the lock nuts (1).
2. Tension the wire with the adjusting screw (2)
until all the play in the wire is taken up.
3. Tighten the lock nuts (1).
4. On completion of the adjustment the brake
should be re-checked.
Checking the brake Rider 11 and
Rider 11 Bio
The brake is of the disc brake type and is fitted on
the gearbox.
Check that the brake is correctly adjusted by
measuring the distance between the brake lever
and the front edge of the recess on the chassis.
The distance should be 0–1 mm (0-0,040") when
the brake is not applied.
Adjusting the brake Rider 11 and
Rider 11 Bio
1. Release the lock nuts (1).
2. Tension the wire with the adjusting screw (2) so
that the distance between the brake lever and
the front edge of the recess on the chassis is
1 mm (0,040").
3. Tighten the lock nuts (1) after adjustment.
MAINTENANCE
 Loading...