O
PERATION
4-3
Operator Manual
OPERATING INSTRUCTIONS
1. Ensure that the work environment and your clothing meet the safety requirements outlined in
the Safety section.
2. Follow the instructions in the Setup section. Verify that the input gas supply pressure is set to
90 psi (6.2 bar).
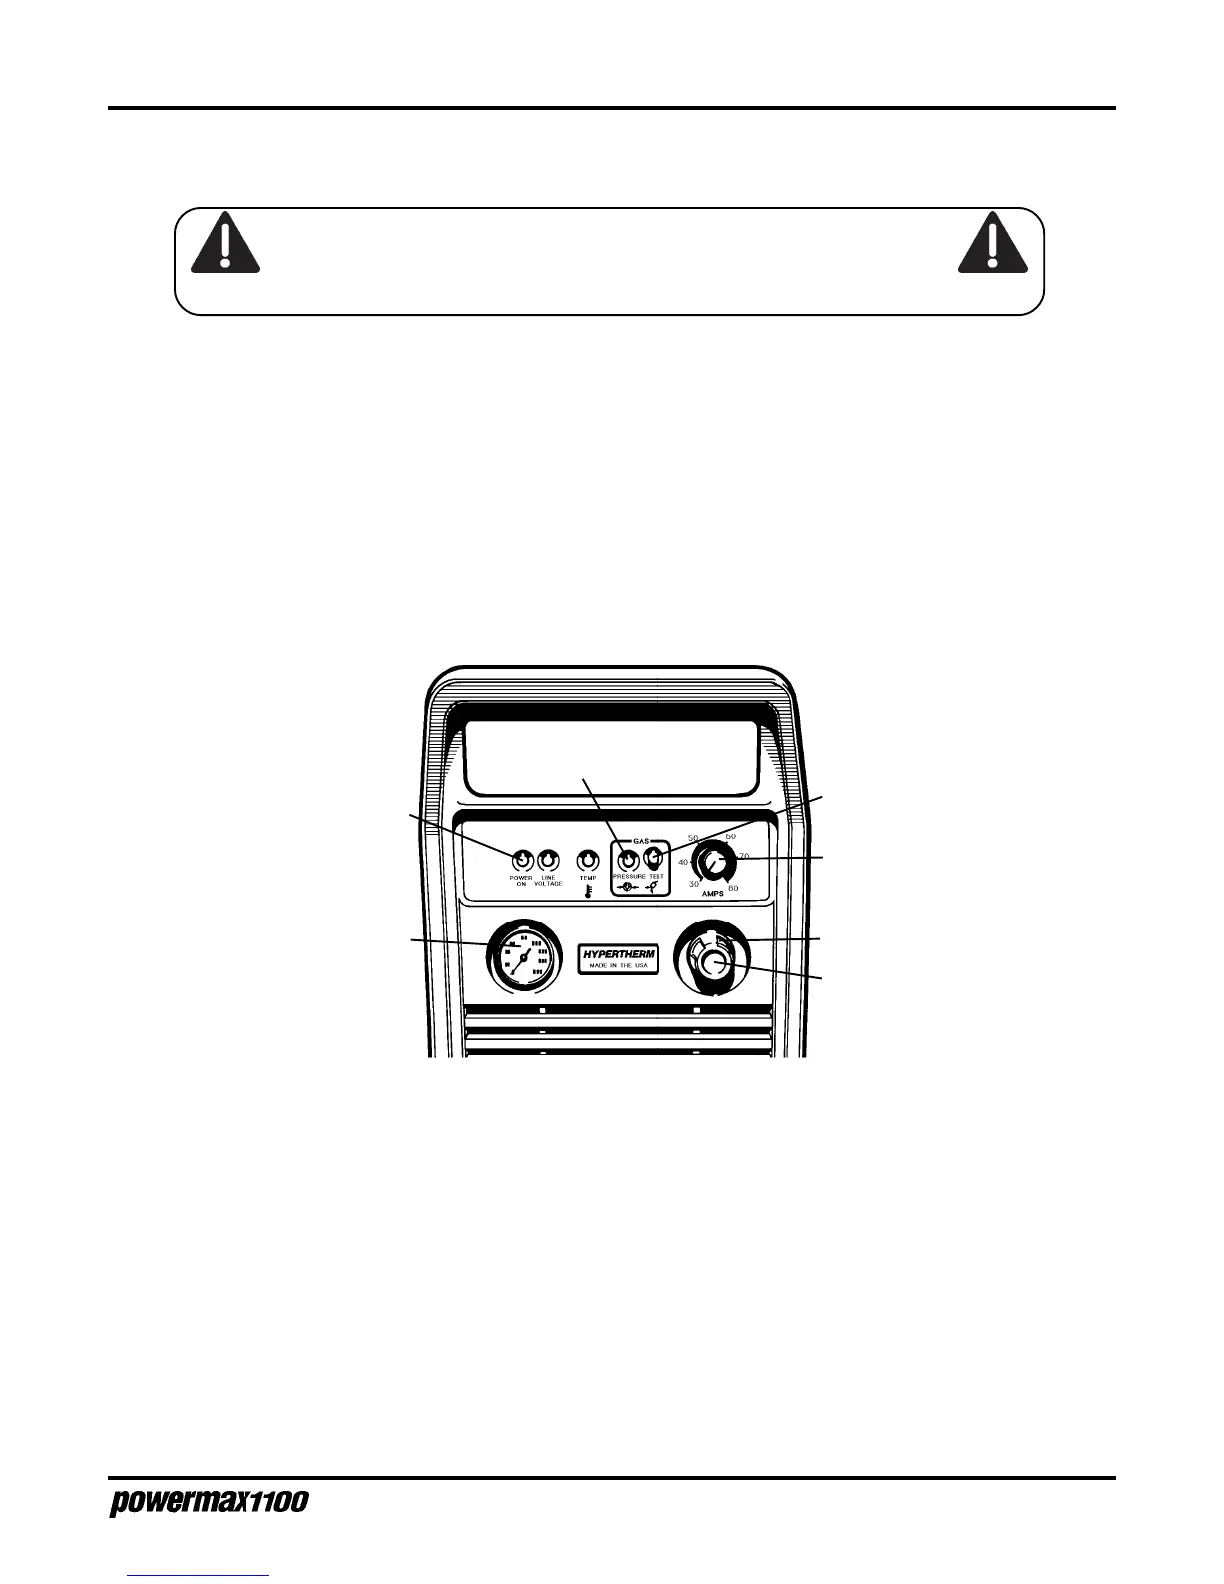
3. At the rear of the power supply, set the power switch to the ON (I) position. The POWER ON
and GAS PRESSURE LEDs should illuminate. The LINE VOLTAGE LED will blink and then
extinguish. The TEMP LED will remain extinguished.
4. Adjust the gas pressure REGULATOR to 65 psi (4.5 bar):
• Pull the REGULATOR CAP out
• Push the GAS TEST switch in
• Turn the REGULATOR CAP while still pushing in the GAS TEST switch
• After adjusting to 65 psi (4.5 bar), release the GAS TEST switch
• Push the REGULATOR CAP back in
Note: If using 50 ft (15.2 m) torch leads, adjust the pressure to 70 psi (4.8 bar).
5. Adjust the AMPS knob to the desired setting. See
Cut Chart
later in this section if necessary.
WARNING
Before operating this system, read the Safety section of this manual thoroughly!
PRESSURE GAUGE
Figure 4-2
Powermax1100 Operating Indicators and Adjustments
REGULATOR
AMPS
GAS TEST
REGULATOR
CAP
POWER ON
GAS PRESSURE

 Loading...