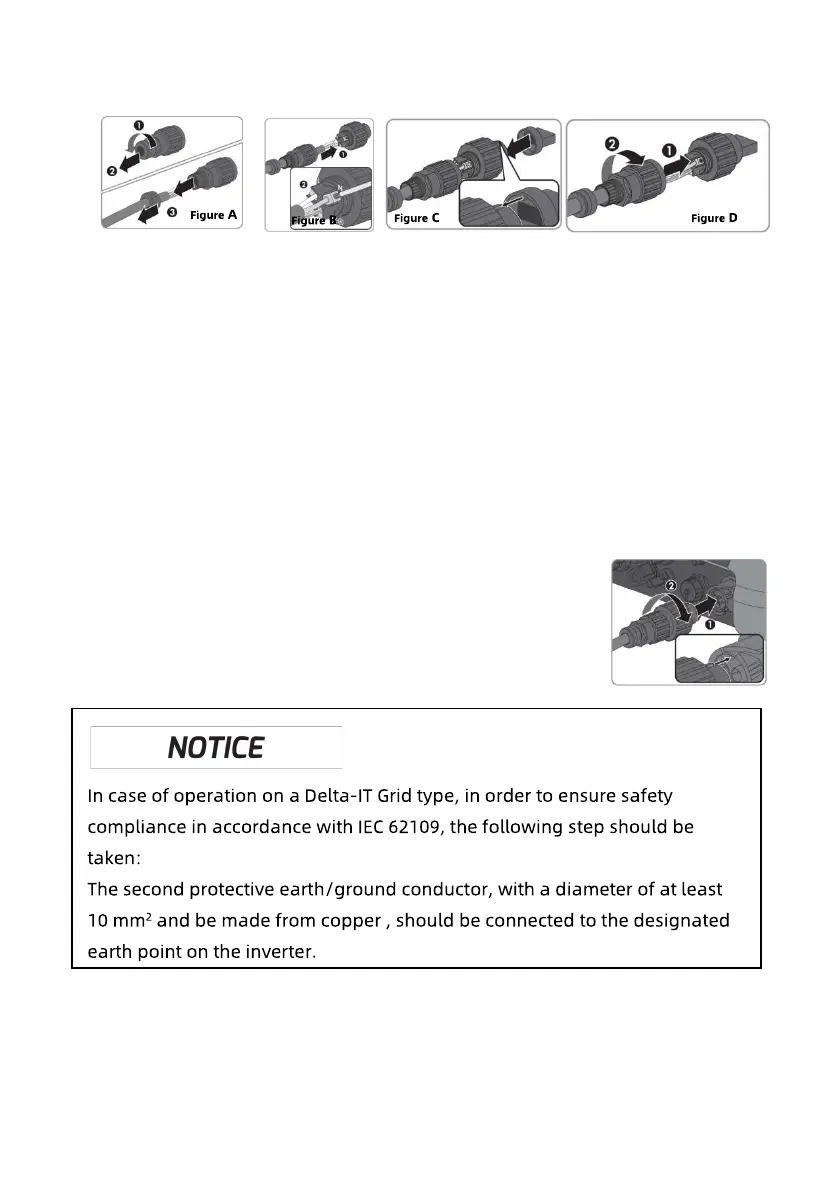
3. Unscrew the swivel nut from the threaded sleeve,then thread the swivel
nut and threaded sleeve over the AC cable(Figure A).
4. Insert the crimped conductors L, N and PE into the corresponding terminals and
tighten the screw with a Torx screwdriver(TX 8, torque: 1.4Nm). Ensure that all
conductors are securely in place in the screw terminals on the bush insert
(Figure B).
5. Assemble the locking cap, threaded sleeve and swivel nut together. When doing
so, hold the bush insert firmly by the locking cap (Figure C),This ensures that
the threaded sleeve can be screwed firmly onto the bush insert.Then screw the
threaded sleeve and swivel nut(Figure D).
6. Plug the AC connector into the jack for the AC connection and screw tight.
When doing so, align the AC connector so that the key on
the inverter AC jack is inserted into the keyway on the AC
connector bush insert(Figure E).
5.4.3 Second protective grounding connection
Procedure:
1. Insert the grounding conductor into thesuitableterminal lug and crimp the contact.
2. Align the terminal lug with the grounding conductor and the ground washer on
the screw. The teeth of the ground washer must be facing the housing.
 Loading...