Removing and installing a disk drive
You can service a disk drive concurrently.
Attention: Failure to follow the steps sequentially for this field replaceable unit (FRU) removal or
installation might result in damage to the FRU or system.
Use the following precautions whenever you handle electronic components or cables:
v Attach a wrist strap to an unpainted metal surface of your hardware to prevent electrostatic discharge
(ESD) from damaging your hardware.
v If you do not have a wrist strap, before removing the product from ESD packaging and installing or
replacing hardware, touch an unpainted metal surface of the system for a minimum of 5 seconds.
v Keep all electronic components in the shipping container or envelope until you are ready to install
them.
v If you remove and reinstall an electronic component, temporarily place the component on an ESD pad
or blanket, if available.
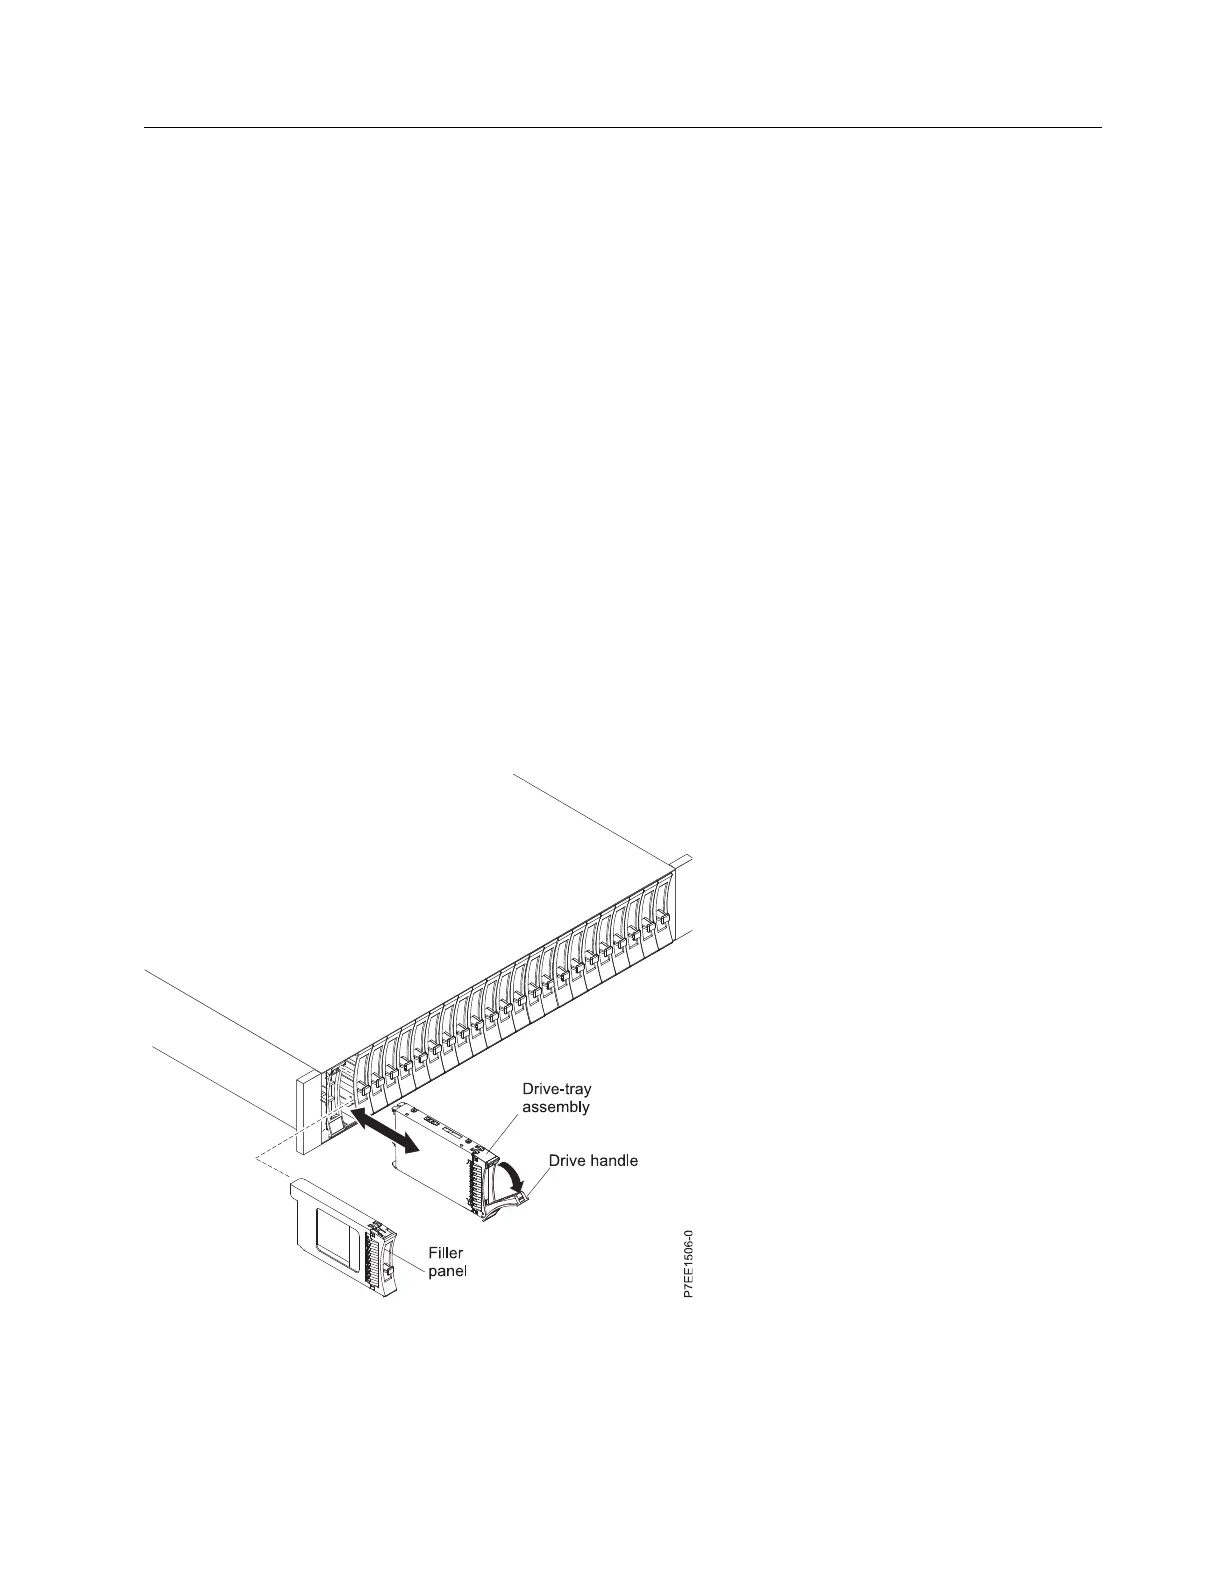
To remove a disk drive from the disk drive enclosure, complete the following steps:
1. Slide the orange release latch up gently to unlock the drive handle.
2. Grasp the handle and pull the drive partially out of the slot.
3. Grasp the front of the disk drive and pull it out from the slot, making sure that you support the
bottom of the disk drive.
Note: The concurrent maintenance light for the slot turns off when you remove the disk drive.
To install a disk drive in the disk drive enclosure, complete the following steps:
1. With the handle in the unlocked position, support the bottom of the disk drive as you align it with
the guide rails in the disk drive enclosure.
Note: Do not hold the disk drive only by the handle.
Figure 1. Removing a disk drive from the disk drive enclosure
Removal and replacement procedures 3
 Loading...