2. If any of these conditions are not true, continue the repair only after powering off the unit containing
the FRU that is being repaired, and begin with The ESM will be serviced nonconcurrently.
Otherwise, continue with The ESM will be serviced concurrently.
v The ESM will be serviced concurrently.
Go to step 3.
v The ESM will be serviced nonconcurrently.
Power off the system or partition that is using the disk drive enclosure. Remove power from both
power supplies of the disk drive enclosure. Go to step 3.
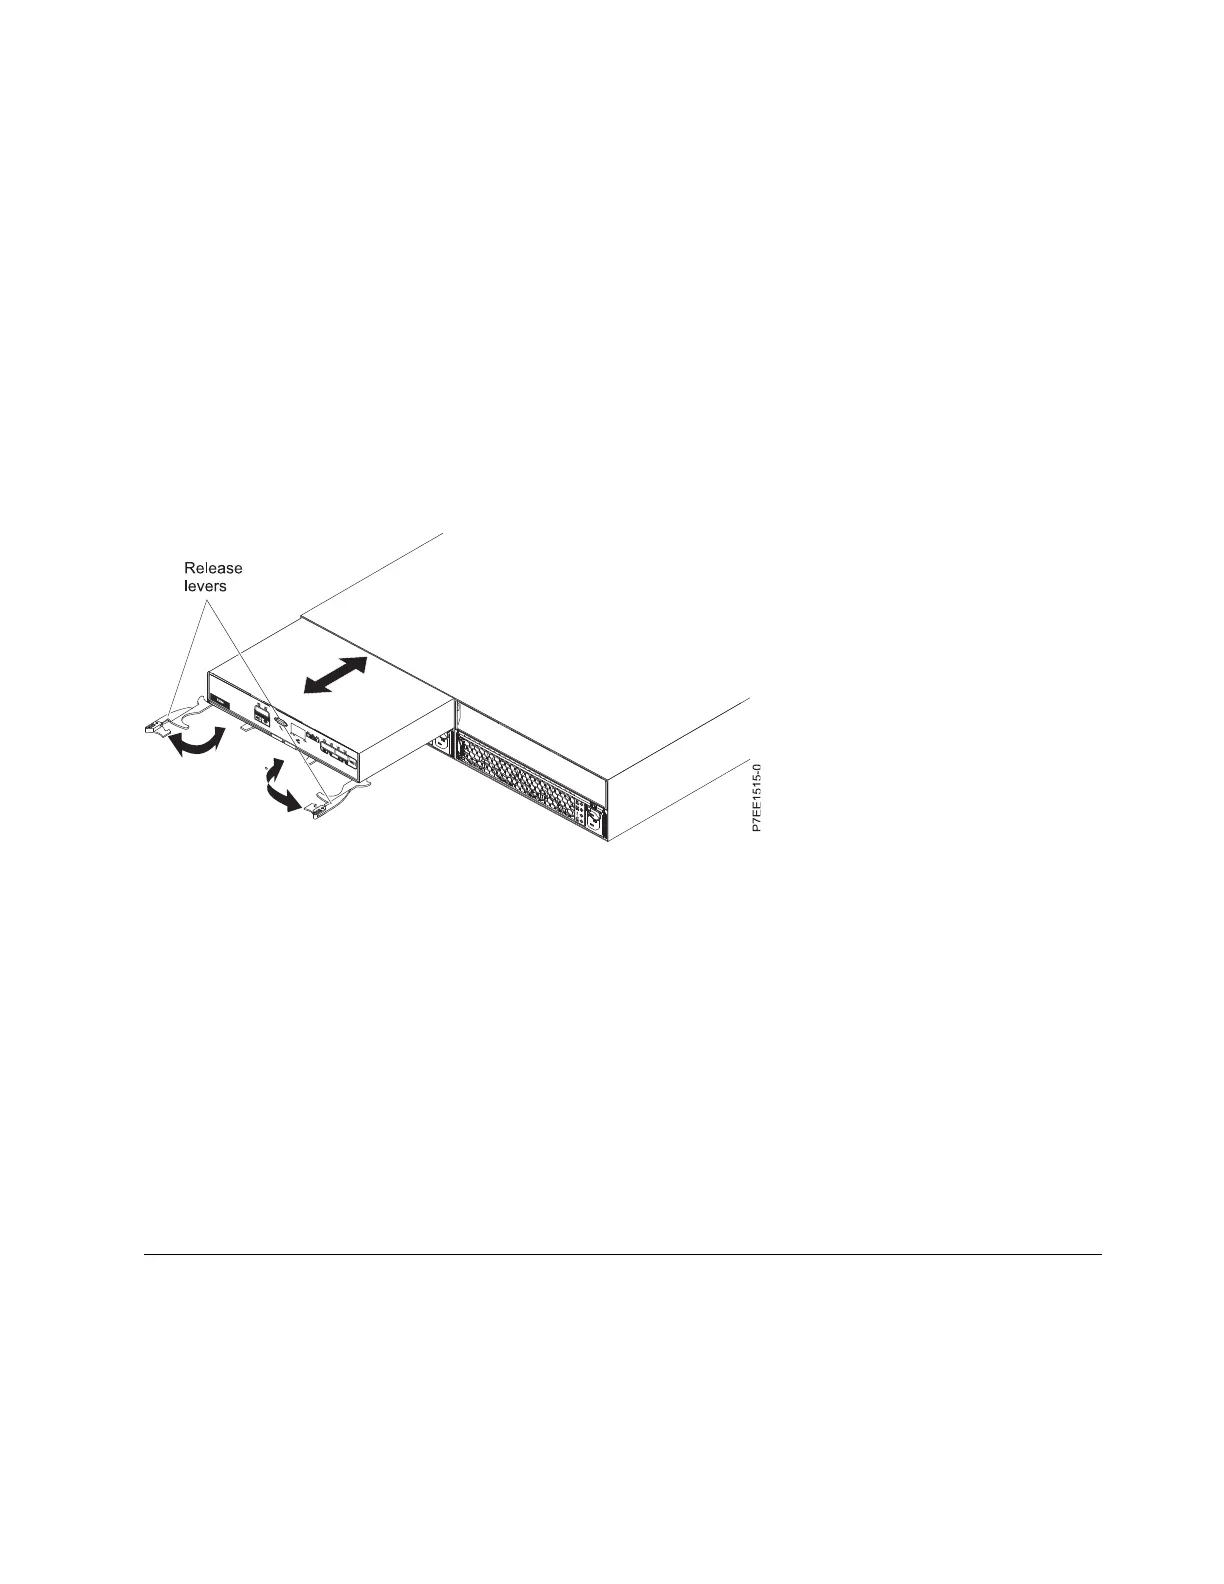
3. Remove the ESM:
a. Disconnect the serial-attached SCSI (SAS) cable or cables from the ESM and mark each cable label
with its location.
Attention: Incorrect cable placement might result in data loss.
b. Open the two release levers.
c. Support both sides of the ESM while you slide it out of the enclosure.
4. Install the ESM:
a. Ensure that the release levers on the new ESM are in the open position.
b. Gently slide the ESM into the enclosure until the ESM stops.
c. Push the release levers to the closed position.
d. Reconnect the SAS cable or cables to the ESM using the location information marked on each cable
in step 3a.
Attention: Incorrect cable placement might result in data loss.
e. If this service action was a nonconcurrent repair, restore power to the power supplies of the disk
drive enclosure and power on the system or partition.
Note: To prevent loss of enclosure information, do not replace both ESMs at the same time with
the power off. To replace the second ESM nonconcurrently, restore power first. Then remove
power and replace the ESM.
Removing and installing a midplane
You can service the midplane nonconcurrently.
Attention: Failure to follow the steps sequentially for this field replaceable unit (FRU) removal or
installation might result in damage to the FRU or system.
Use the following precautions whenever you handle electronic components or cables:
Figure 3. Removing an ESM from the disk drive enclosure
Removal and replacement procedures 5
 Loading...