10. Install the midplane.
a. Align the six screw holes on the midplane with the six screw holes on the midplane assembly.
b. Secure the midplane to the midplane assembly with the six screws that you removed earlier in
this procedure.
11. Install the midplane assembly.
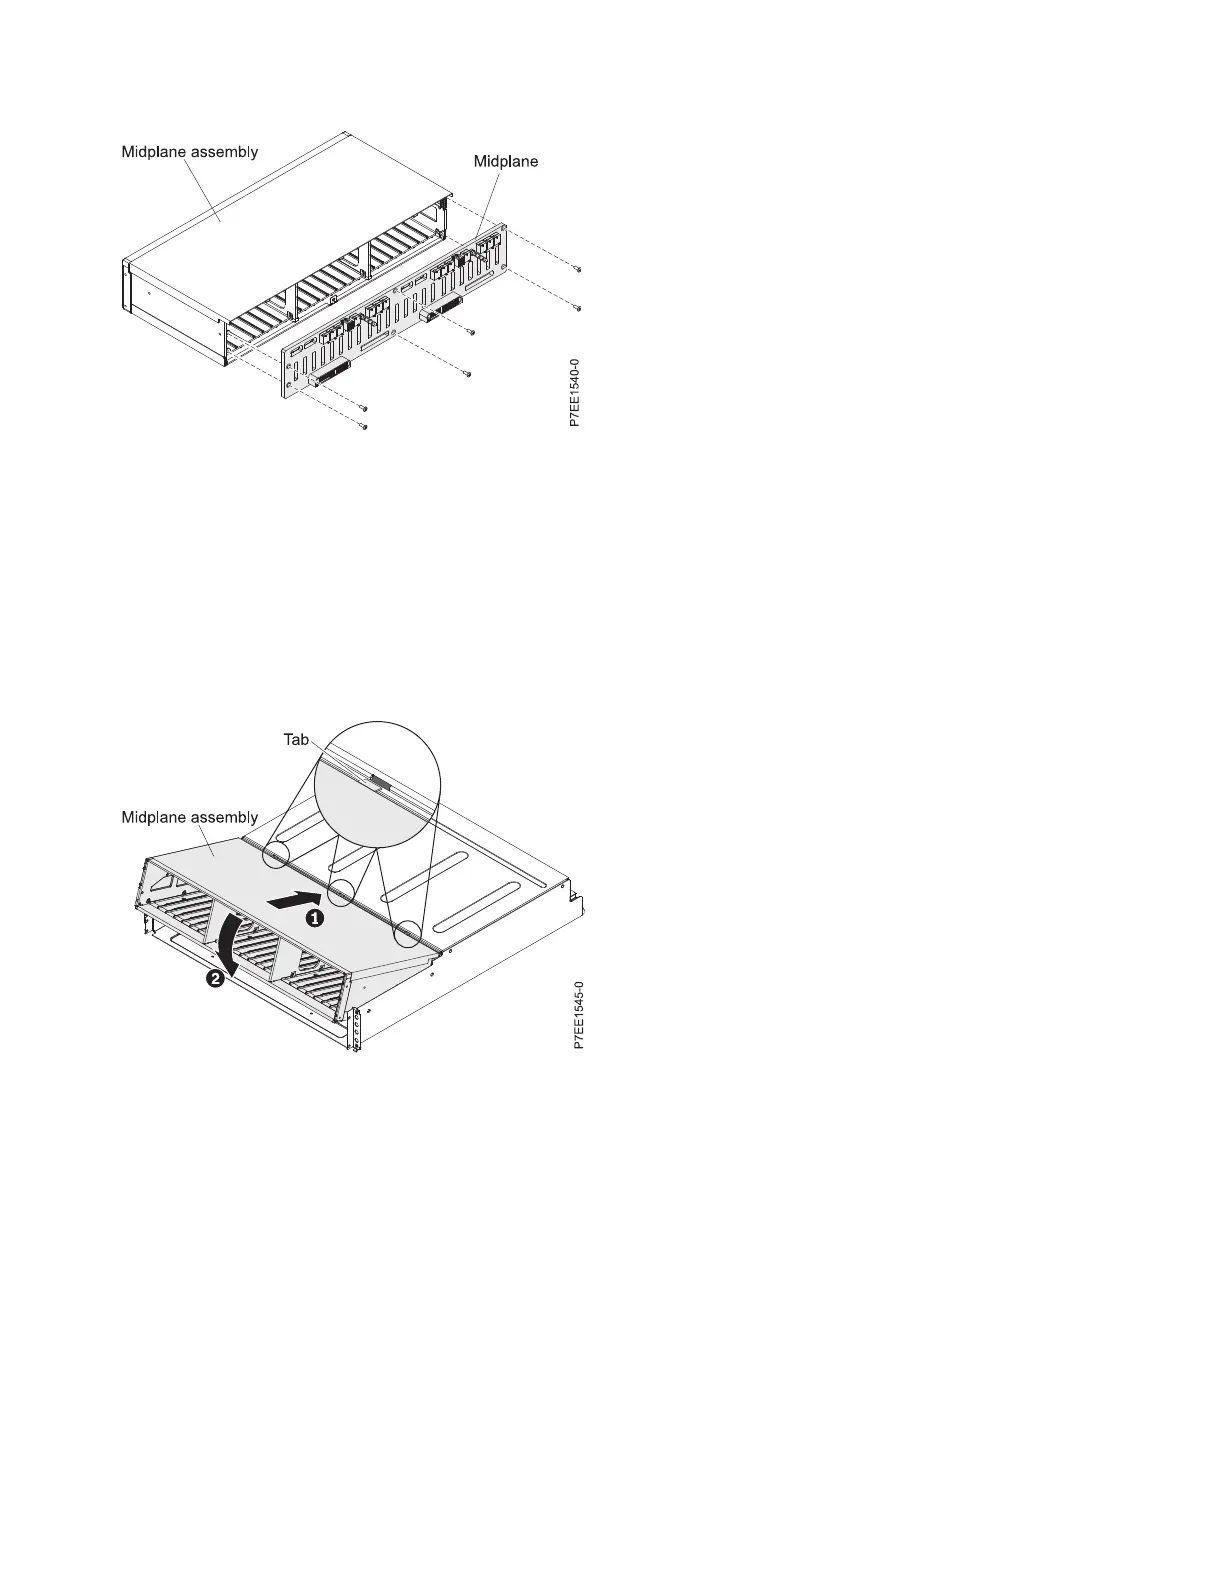
a. Grasp the midplane assembly with two hands and hold it at a 45 degree angle.
b. Insert the three tabs on the midplane assembly into the tab holes in the enclosure and rotate the
front of the assembly down.
12. Install the midplane assembly screws.
a. Secure the midplane assembly to the chassis on both the right and left sides of the enclosure by
using the four screws that you removed earlier in step 7d.
b. Insert the four beveled screws that secure the midplane assembly to the front of the enclosure by
using the four screws that you removed earlier in step 7c.
c. Turn the enclosure upside down and insert the two screws on the bottom of the enclosure by
using the two screws that you removed in step 7b.
d. Turn the enclosure top side up and install the enclosure in the rack.
13. Screw the drawer into the rack and install bezels.
14. Install both of the original ESMs. For instructions, see “Removing and installing an enclosure
services manager” on page 4.
15. Install SAS cables to the ESMs.
16. Install both original power supplies. For instructions, see “Removing and installing a power supply”
on page 9.
Figure 6. Removing and installing the midplane
Figure 7. Installing the midplane assembly
8
 Loading...