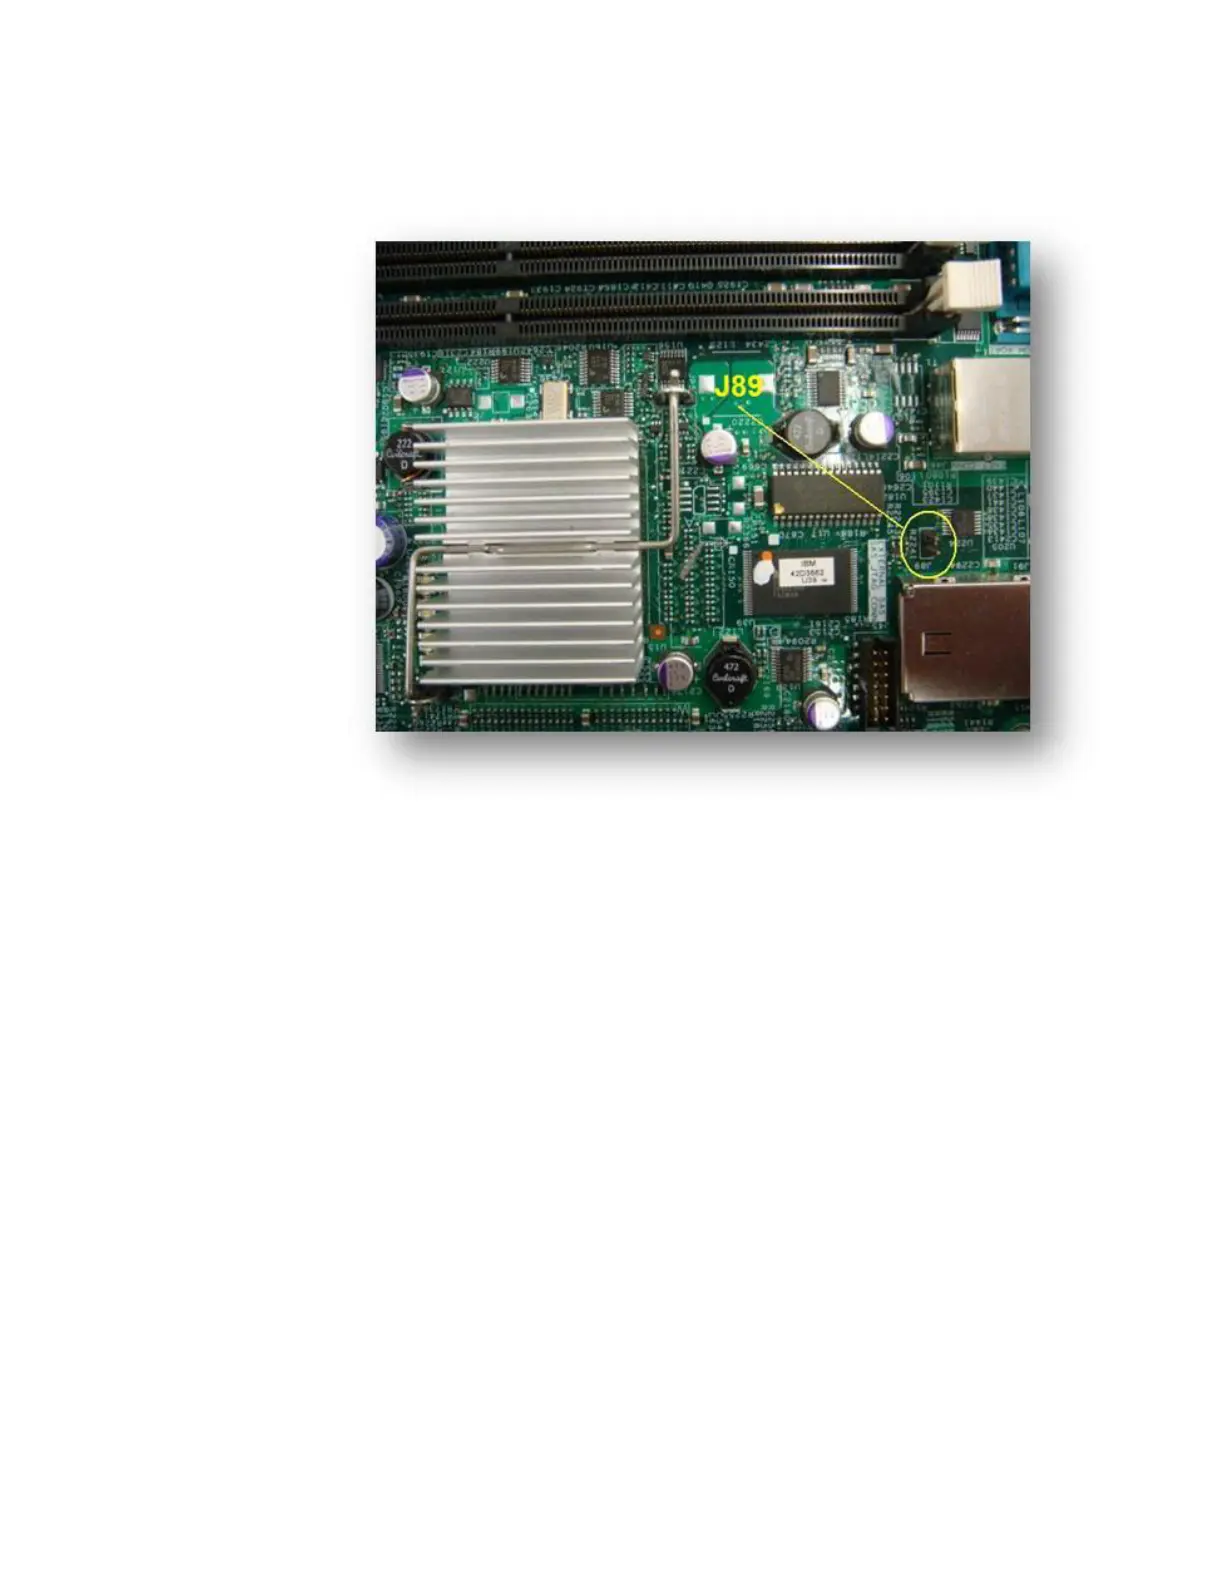
5. Locate the 2-pin jumper at J89 on the system board at the back of the server,
next to the power supply (see Figure 4).
6. Install the jumper connector across the two pins that are shown in Figure 4.
7. Connect the USB diskette drive to the front panel of the server.
8. Insert the ServeRAID-8k firmware disk 1 into the diskette drive.
9. Turn on the server and observe the server POST process. If the zero-mode
jumper is installed correctly, the ServeRAID-8k or ServeRAID-8k-l controller
does not display a POST banner.
10. As the server starts to diskette 1, the following message is displayed:
This program will update the firmware on all IBM ServeRAID-8k controllers
in the system. Do you want to continue. [Y,N]?
11. Type y to respond to the prompt, and then follow the instructions on the screen
to complete the flash update.
12. After the flash update is completed, turn off the server.
13. Disconnect the USB diskette drive.
14. Remove the 2-pin jumper connector from J89.
15. Replace the server cover.
16. Turn on the server and observe the server POST process for correct operation.
Figure 4. ServeRAID-8k and ServeRAID-8k-l zero-mode flash jumper (System x3650)
Chapter 1. ServeRAID-8 series best practices and maintenance information 17
 Loading...