Note:
– Simple-swap SATA hard disk drives support AHCI mode.
– Simple-swap models only support ServeRAID-BR10il adapter.
v The electromagnetic interference (EMI) integrity and cooling of the server are
protected by having all bays and PCI and PCI Express slots covered or
occupied. When you install a drive, PCI, or PCI Express adapter, save the EMC
shield and filler panel from the bay or PCI adapter or PCI Express adapter slot
cover in the event that you later remove the device.
v For a complete list of supported optional devices for the server, see
http://www.ibm.com/servers/eserver/serverproven/compat/us/.
Installing a simple-swap Serial ATA hard disk drive
Simple-swap hard disk drives are not hot-swappable. Disconnect all power from the
server before you remove or install a simple-swap hard disk drive.To install a
simple-swap Serial ATA hard disk drive, complete the following steps.
Note:
v If you have only one hard disk drive, install it in the left drive bay.
v If the server is configured for RAID operation using a ServeRAID adapter,
you might have to reconfigure your disk arrays after you install hard disk
drives. See the ServeRAID adapter documentation for additional
information about RAID operation and complete instructions for using the
ServeRAID adapter.
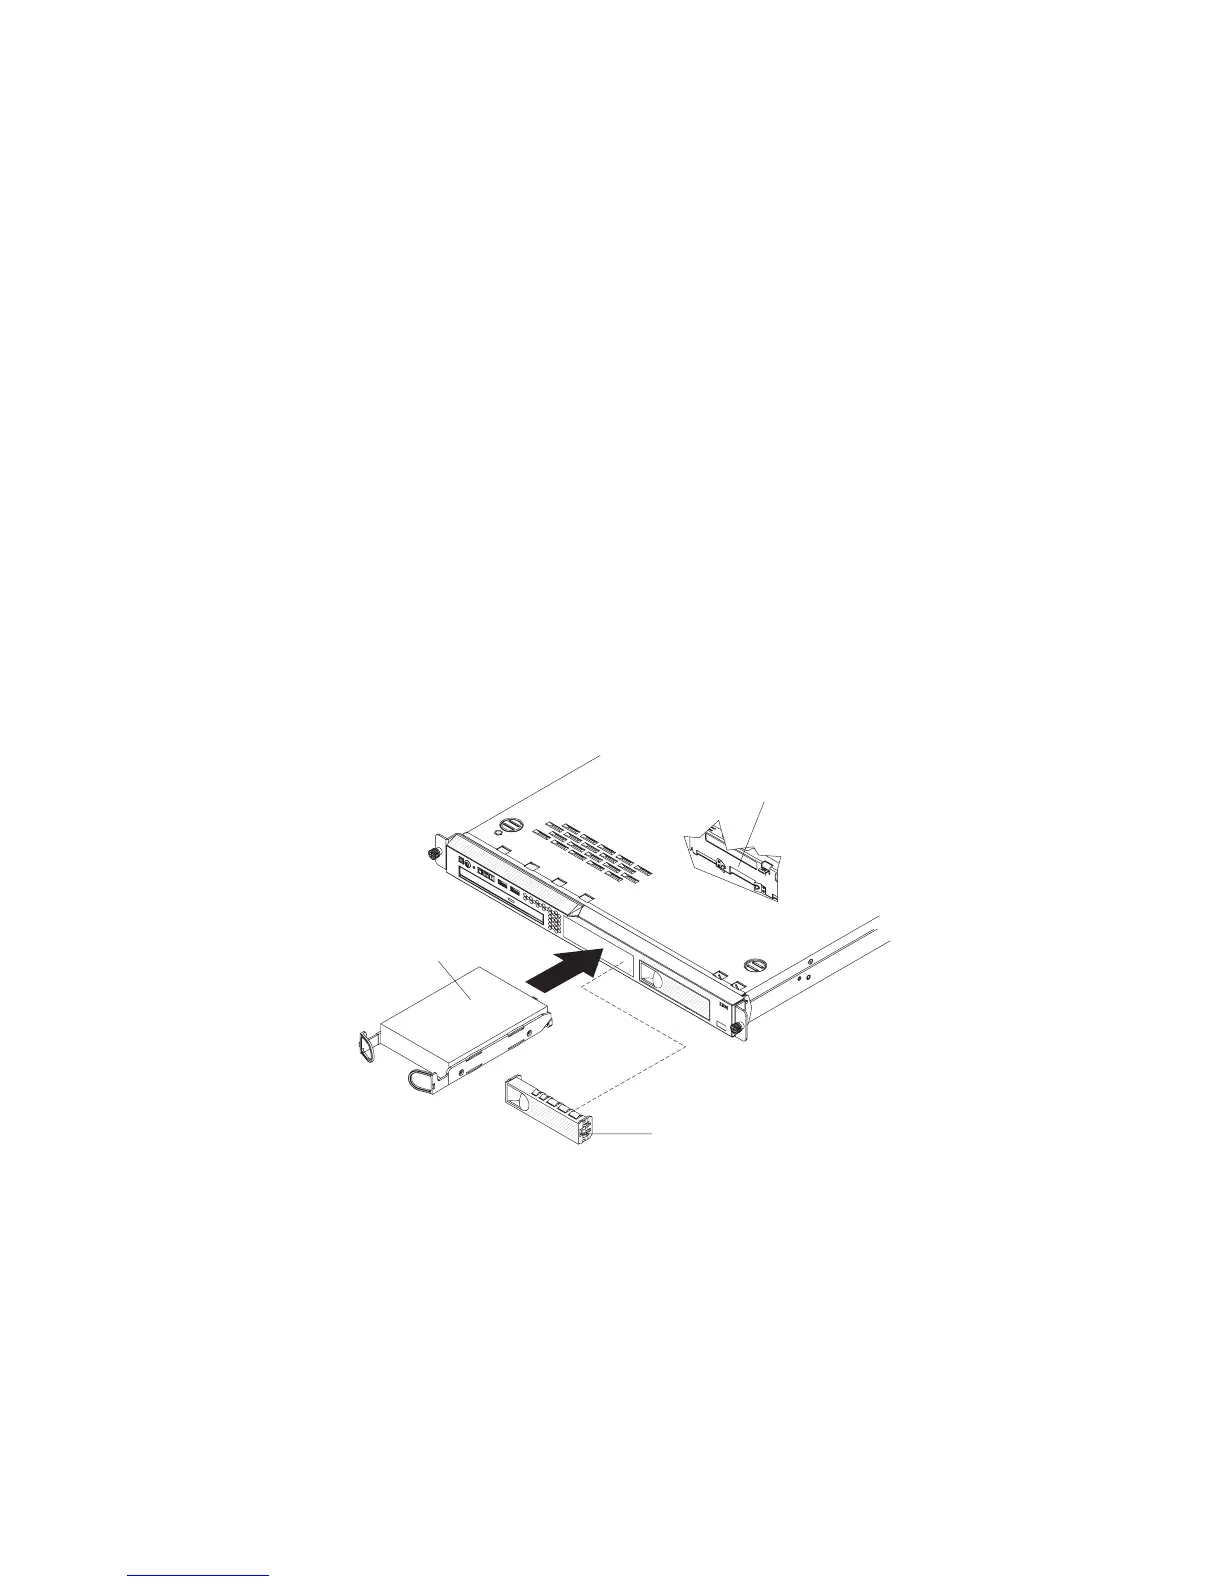
Filler panel
Hard disk
drive assembly
SATA hard disk
drive back plate
Attention: To avoid damage to the hard disk drive connectors, make sure that the
cover is in place and fully closed whenever you install or remove a hard disk drive.
1. Read the safety information that begins on page vii and “Installation guidelines”
on page 27.
2. Make sure that the server cover is in place and fully closed.
3. Turn off the server and peripheral devices, and disconnect the power cord and
all external cables.
4. Remove the filler panel from the bay.
5. Pull the loops of the drive tray toward each other, and slide the drive into the
server until the drive connects to the back plate.
36 IBM System x3250 M3 Types 4251, 4252, and 4261: Installation and User’s Guide
 Loading...


