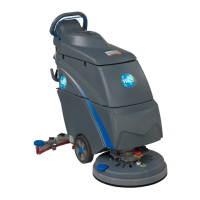
operating triggers (9) are pulled.
5) To begin scrubbing, pull on the blue operating trigger(9), when this triggers is pulled, the pad
driver will begin to spin and the solution will begin to ow.
6) Begin scrubbing by moving the machine forward
Do not keep the machine in the same position with the pad / brush spinning,
or you might damage the floor.
7) Adjust solution ow by adjusting the position of ball valve knob.
WHILE OPERATING MACHINE
1) Occasionally open the cover tank(3) to see if there is any foam build-up. If excessive foam is
found, add defoamer to the recovery tank.
Foam must not enter the float shut-off screen, or damage can occur to the
vacuum motor. Foam will not activate the machine's float shut-off device.
2) Occasionally view the clear tube at the back left of the machine to check the amount of cleaning
solution that is left in the machine.
If the squeegee assembly leaves streaks on the oor, raise the squeegee off the oor and wipe the
blades down with a damp cloth.
Do not use your fingers to wipe or remove debris from the blades, as injury
may occur.
When the solution tank runs empty, turn off the brush switch and ball valve of solution tank. Keep
the squeegee down and continue to vacuum until all the dirty water is picked up.
TANK DRAINING
1) Turn the switches on the control panel to “off ” position.
2) Raise the squeegee, transport machine to approved area for draining tank(s).
Any time scrubbing is completed, or when refilling solution tank, the
recovery tank should be drained and cleaned.
If the recovery tank is not drained when the solution tank has been refilled,
foam or water may enter the float shut-off mechanism and cause damage to
the vacuum motor.

 Loading...