7
1. Lay out the Bounce N Splash on a flat surface. Make sure
there are no sharp objects that could damage or cause
a puncture to the water bouncer.
2. Prior to inflation, check the cable lock clamp which
connects the wire under the water bouncer to ensure the
jump surface is tight. Most of the time you don’t need
to do anything to this prior to use because it comes tightened
to the manufacturer’s suggested tension.
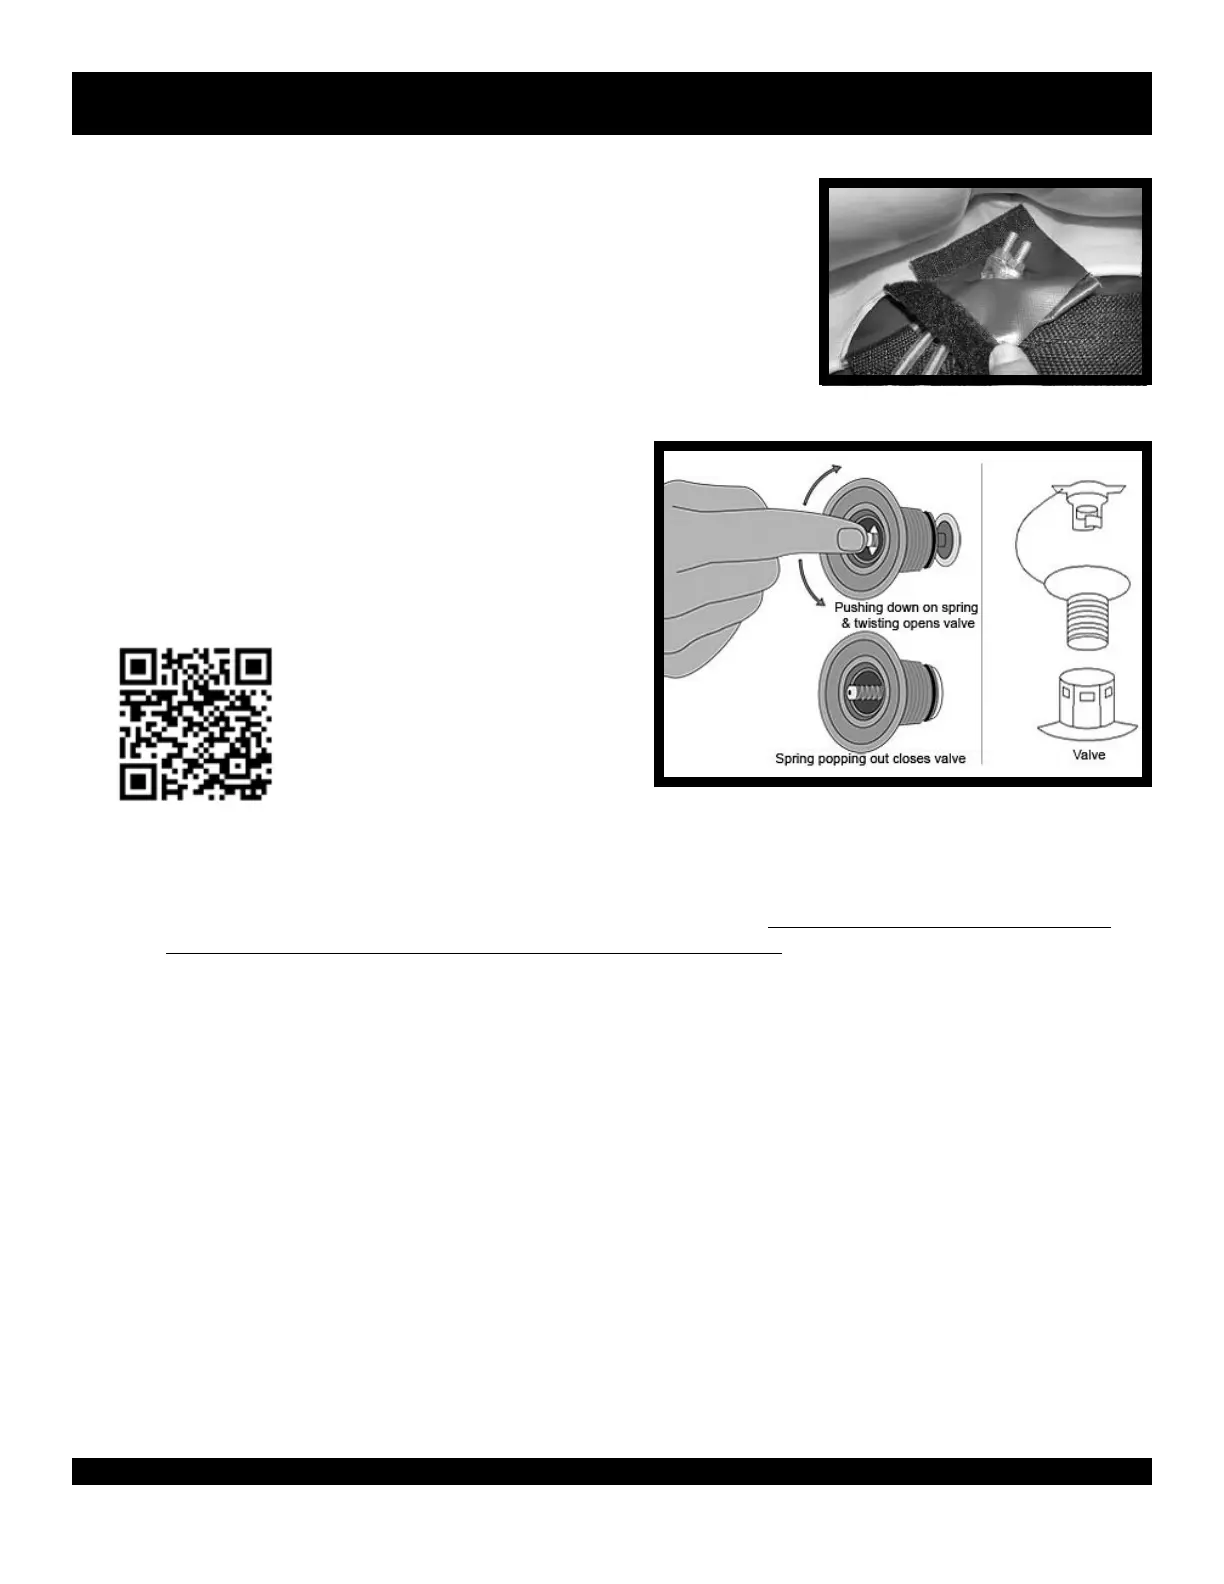
3. Locate the Valve. To Open the valve, push
the spring stem down and turn counter
clockwise and the spring will stay down and
the valve will remain open. Inflate using any
type of air blowing device such as a shop
vac, leaf blower, or foot pump. Blowers can
be found on our website. Take
a picture of this QR with your
smart phone to find that web
page quickly.
• Fill the tube with air until firmly inflated. It should be hard to the touch.
This will be about 2 PSI.
• When ination is complete, quickly remove the inator, close the valve by pushing the
valve stem down and turning clockwise so it pops out. Then put on the valve cap.
• If you don’t have a valve adapter you can still inate your Bounce N Splash water
bouncer, simply put the nozzle of your shop vacuum or any power inflator to the
open valve and blow the air in. Once the tube is firmly inflated, pull the nozzle away
and quickly close the valve, needle spring popped up. To top of and make your
product firm, take inflator nozzle and butt it back up to the closed valve and force air
in. This will allow a little air to get in and top o product without letting the air escape.
Air fluctuations are normal depending on outside air and water temperatures. In the
cool morning, your tube may look like it is going flat due to a leak when it actually
is soft due to the air temperature. TOP OFF WITH AIR WHEN NEEDED AND KEEP
TUBE FIRM WHEN IN USE.
4. Attach LADDER by snapping it to the D-rings in the anchor/handle area.
Inflation and Set Up
Visit our website for helpful videos on inflation:
watertrampolines.com/valveuse/
watertrampolines.com/product-informational-videos/
 Loading...