SECTION 3. Installation Instructions
6
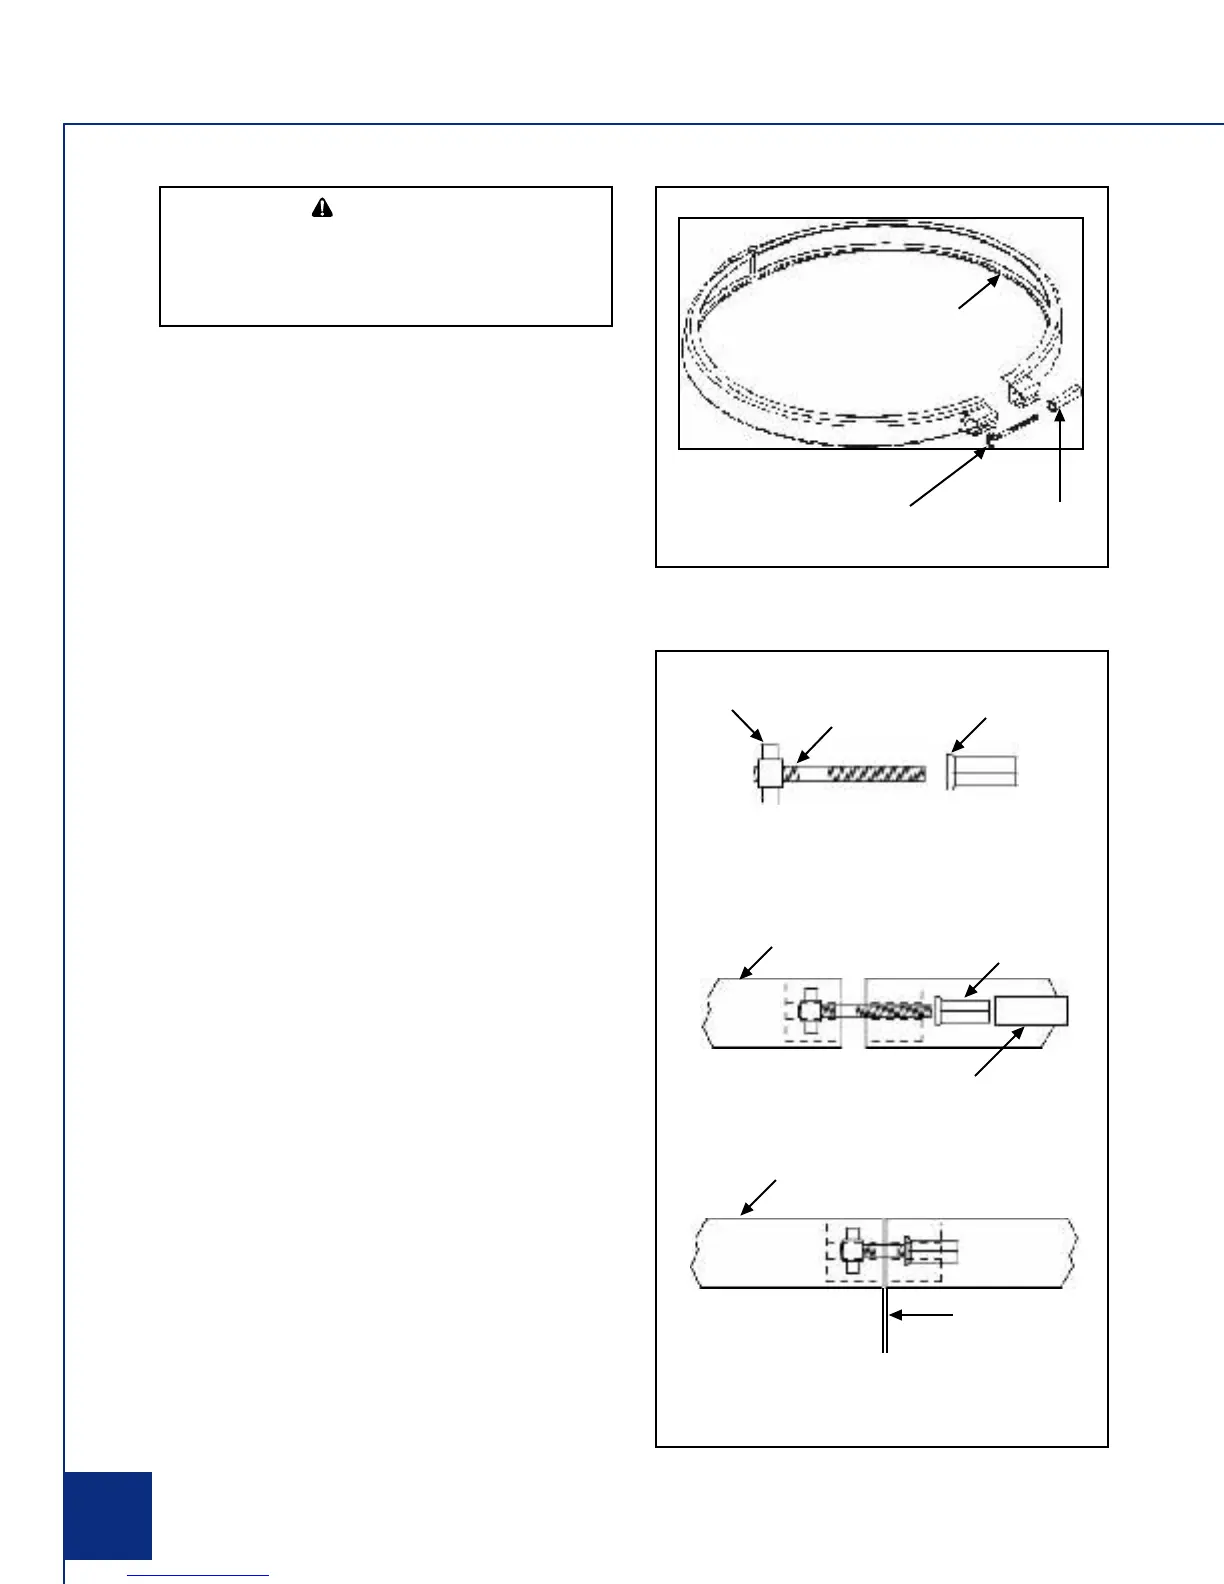
3.4 Clamp Installation, CL Series
1. Be certain the o-ring is in position in the lower tank
half. Press the filter lid over the lower half sandwiching
the o-ring between the two halves.
2. Holding the ends of the filter clamp apart, position
the hinged segment of the filter clamp over both upper
and lower tank flanges. Bring the ends of the filter
clamp together.
3. Place the "T" nut and threaded rod assembly into
the clamp. Besure the "T" nut is seated in the clamp in
the proper orientation (See Fig. 6).
4. Use a 9/16" socket on the tightening nut until the
clamp ring halves touch each other, or are within 1/16"
(See Fig. 6) but do not overtighten as the clamp can
break. If unable to tighten as indicated, do not operate
the filter and call a service technician immediately.
5. After the first week of operation, check the clamp
and retighten if necessary.
6. Check the filter clamp at least once a month.
WARNING
Follow these instructions carefully. Improper
clamp installation can cause the filter lid to be
blown off which can result in death, serious
personal injury or property damage.
"T" Nut and
Threaded Rod
Tightening Nut
w/ Shoulder
Clamp Ring
Figure 5- Filter Clamp Ring
Figure 6- Filter Clamp Ring Assembly
"T" Nut
Threaded
Rod
Tightening
Nut w/
Shoulder
Tightening
Nut w/
Shoulder
Clamp Ring
Use a 9/16" Socket
Clamp Ring, Closed Position
GAP NOT TO
EXCEED 1/16"
 Loading...