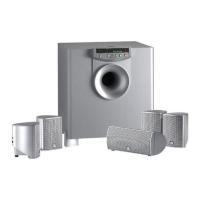
Front Panel
Antennas
Each EVO Wireless Receiver uses two antennas for diversity
in order to receive the transmitter signal at two different
spots. The diversity electronics will automatically activate the
antenna that delivers the better signal.
POWER
Press this switch to turn the controller’s power on or off.
SQUELCH
The squelch circuit switches the receiver off if the received sig-
nal is too weak, in order to suppress related or residual noise
while the transmitter is off. Set the SQUELCH control to min-
imum before first switching the receiver on.
MUTE LED
The MUTE LED turns on red if the squelch is active. In this
case, the audio output will be muted.
NOTE: The MUTE LED does not indicate the position of the MUTE
switch on a microphone transmitter.
RF LOW/OK LEDs
Indicate the received field strength of the transmitter signal.
DIVERSITY A/B LEDs
Indicate which of the two receiving antennas is active.
AF/PEAK LEDs
Indicate the received audio level. Optimum modulation
occurs when the green LED is on and the red LED flashes
occasionally. If the LEDs do not light, the sensitivity setting
on the transmitter is too low. If the red LED is constantly on,
overmodulation is occurring.
CHANNEL
Use the CHANNEL rotary switch to select the desired carrier
frequency or alternative frequencies.
VOLUME
Use the VOLUME control to match an EVO Wireless
Receiver’s output level to an input channel’s sensitivity on the
EVO mixer.
Rear Panel
Carrier Frequency Table
A label (on the bottom) lists available Carrier Frequencies.
Frequency Set Designation
The label (on the rear panel) lists the Frequency Set for
this receiver.
AUDIO OUT (Balanced)
Balanced 3-pin male XLR audio output for connection to a
balanced audio input (e.g., a MIC input on the EVO mixer).
AUDIO OUT (Unbalanced)
Unbalanced audio output on a
1
⁄4" mono jack for connection
to an unbalanced audio input (e.g., a guitar amplifier).
BALANCED LINE/MIC
Use the BALANCED LINE/MIC switch to set AUDIO OUT
(Balanced)
to line or microphone level.
POWER
Input connector for the supplied ac adapter.
Screwdriver
If desired, use the Screwdriver to adjust CHANNEL and GAIN
controls on microphone transmitters.
16
15
14
13
12
11
10
9
8
7
6
5
4
3
2
1
25
MICROPHONE OPERATION
 Loading...