TEC3000 Series Single- or Two-Stage Economizer Thermostat Controllers Installation Instructions
14
6. Press Confirm to save locally and on USB.
The setting files are named based on the TEC3000 model name, date, and time stamp
(for example, TEC3311-00_2015-10-08T1). The files are saved locally and on the USB drive’s root directory.
See Troubleshooting
if the settings are not backed up correctly.
7. After the settings are saved onto the USB drive, remove the USB drive from the TEC3000.
Restoring the Settings
1. Ensure that the TEC screen is on.
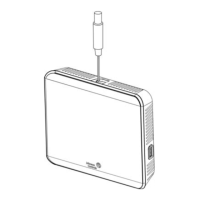
2. Insert the USB drive into the right side of the TEC.
See Figure 1 for the USB port location.
3. Press the Menu icon.
4. Press Update.
5. Press Restore.
6. Select Local Storage or the correct configuration file created from a previous backup operation.
The setting files are named based on the TEC3000 model name, date, and time stamp
(for example, TEC3311-00_2015-10-08T1). The files are saved locally and on the USB drive’s root directory.
7. Press Confirm if you have the correct file name.
The settings are loaded from the USB drive.
8. After the settings are loaded from the USB drive, remove the USB drive from the TEC3000.
Choosing the Communication Mode
(TEC3630-00-000 and TEC3631-00-000 Models)
1. Ensure that the TEC screen is on.
2. Press the Menu icon.
3. Press Network Setup.
4. Press FC Comm Mode.
5. Select BACnet or N2 by pressing .
6. Proceed to Step 7 to perform BACnet communication and Step 15 to perform N2 communication.
7. Press
to return to the previous screen.
8. Press BACnet Instance ID.
9. Enter the unique BACnet instance ID through the keypad.
10. Press Save.
11. Press to return to the previous screen.
12. Press BACnet Address.
13. Enter the BACnet MS/TP address through the keypad.
14. Press Save.
15. After selecting N2 in Step 5, press Save.
 Loading...