s.
THREADIN:Gl:ll.rfpg,l'MAC]H,l'xe,
n,EAb
\-o
i--.'-''-.-
I
I
,,\.
I
)l
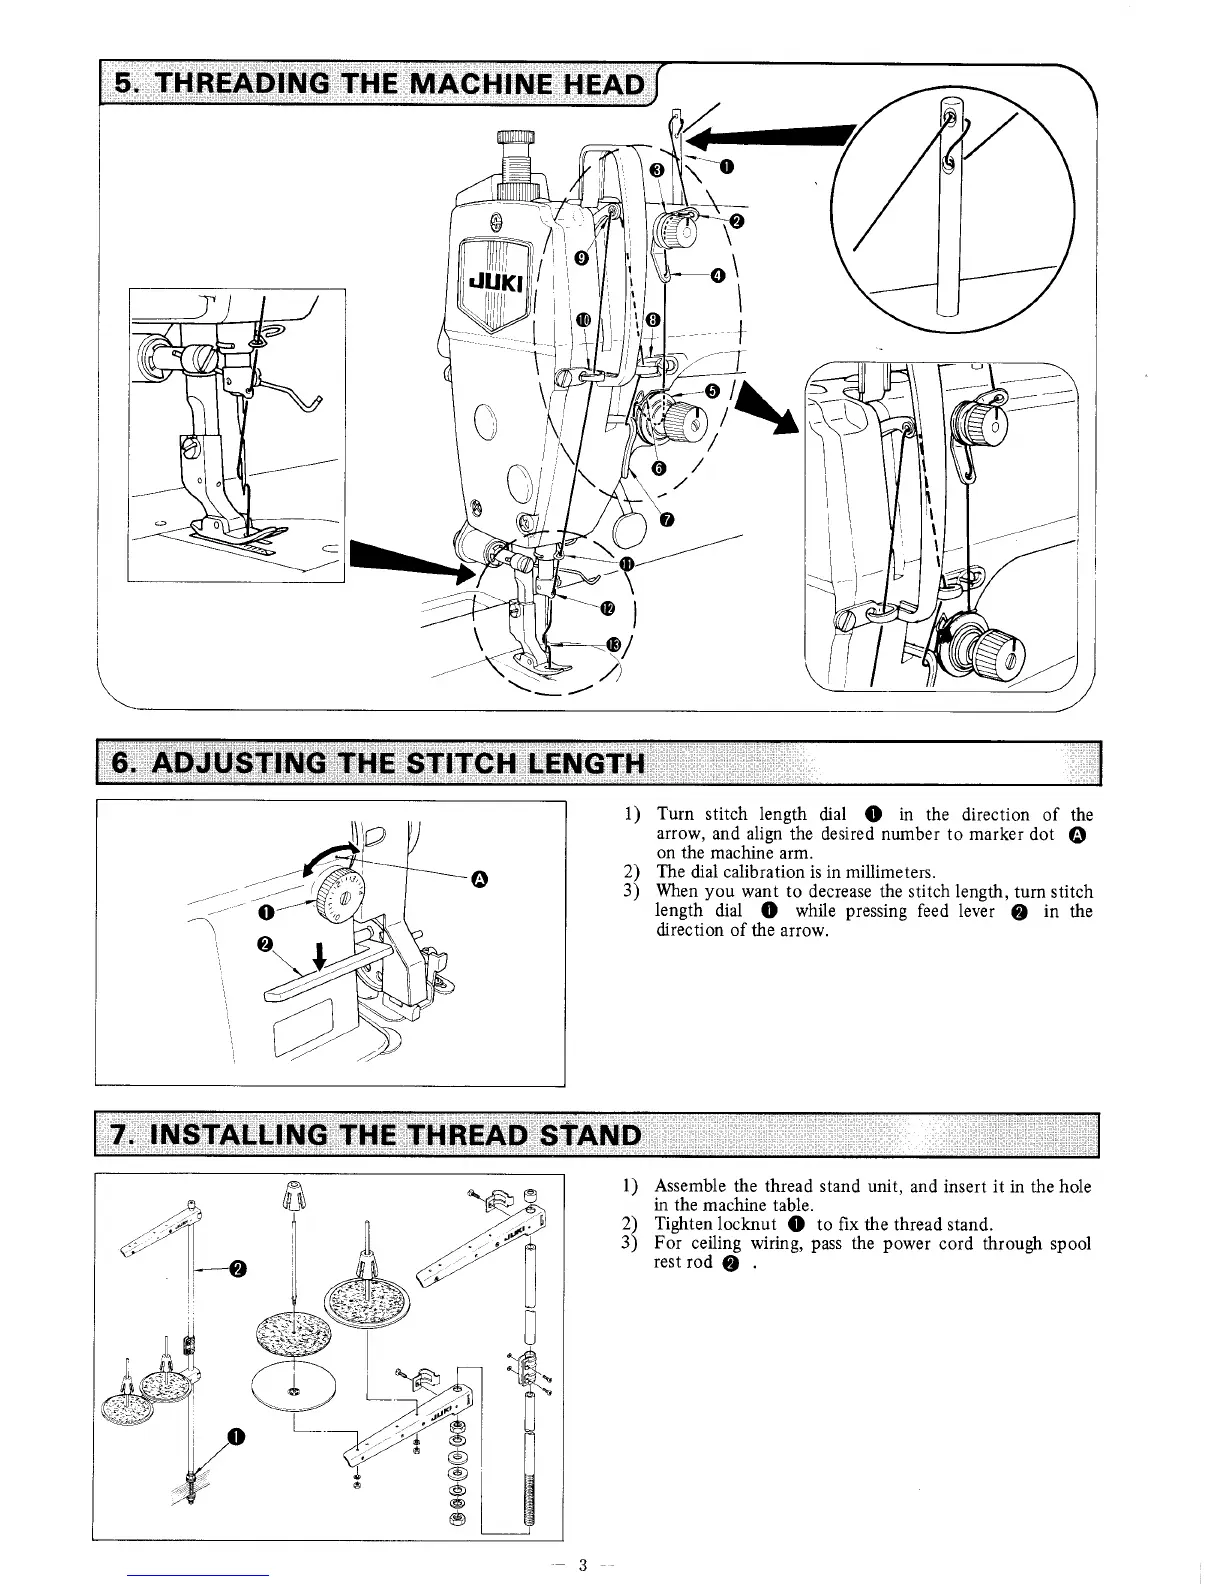
Turn
stitch length
dial
O
in
the direction
of the
arrow,
and align
the desired number to marker
dot
@
on
the machine arm.
The
dial calibration is in millimeters.
When
you
want to decrease the stitch length,
turn stitch
length
dial
O
while
pressing
feed lever
@
in
the
direction of
the arrow.
1)
2)
3)
Assemble
the thread stand unit,
and insert it in the hole
in
the machine table.
Tighten
locknut
O
to fix the thread stand.
For
ceiling wiring,
pass
the
power
cord through spool
rest
rod
@
l)
2)
3)
 Loading...