– 14 –
WARNING :
Turn OFF the power before starting the work so as to prevent accidents caused by abrupt start of the sewing machine.
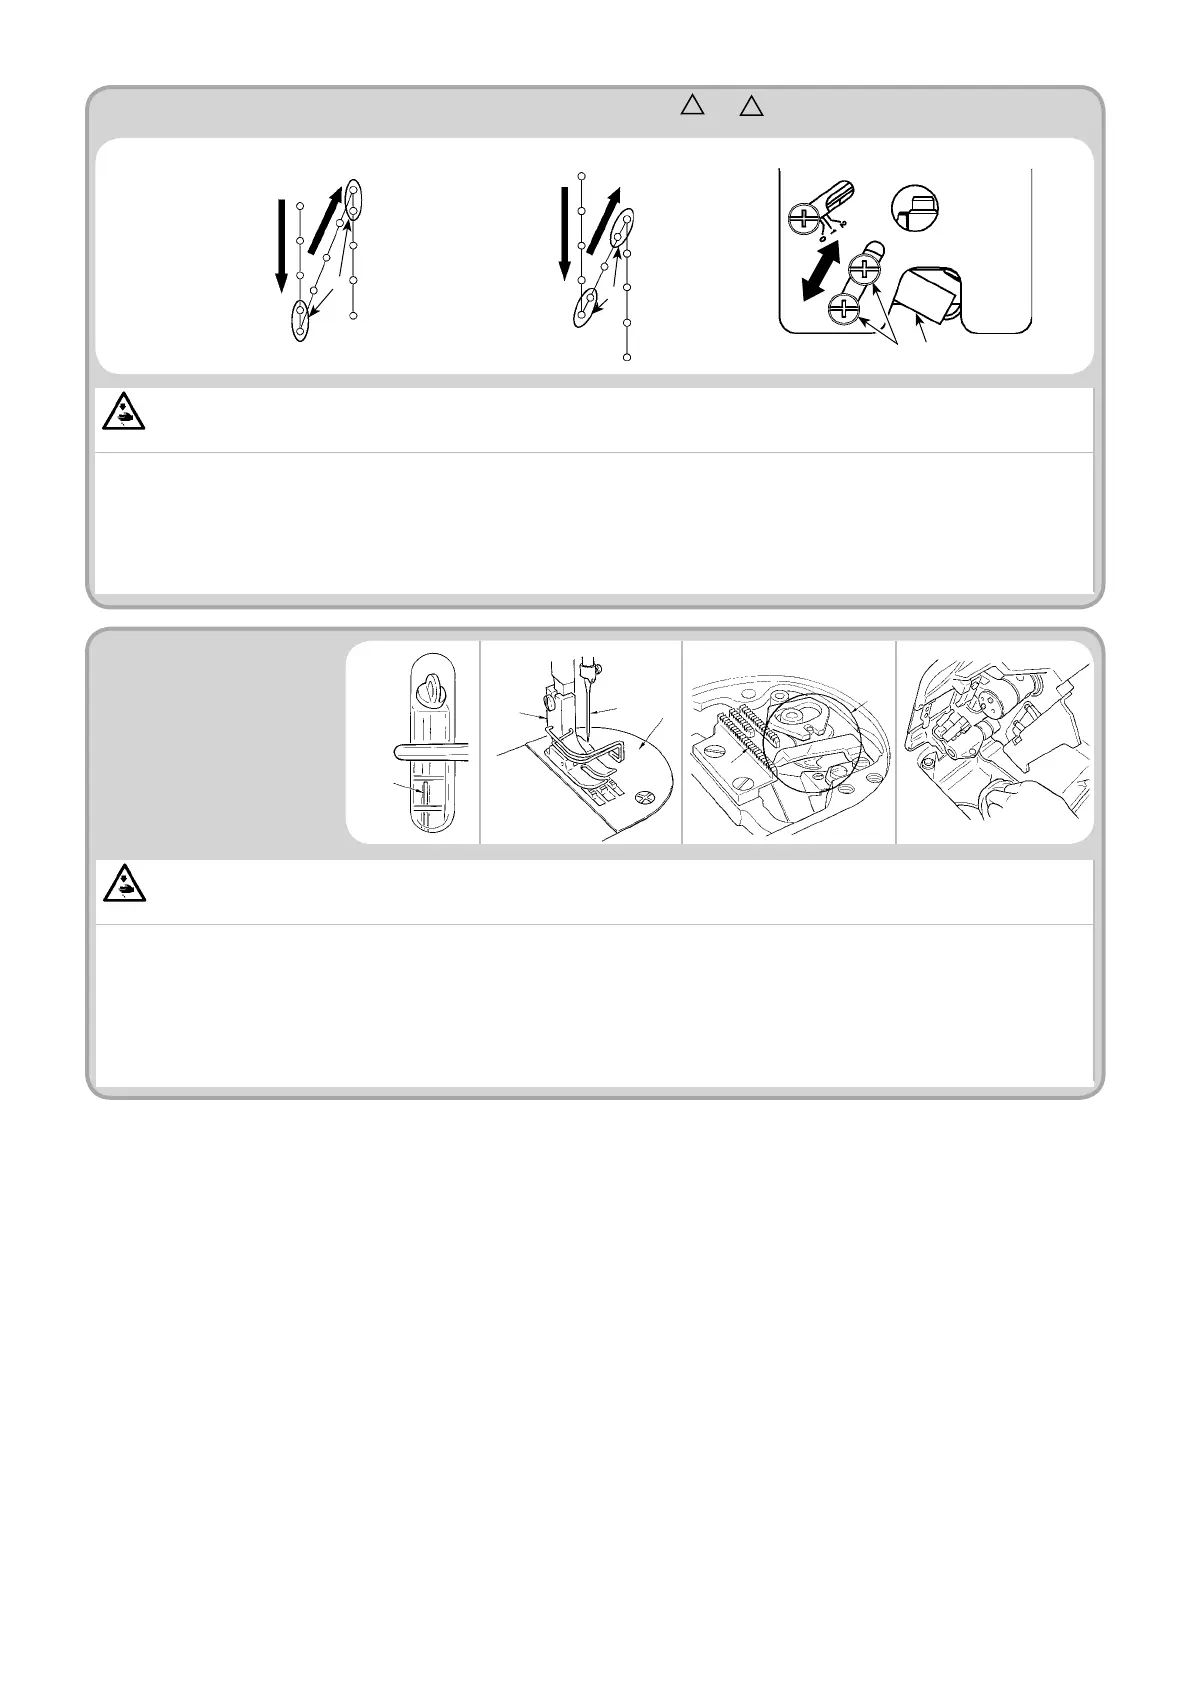
Perform the maintenance below every day for longer use of your machine.
(1) Conrmation of the amount of oil in the hook oil tank.
Conrm that the top of oil amount indicating rod
1
is between the upper engraved marker line and the lower engraved marker line of the oil amount indicating
window. (For the details, refer to “4. LUBRICATION”.)
(2) Cleaning
1) Remove needle
2
, presser foot
3
and throat plate
4
.
2) Remove dust adhered to feed dog
5
and thread trimmer unit
6
with a soft brush or cloth.
3) Tilt the machine head and wipe out the dirt of bobbin case and the like with soft cloth, and conrm that there is no scratch. Wipe out with the cloth dust and
hook oil drained in the under cover near the hook.
29. CARE
WARNING :
Turn OFF the power before starting the work so as to prevent accidents caused by abrupt start of the sewing machine.
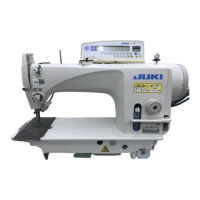
In automatic reverse stitching, in case the forward and the reverse stitches do not match, a rough correction can be made by adjusting the feed adjustment
spring hook
1
.
※ To make a ne correction, the correction of timing of the reverse feed stitching solenoid is necessary by adjusting Function Setting Nos. 51, 52
and 53. Refer to the Instruction Manual for the control box (SC-920) for details of adjustment procedure.
1) In case the stitch does not match the target as shown in
3
, loosen feed adjustment spring hook xing screw
2
, make
1
slide in A direction, and x using
the screws
2
.
2) In case the stitch does not match the target as shown in
4
, loosen feed adjustment spring hook xing screw
2
, make
1
slide in B direction, and x using
the screws
2
.
28.
FEED CONVERSION SPRING MECHANISM (DDL-9000B-S , -M )
1
2
3
4
6
5
B
A
1
2
4
3
Direction of reverse
feed stitching
Direction of reverse
feed stitching
Sewing direction
Sewing direction
Shorter
Shorter
Shorter
Shorter

 Loading...