– 11 –
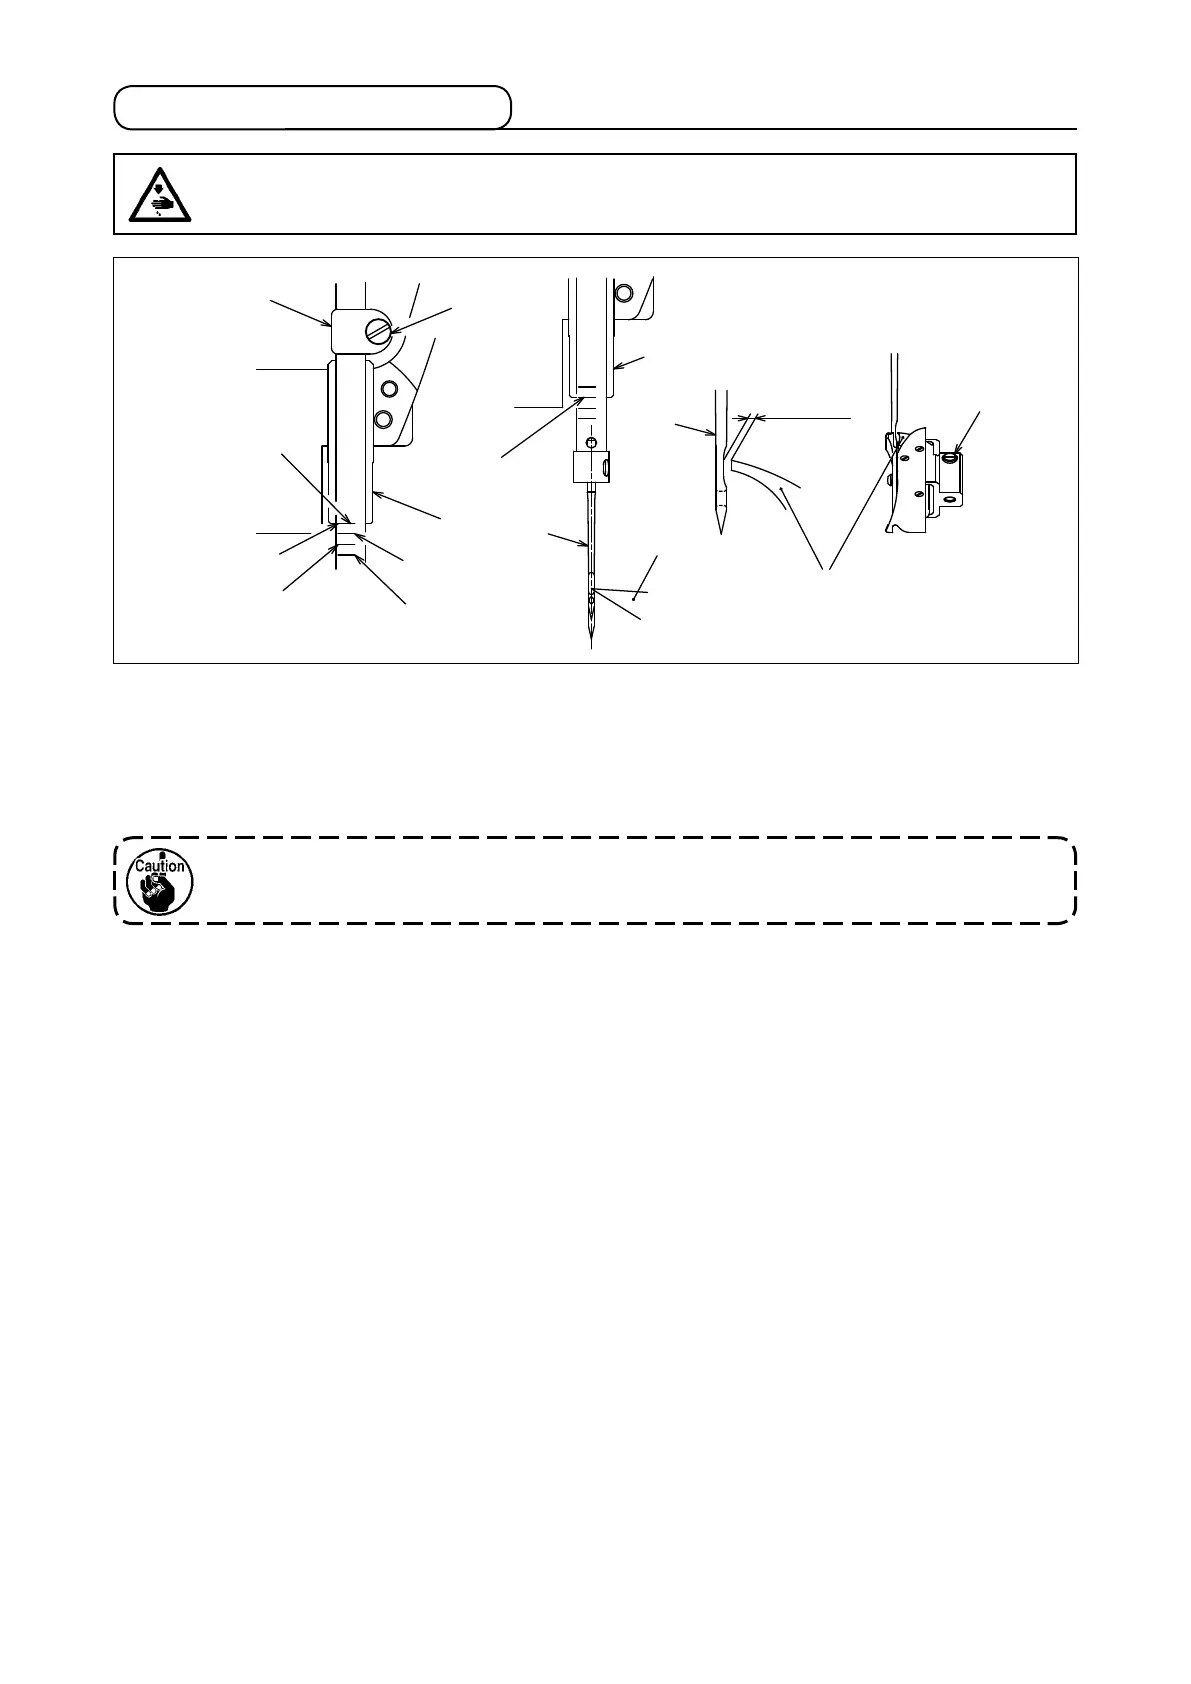
4-8. Needle-to-hook relationship
WARNING :
To protect against possible personal injury due to abrupt start of the machine, be sure to start the
following work after turning the power o and ascertaining that the motor is at rest.
After the height of the needle bar has been properly adjusted, check that the needle bar
does not come in contact with the walking foot.
1) Positioning the needle bar.
Tighten needle bar connection screw
❸
in needle bar connection
❷
so that the marker line of the
needle bar aligns with the bottom end of needle bar lower bushing
❶
at the lowest position of the
needle bar.
(Fourth line
A
from the bottom for a DB x 1, second line
C
from the bottom for DP x 17)
❷
❶
❶
❺
❹
❸
A
C
D
B
Upper
marker line
❹
❺
❻
0.05 to 0.1mm
2) Position the needle and the hook.
Adjust so that the specied marker line (third line
B
from the bottom for a DB x 1 needle, or line
D
at the bottom for a DP x 17 needle) on the ascending needle bar aligns with the bottom end of lower
bushing
❶
. Further adjust to make hook point
❹
nearly meet the center of needle
❺
, and adjust
the clearance between needle
❺
and hook point
❹
to 0.05 to 0.1 mm. Then tighten hook screw
❻
.
3) To adjust the hook, remove the throat plate rst. Loosen hook setscrew
❻
with a screwdriver and
adjust the hook position from the throat plate side.
Lower
marker line
 Loading...