– 2 –
❹
5) Installation of the machine
Put the sewing machine head on the table with the sewing
machine head and hinge seats
❸
aligned.
Fix hinge seat
❸
with screw
❹
, washer
❺
and nut
❻
sup-
plied with the machine.
6) Installing the coupling chain
Attach chain
❽
supplied with the unit to S-shaped fi tting
❼
which has been installed on the presser lifting lever.
Install S-shaped fi tting
❿
and chain
⓫
to changeover link
spring peg plate
❾
.
Bring down chains
❽
to
⓫
respectively from the oil pan to
connect to the table stand.
❺
❻
2. INSTALLING THE THREAD STAND
Assemble the thread stand device. Fit it in the hole in the table.
Tighten locknut
❶
so that the thread stand does not fl uctuate.
❶
❽
❾
❼
❿
⓫
– 7 –
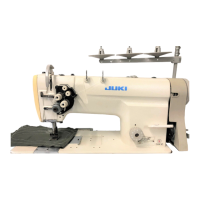
1. Timing of the needle with the sewing hook
First, set the feed amount to “0” and verify that the clearance between the presser bar and the walking bar is 17mm (43/64”).
Raise up the presser foot and after matching the feed graduator plate to “0”, remove the throat plate.
When the needle has risen 3.5 mm (9/64”) from the lowest point,
Match the blade point of the sewing hook with the center of the needle. At this point,
* The clearance between the needle side surface and the blade point of the sewing hook comes to 0 -
0.05 mm (1/512”),
* The clearance between the needle side surface and the needle guard of the sewing hook comes to 0 -
0.05 mm (1/512”),
* The distance between the upper tip of the thread hole of the needle and the tip of the sewing hook blade comes to 3.0 mm (1/8”).
2. Height of the needle bar
First, set the feed graduator to 0 mm, and bring the needle bar to its lowest point. At this point, make the distance between the
bottom end of the needle clamp to the surface of the throat plate to 21.2 mm (53/64”) and tighten the needle bar clamping screw.
11. ADJUSTING THE WALKING FOOT AND PRESSER FOOT
WARNING :
To protect against possible personal injury due to abrupt start of the machine, be sure to start the following
work after turning the power off and ascertaining that the motor is at rest.
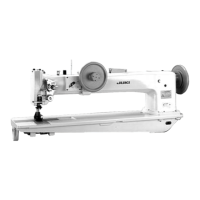
3. How to match the timing of sewing hook
Loosen the set screw
❶
of the large gear of the hook shaft,
move the large gear
❷
to right and left and when the center
of the needle and the blade point of the sewing hook are
matched together, tighten the set screw
❶
. At this point, be
careful to see that the center gear of the large gear and the
center of the hook shaft do not slide each other.
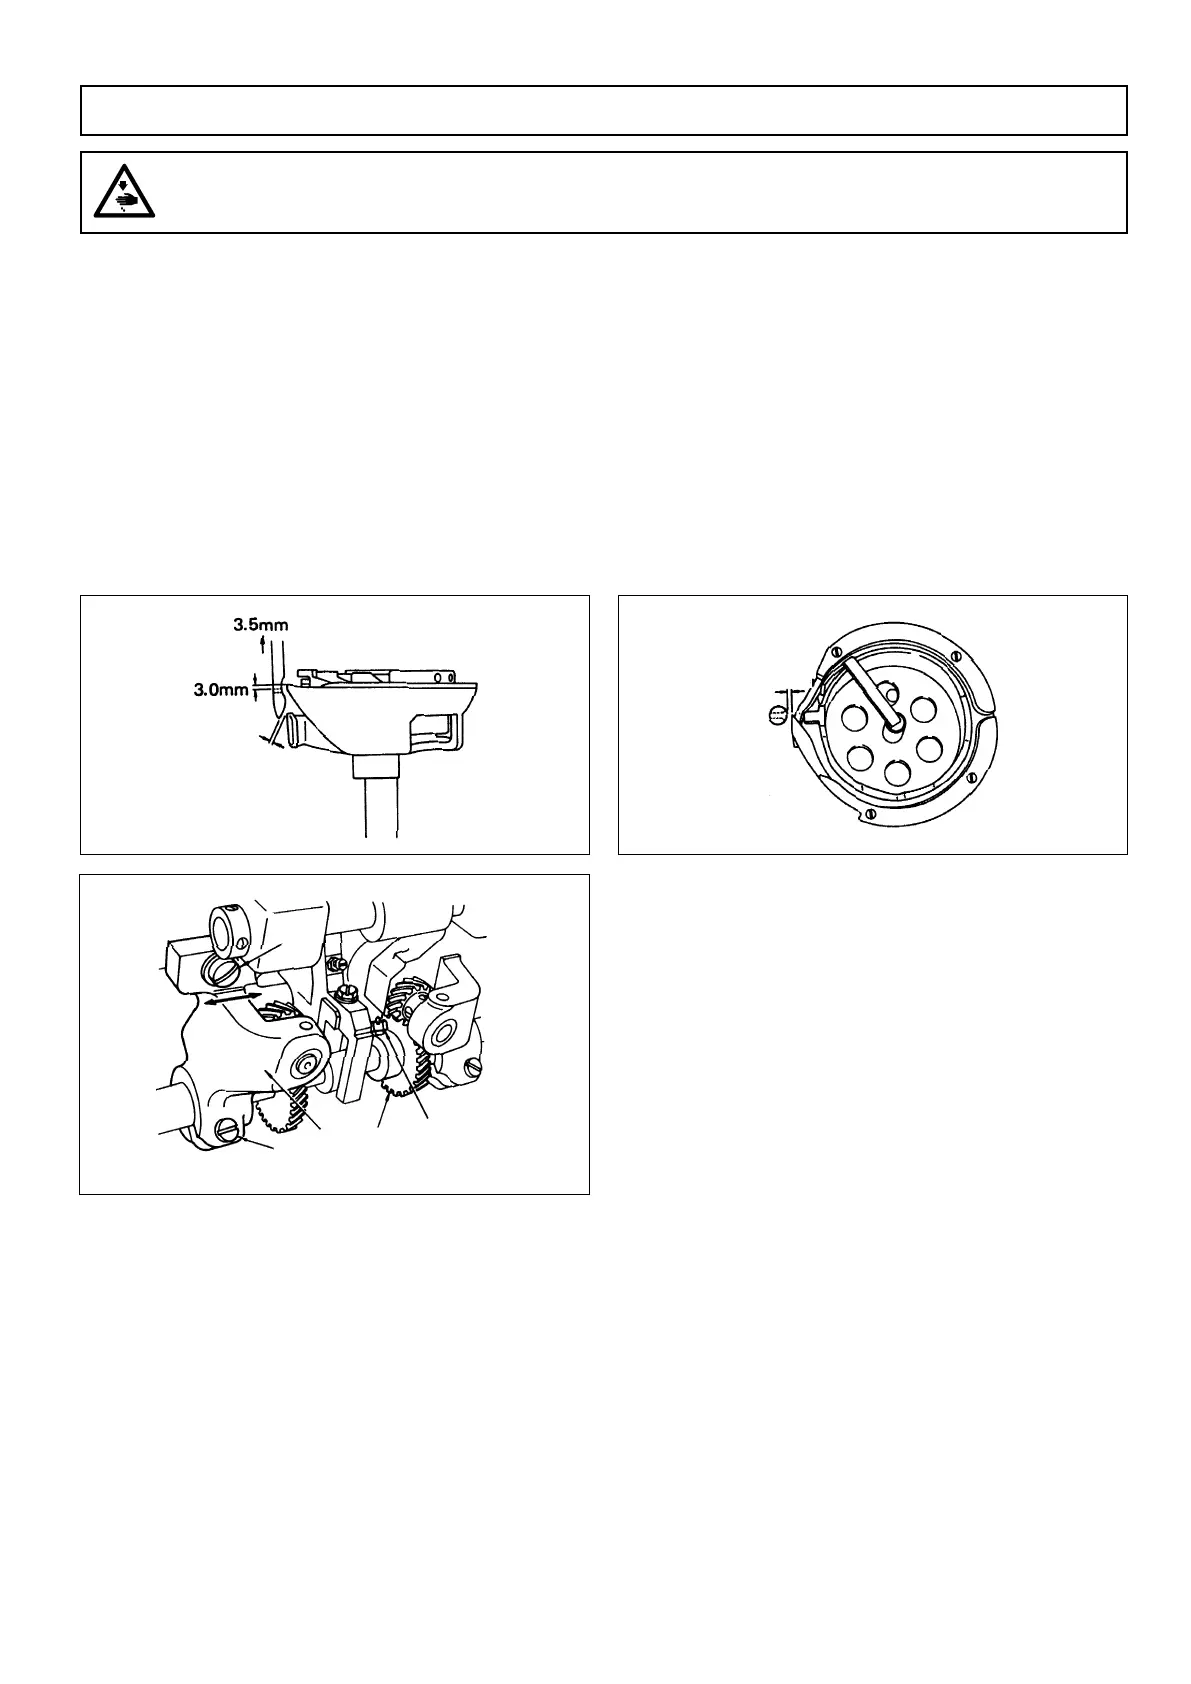
4. Adjusting the clearance between the needle and blade point of the sewing hook
Make adjustment as follows:
1) Remove the presser foot and the throat plate and tilt the machine.
2) Loosen the clamp screw
❸
and set screw
❹
of the hook driving shaft saddle of the adjusting side.
3) Tap the hook driving shaft saddle
❺
lightly and move it to right and left and by making the clearance between the needle and the
blade point of the hook to 0 - 0.05 mm (1/512"), tighten the clamp screw
❸
and set screw
❹
fi rmly.
0 - 0.05mm
0 - 0.05mm
❶
❷
❸
❹
❺
 Loading...