Adjusting the pressing pressure of the
feed
lever
The reversing spring of the feed lever is
strengthened somewhat so that at high speed
sewing, no matter what kind of stitches are
to
be
formed, the lever returns positively to
the original position.
When the stitching pitch is small or when the
machine is to be run by lowering the
r.p.m.,
the pressing pressure of the feed lever can
be
lessened by loosening the adjusting nut
@
of
the accompanying figure.
L
I
2)
On needle bar and needle
Adjusting the height of the needle bar
When
an
Organ needle
(TV
x
7)
is used, set
the height of the needle bar so that when the
needle bar has reached to lower dead point,
the left side carved line
(No.1 mark) matches
with the bottom surface of the needle bar
lower bushing. (See figure)
Also, when the Schmetz needle (UY-128GAS
etc.)
IS
used, match it so that the right side
carved line comes to the position as men-
tioned above. (At this condition, the distance
bctwecn the needle point and upper surface
of the throat plate becomes
10.0mm(25/64").
3)
Matching the needle and the looper
Lvopcr
\
needle
Adjusting the looper avoiding motion
Within the oval movement of the looper,
the dimcnsion of
B
in the figure can be
adjustcd
in
the following order.
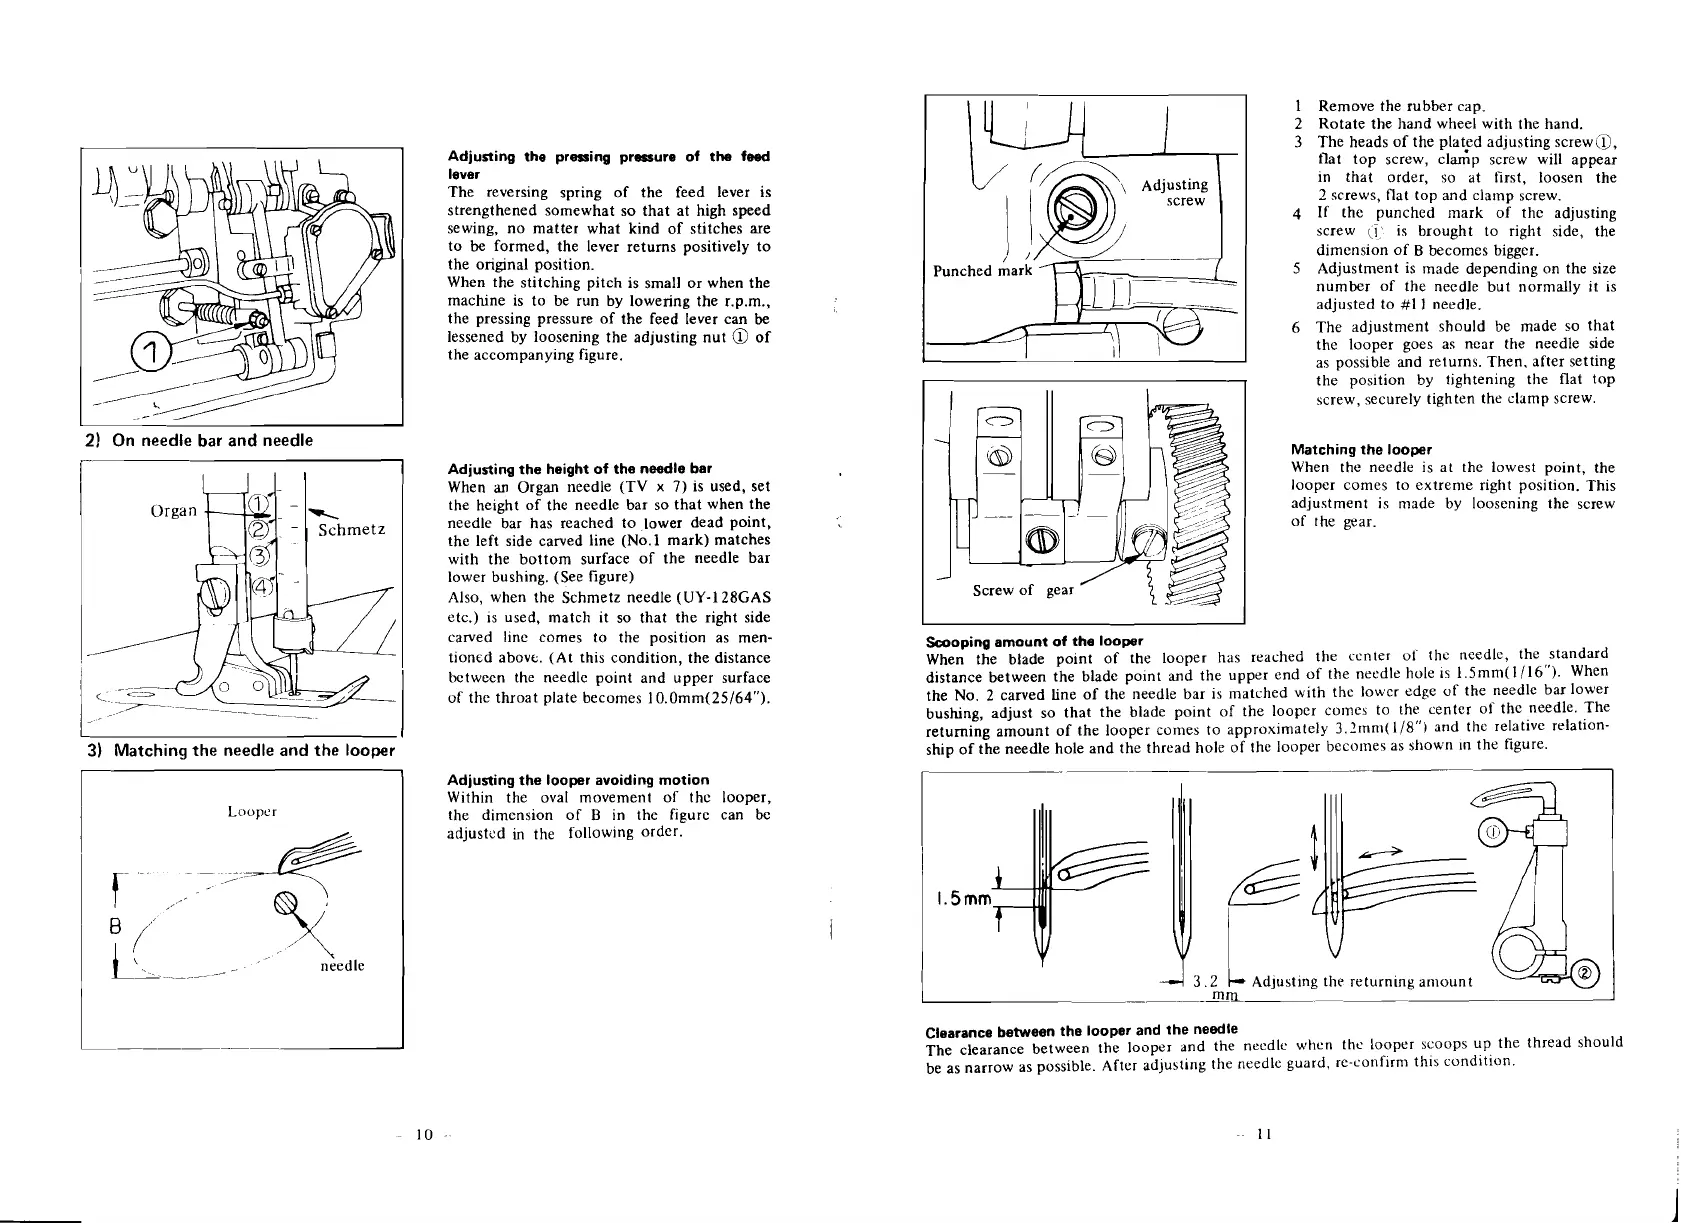
1
Remove the rubber cap.
2
Rotate the hand wheel with the hand.
3 The heads of the plated adjusting
screw(D,
flat top screw, clGp screw will appear
in that order, so at first, loosen the
2
screws, flat top and clamp screw.
4
If the punched mark of the adjusting
screw
(i'
is brought to right side, the
dimcnsion of
B
becomes bigger.
5
Adjustment is made depending on the size
number of the needle but normally it is
adjusted to
#1 1 needle.
6
The adjustment should be made so that
the looper goes as near the needle side
as possible and returns. Then. after setting
the
pos~tion by tightening the flat top
screw, securely tighten the clamp screw.
Matching the looper
When the needle is at the lowest point, the
looper comes to extreme
right position. This
adjustment is made by loosening the screw
of the gear.
Scooping amount of the looper
When the blade point of the looper has reached the center of the needle, the standard
distance between the blade
polnt and the upper end of the needle hole is 1.5mm(l/l6"). When
the No.
2
carved Line of the needle bar is matched with the lower edge of the needle bar lower
bushing, adjust so that the blade point of the looper
come5 to the center of the needle. The
returning amount of the looper comes to approximately
3.2mrn(1/8") and the relative relation-
ship of the needle hole and the thread hole of the looper becomes as shown
In the figure.
Clearance between the looper and the needle
The clearance between the looper and the needle when the looper scoops up the thread should
be as narrow as possible. After
ad~usting the needle guard, re-conf~rn~ th~s condition.
I
I
 Loading...