– 4 –
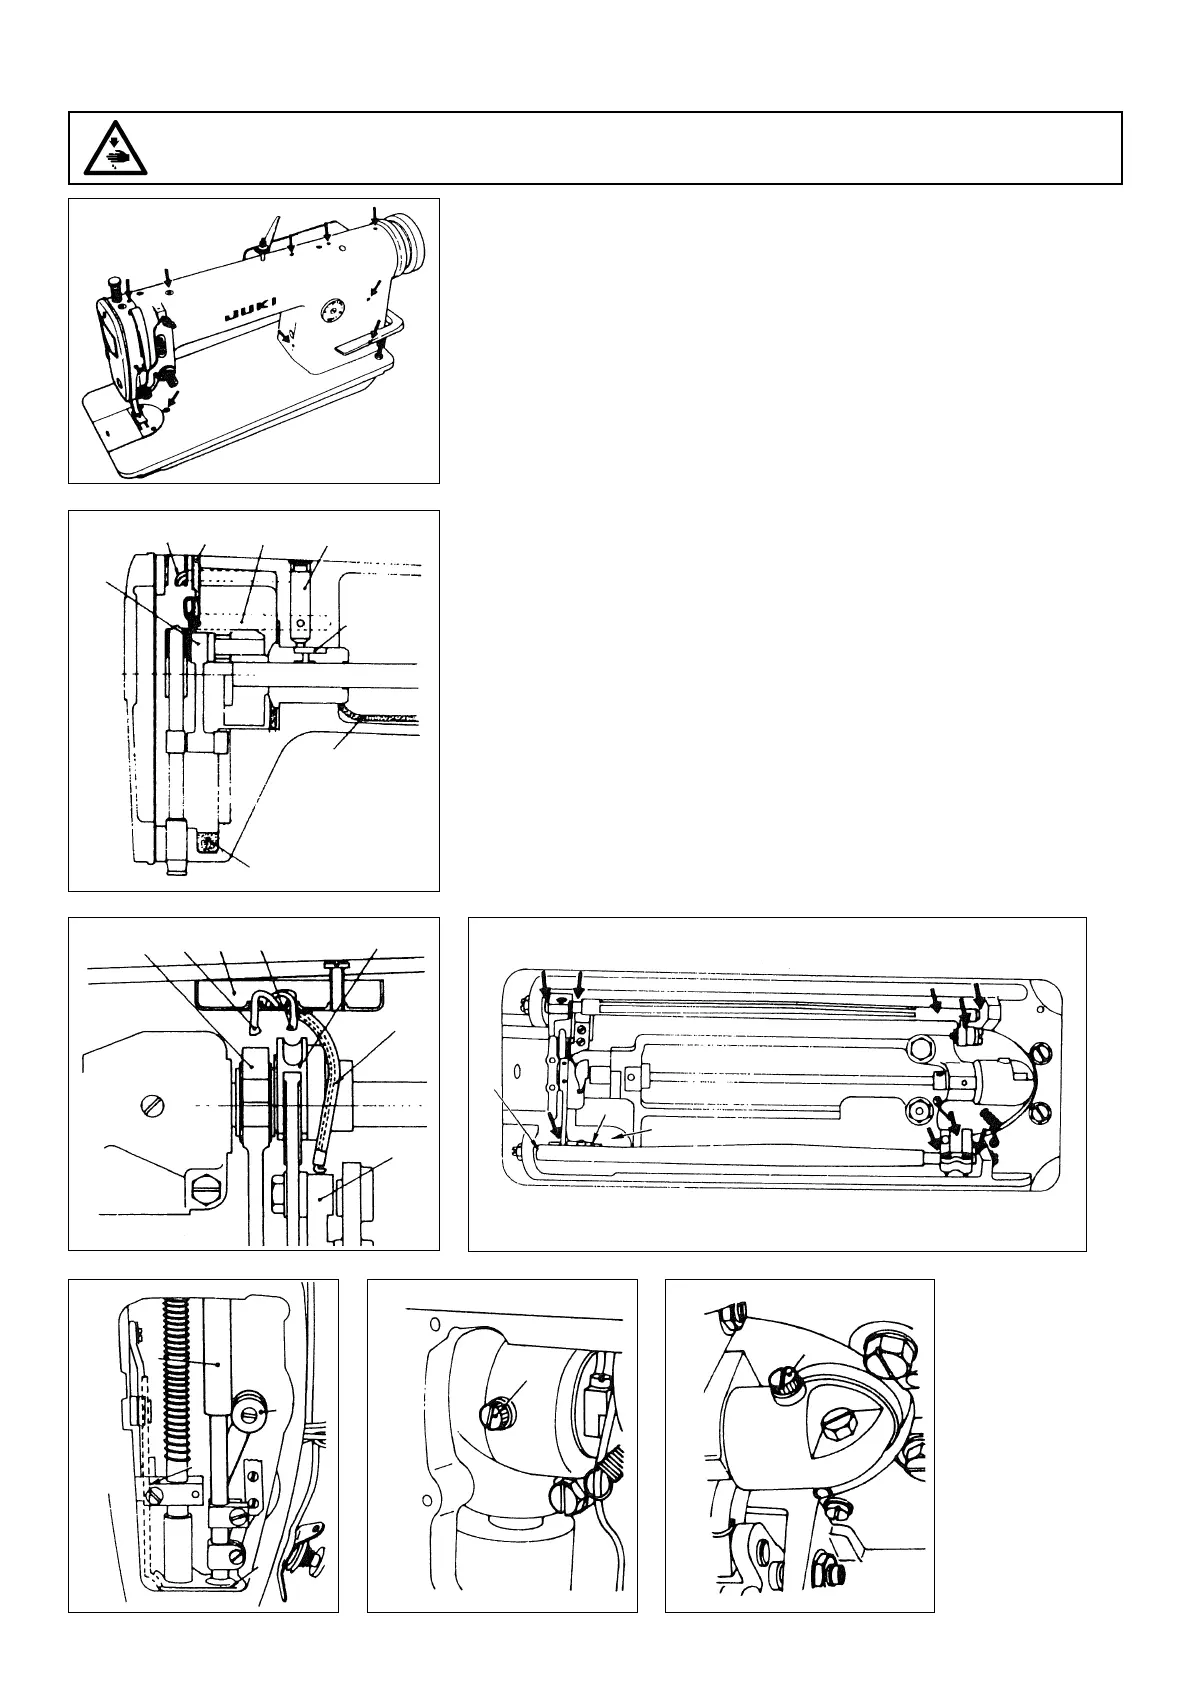
6. LUBRICATION
Lubricate the arrow points shown in Fig. 1 and 4. They must be lubricated at least twice a
day when the machine is continuously operated. Use JUKI New Defrix Oil No. 1.
(Caution) Before starting the fi rst operation of your newly installed machine,
lubricate the following parts without fail.
1. Needle bar crank (See Fig. 2 a~d Fig. 5)
Pour oil into the oil hole
1
on the front of the machine arm, and the oil will fl ow
through main shaft front bushing
2
, oil felt
3
and the oil wick and will reach oil pipe
4
to lubricate needle bar crank rod
5
.
On the other hand, another oil wick allows the oil to lubricate the needle bar through
needle bar upper bushing
6
.
Thus, the needle bar crank mechanism is completely lubricated. After lubrication, the
used oil gathering in the front part
7
of the machine arm is collected by the drip pan
on the bottom of the machine through oil return felt
8
.
2. Feed mechanism (Fig. 3)
The lubricating oil poured into the oil reservoir
9
fl ows to lubricate feed regulator
connecting link
!3
,
pit-man
!4
and feed driving shaft connecting rod
!5
through the oil
wicks
!0
,
!1
and
!2
respectively.
3. Feed driving and feed bar (Fig. 4)
Lubricate all the arrow points as illustrated from the bottom of the machine bed.
The center of feed rock shaft
!7
and feed bar shaft
!8
are lubricated through oil wick
!6
.
4. Filling the gear case with grease. (Fig. 6 and Fig. 7)
Regularly fi ll the gear case by removing plug screws
!9
and
@00
.
As soon as the oil seals which prevent grease from leaking are found damaged or worn
after long period of use, replace them immediately.
Fig.1
Fig.2
Fig.3
Fig.4
Fig.5
Fig.6 Fig.7
WARNING :
To avoid possible personal injury due to abrupt start of the machine, turn off the power to the machine and check to be sure that the
motor has totally stopped rotating in prior.
134
6
5
2
8
7
6
5
8
7
!0
9
!1
!2
!3
!4
!5
!6
!7
!8
!9
@0
vii
DECLARATION OF INCORPORATION OF PARTLY COMPLETED MACHINERY
We hereby declare that the sewing machine (sewing head) described below ;
1. Must not be put into service until the machinery to which it is incorporated has been declared in
conformity with the provisions of the Directive 2006/42/EC, and
2. Conforms to the essential requirements of the Directive 2006/42/EC, described in the technical
documentation, and
3. To be prepared with the above technical documentation compiled in accordance with part B of
Annex VII, and
4. Also to conform to the RoHS Directive 2011/65/EU
5. Relevant information on which should be transmitted in response to a reasoned request by the
national authorities, by the electronic method or other according to the request.
Applied harmonized standards, in particular :
EN ISO12100, EN ISO10821, EN 50581
Manufacturer :
JUKI CORPORATION
2-11-1, Tsurumaki, Tama-shi, Tokyo, Japan
Model
Description Industrial Sewing Machine
Function make stitches and sew
ML-111
 Loading...