– 14 –
❶
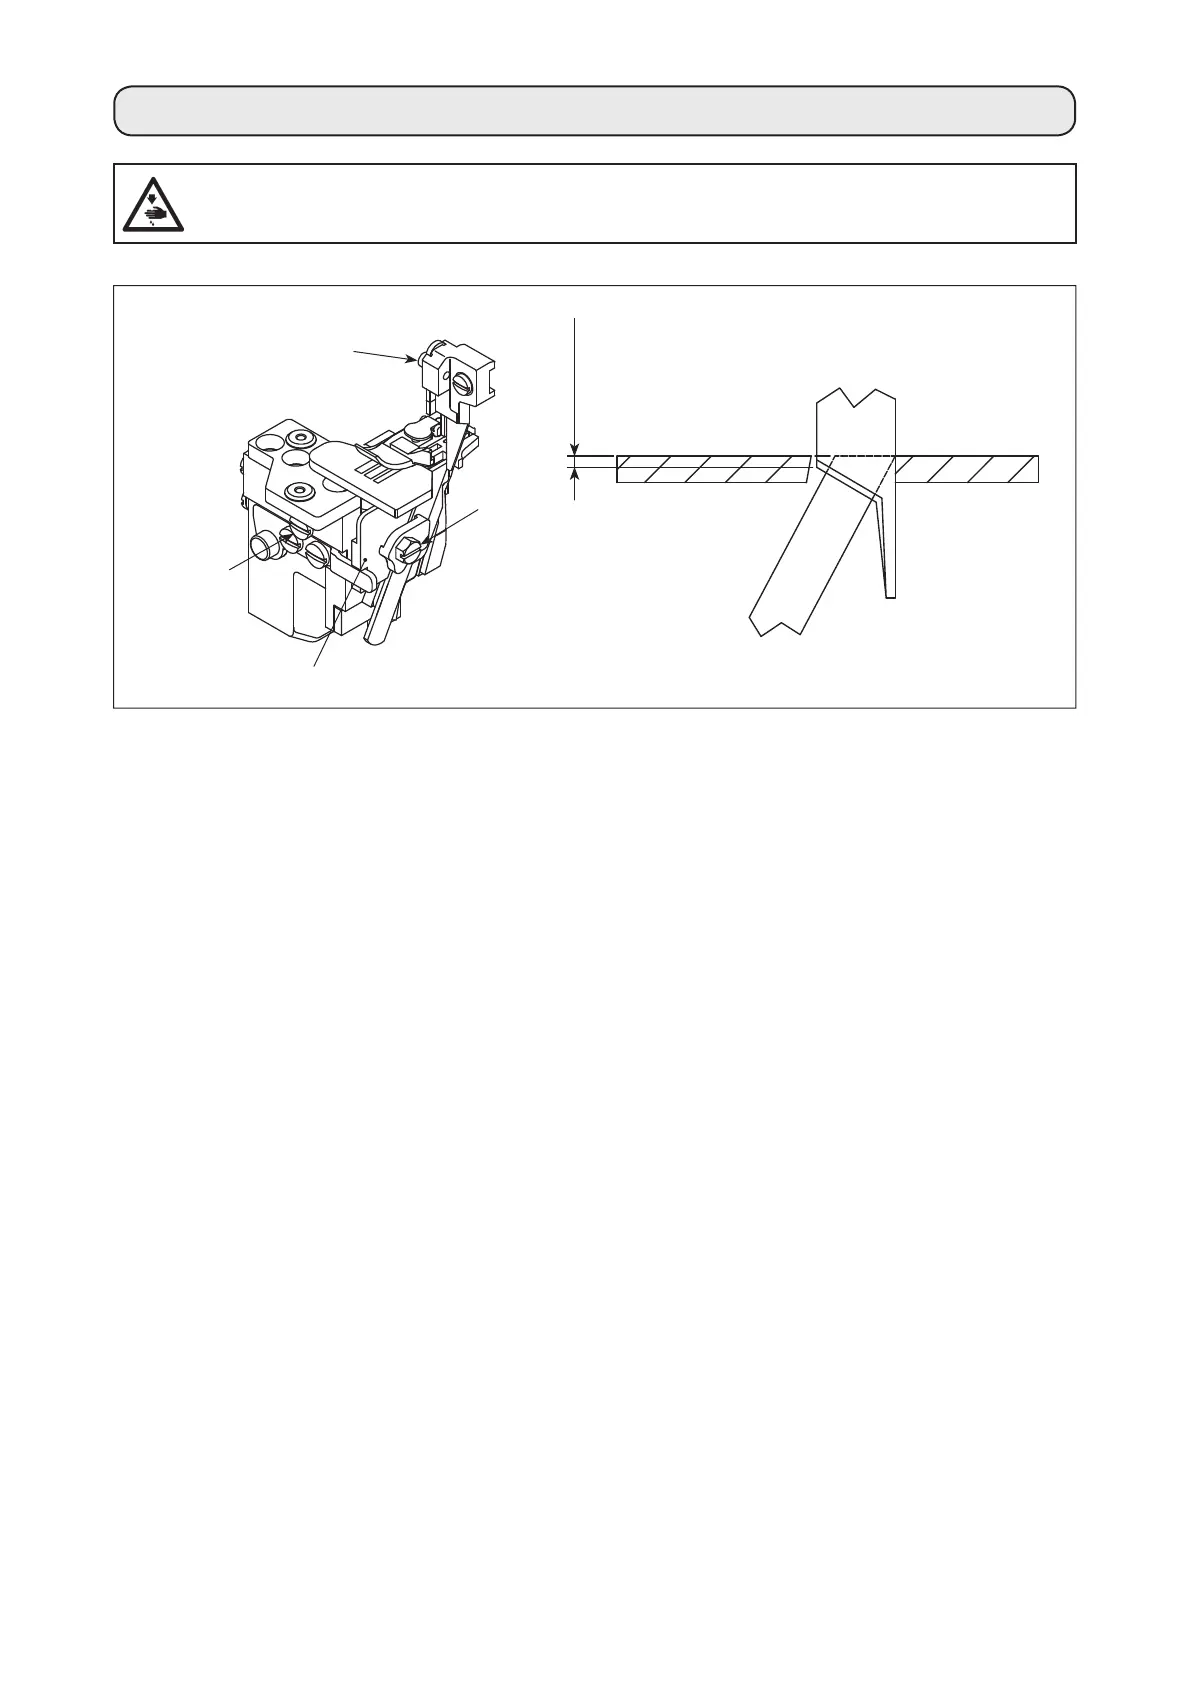
10. REPLACE THE KNIVES
(1) Replace the upper knife
1) Loosen the screw ❶ and move the lower knife holder ❷ to the left. Then, tighten the screw ❶ a little.
2) Remove the screw ❸ and put the new upper knife. Then, tighten the screw ❸ a little.
3) Turn the pulley to move the upper knife to the lower dead point. Adjust the height of the upper knife so that
the upper knife can cross the lower knife about 0.5 to 1.0 mm. After that, tighten the screw ❸.
4) Loosen the screw ❶ and return the lower knife holder ❷ to its original position.
Test if the upper and the lower knife can cut the thread exactly, and then tighten the screw ❶.
(2) Replace the lower knife
1) Loosen the screw ❶ and move the lower knife holder ❷ to the left. Then, tighten the screw ❶ a little.
2) Loosen the screw ❹. Take off the lower knife and replace a new one.
3) Adjust the edge of the lower knife to be aligned with the surface of the throat plate. Then, tighten the screw
❹.
4) Loosen the screw ❶ to return the lower knife holder ❷ to its original position and test if the upper and the
lower knife can cut the thread exactly. Then, tighten the screw ❶.
❸
❷
❹
0.5 to 1.0 mm
WARNING :
To protect against possible personal injury due to abrupt start of the machine, be sure to start the
following work after turning the power off and ascertaining that the motor is at rest.
TRIAL MODE − a valid license will remove this message. See the keywords property of this PDF for more information.
 Loading...