n.
HOW
TO
OPERATE
THE
MACHINE
1.
Cautions
on
operation
O Do not, under any circumstances, start the machine before filling up the oil reservoir.
e The rotational direction of the
machine
is
clockwise
as
viewed
from the
pulley
side. Do not run the
machine
in the
reverse
direction
because if you do, the lubrication pump will not function and will invite scorching
of
the machine.
2.
Lubrication
and
drainage
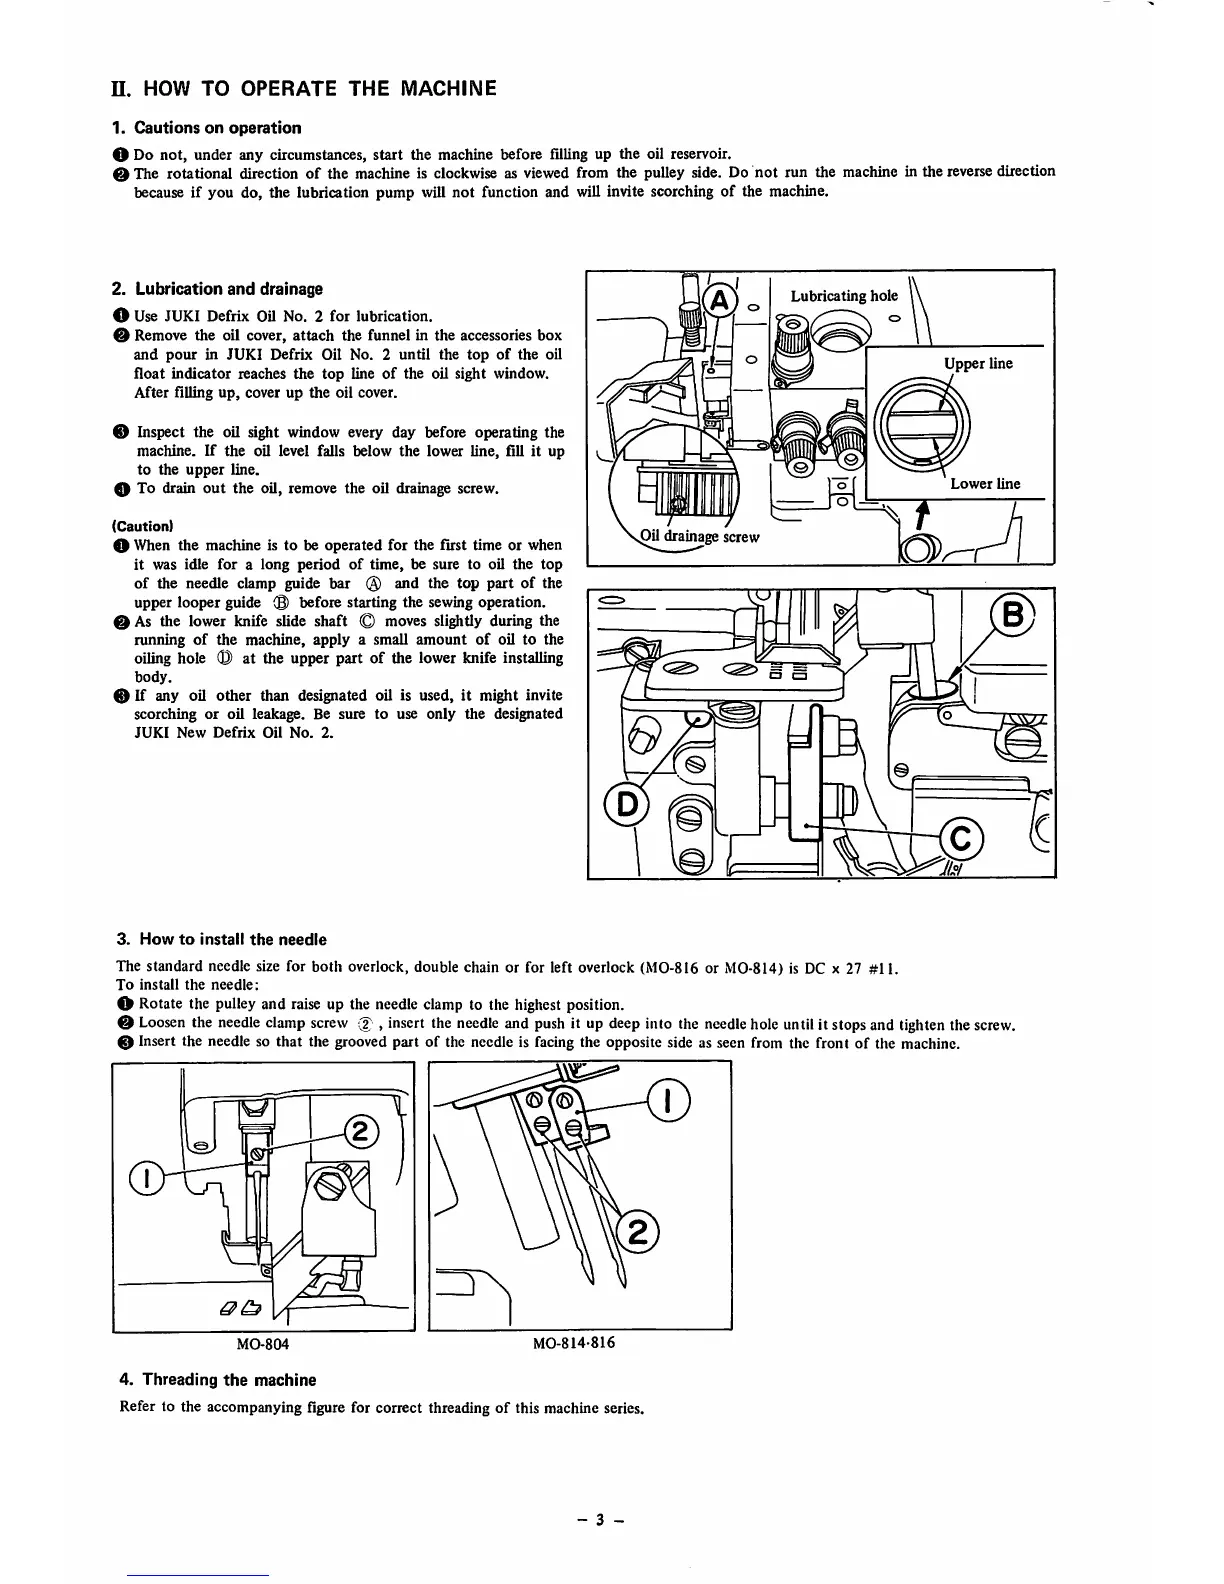
O Use JUKI Defrix Oil No. 2 for lubrication.
Remove
the
oil cover,
attach
the funnel in
the
accessories
box
and
pour
in
JUKI
Defrix
Oil No. 2
until
the
top
of
the
oil
float
indicator
reaches
the
top
line
of
the
oil sight window.
After
filling
up,
cover up
the
oil cover.
0 Inspect the oil sight window every day before operating the
machine.
If
the oil level falls below the lower line, fill it up
to
the
upper
line.
0 To drain
out
the
oil, remove
the
oil drainage screw.
(Caution)
O When the machine is to be operated for the first time or when
it
was idle
for
a
long
period
of
time,
be sure to oil
the
top
of the needle clamp guide bar @ and the top part of the
upper looper guide 0 before starting the sewing operation.
0 As the lower knife slide shaft © moves slightly during the
running
of
the machine, apply a small
amount
of
oil to the
oiling hole 0 at the upper part of the lower knife installing
body.
0 If any oil
other
than designated oil is used, it might invite
scorching or oil leakage. Be sure to use only the designated
JUKI
New
Defrix
Oil
No.
2.
Oil drainage screw
0
Lubricating hole
Upper line
Lower
line
3.
How
to
Install
the
needle
The standard needle size for both overlock, double chain or for left overlook (MO-816 or MO-814) is DC x 27 #11.
To
install
the
needle:
O Rotate the pulleyand
raise
up the needleclamp to the
highest
position.
0
Loosen
the
needle
clamp
screw
,
insert
the
needle
and
push
it up
deep
into the
needle
hole
untilit
stops
and
tighten
the
screw.
0 Insert the needle so
that
the grooved part
of
the needle is facing the opposite side as seen from the front of the machine.
©
MO-804
MO-8I4-816
4.
Threading
the
machine
Refer to the accompanying figure for correct threading of this machine series.
- 3 -
c
 Loading...